
Repairing a Drawer via a Custom 3D Printed Patch: the Trapezoidal Dutchman (Part 1)
Version one finished printing before I finished writing the piece, it was unbelievably fast to design and build. I've already started on the second piece — by this time tomorrow we will once again have a working nightstand drawer. Hooray for 3D printing!
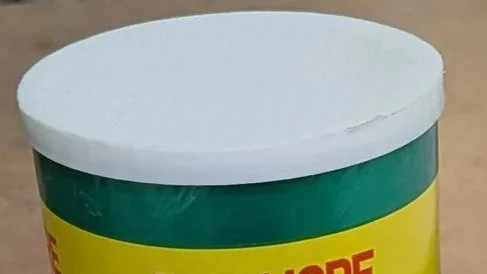
Designing a 3D-Printed Lid for Comet Cleanser
I designed a solution for that, and it was wonderful. I even had it as one of my free uploads. However I have since learned that my design might not work the same way on every printer with every filament type, and that I need documentation. Also someone seems to have thrown away the lid. Gasp.
Time for a re-design, and this time you can come along with me :)

3D Printed Custom Nightstand Organizer (Part 3): Tab and Slot Connectors for Multi-Tier 3D-Printed Shelving
I spent days worth of hours breaking the arc into bits while documenting the process. Creating new wave patterns, while documenting the process. Putting it back together, documenting the process. Changing it up a little by repeating all the prior steps but on a second, smaller tier, dutifully documenting the entire time. All that effort, only to realize that the second tier was rather ugly, as was the sectioned curtain wall, a fact made especially apparent by the prototypes, which I printed in miniature. I’m sharing an image so that the work doesn’t feel entirely wasted.
3D Printed Custom Nightstand Organizer (Part 2): Sculpting Curved Walls and Decorative Panels
I had made sculpted curved walls and flowing decorative panels in Tinkercad, using negative shapes, grouped cuts, and carefully aligned curves, and the result was beautiful. I attached it to the base. It kept all the separate colors because I used the bundle function to keep the pieces together while I moved them around. Neat. Except for one thing: at some point I lowered the center red sphere, and didn’t notice til now. No problem, I broke it all apart, moved the base out of the way, raised up the center sphere, then combined it all again, to make a perfect fence. I then recombined the absolutely perfect fence to the base.
3D Printed Custom Nightstand Organizer (Part 1): Planning Stage and Creating Wave Patterns
I love the look of a shelving unit I made earlier, and am thinking of making something similar in style, but more resistant to cats. While I’m not a big fan of chunky builds, I think I can make this one look good. Time to put some of that art practice to work!

Designing a 3D-Printed Kitchen Organizer (for Food Packets)
The good news: the print was perfect! The bad news: the scaffolding was the absolute worst. The good news again: my toolbox had everything I needed to deal with the unruly scaffolding! It took time and patience, and also a chisel and some sandpaper.

3D-Printed Wedding Flowers (Part 2)
“I made another crown, exactly like the first, only this time I decided to add the pieces to a ring shape, with a plan to make the next three pieces nestable, then print them separately instead of as one solid piece.”
3D Printed Wedding Flowers (Part 1)
I then looked at what went right.
Despite the crummy edges, my idea for forming a petal tepal shape had mostly held. The stem/tepal joining looked like it could work if I fine-tuned it — it was only the height of the rings that made the stacking bad. The stem itself was rather nice, proof that the overall concept worked.
Excellent. Back to the drawing board.

Magnetic Stylus Holder for an Amazon Kindle Scribe
The second print was perfect. The stylus stayed in place when subjected to vigorous shaking. The sides of the holder are sturdier, and the magnet holes are a more aesthetically pleasing depth. Excellent. I added superglue to the magnet holes, then dropped the magnets in, and boy was I glad I wore workman’s gloves for this. The glue was unexpectedly messy, as it came pouring with incredible speed out of an improbably small tube. I felt that the laws of physics were being defied by that surreal flood.


.