3D Printed Custom Nightstand Organizer (Part 2): Sculpting Curved Walls and Decorative Panels
On to the fence!
This tier needs curved fencing for the front, then the top will be done but for the legs? posts? After some thought, I decided that a tab and slot connection would be the best way to keep the shelves together invisibly. So, done but for the curved fencing and some connectors.
Before tackling the fence, I want to have some space. I first cleared my work area by hiding all but the light blue plate from sight. A tip I found helpful: when things are hidden, the light bulb icon up in the top bar activates, and it stays active until everything is visible again.
The workspace cleared of visible clutter, I started on the railing. My plan is to cut away all but the outer arc of the plate, then use that as the rail base. I’ll raise it up into a curtain wall, then start chipping away at it until I have the look that I want.
Creating a Curtain Wall
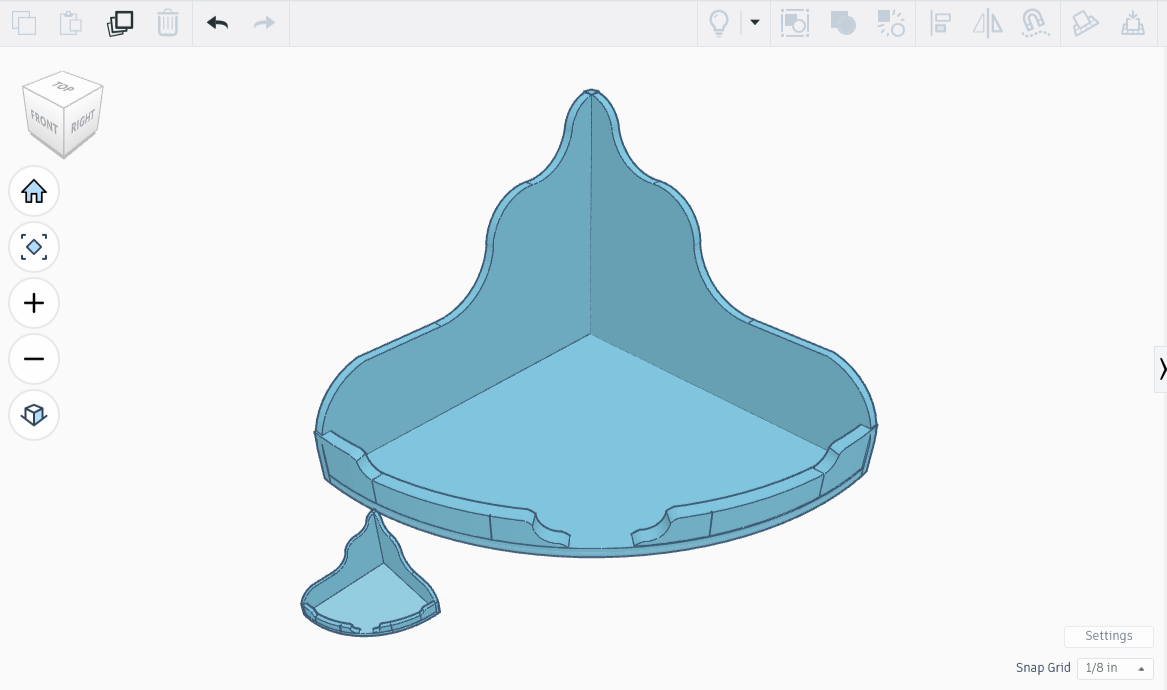
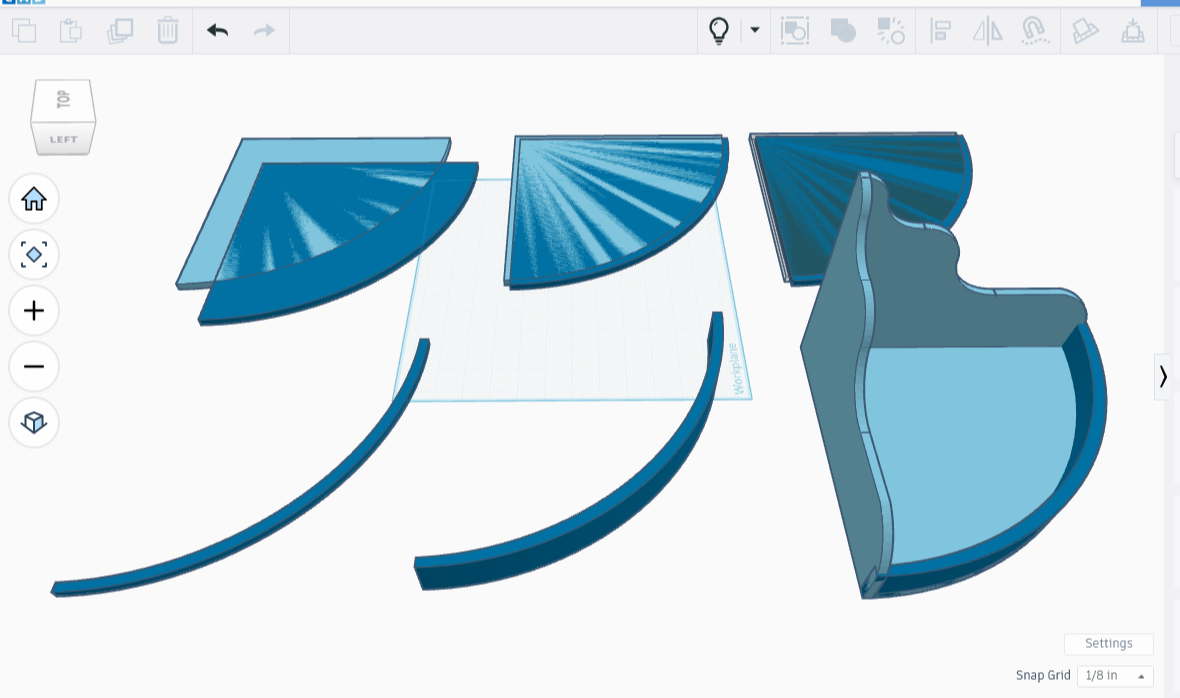
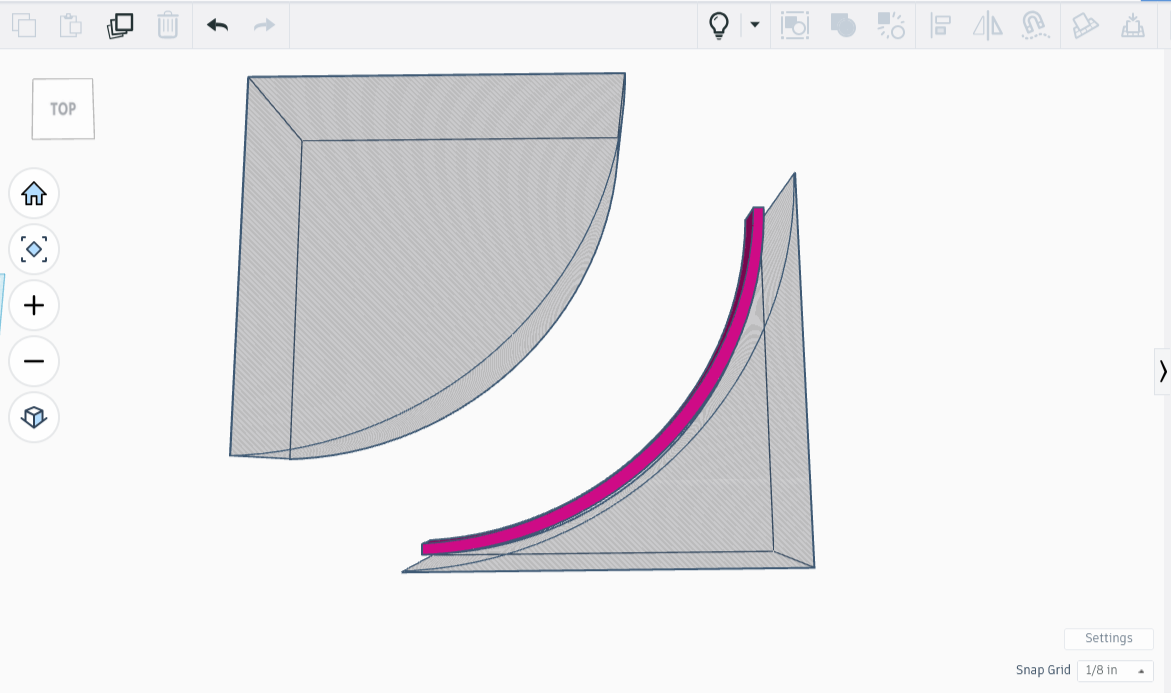
I brought up the tier, made up of two sides and a plate. The piece made me think of waterfalls and birdbaths, so I colored it light blue. I then broke the tier apart, setting the sides aside for now and focusing on the base, a quartered circle plate.
I made a dark copy of the light blue plate, then stacked the dark copy onto the original, offset in such a way that the right angles of the original extended past the copy a quarter of an inch on each side. That left the copy with an equally thick portion of arc extended the other way past the arc. I turned the original plate into an eraser then combined the two plates, leaving behind an arc that would perfectly fit the piece.
I then raised the arc up to 1.5 inches, and tested the concept by pulling out the tier and placing the arc on it. A perfect fit, as hoped for!
I spent days worth of hours breaking the arc into bits while documenting the process. Creating new wave patterns, while documenting the process. Putting it back together, documenting the process. Changing it up a little by repeating all the prior steps but on a second, smaller tier, dutifully documenting the entire time.
All that effort, only to realize that the second tier was rather ugly, as was the sectioned curtain wall, a fact made especially apparent by the prototypes, which I printed in miniature. I’m sharing an image so that the work doesn’t feel entirely wasted. I deleted the rest because it was both incredibly long and ultimately irrelevant.
Creating Erasers that Perfectly Flank the Curtain Wall
During my many hours of attempts, I discovered that lowering the curtain wall height by a quarter inch made for a better look, so I did that. It fit nicely, and after use of the align tool, not even a snip of an overhang. I then disappeared the base and started working on the curves.
I want smooth curves along the top, with no protruding bits and minimal creases. I think it would be best if I add overlapping spheres along the border, then remove excess on either side of the arc with an eraser. I’ll make the erasing tools now.
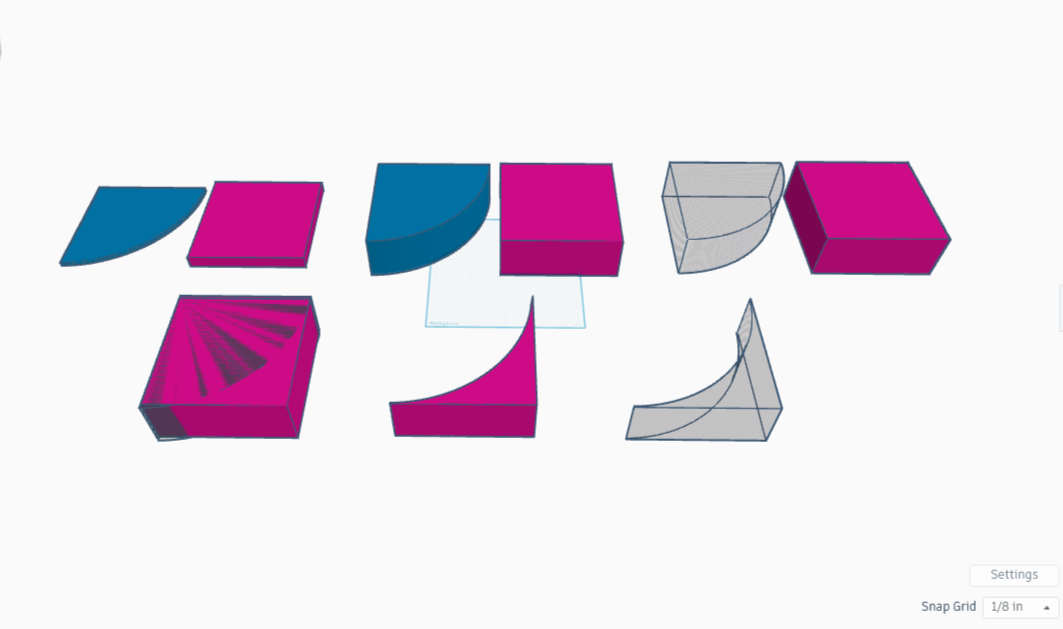
For the outer part of the arc, I’ll make a rectangle, cut out an arc-shaped portion, then turn that rectangle into an arc-shaped eraser. For the inner part, I’ll make a copy of the arc itself, place it on a copy of the plate, then cut away the arc copy, leaving a smaller plate. Turning that into negative space will make the inside eraser.
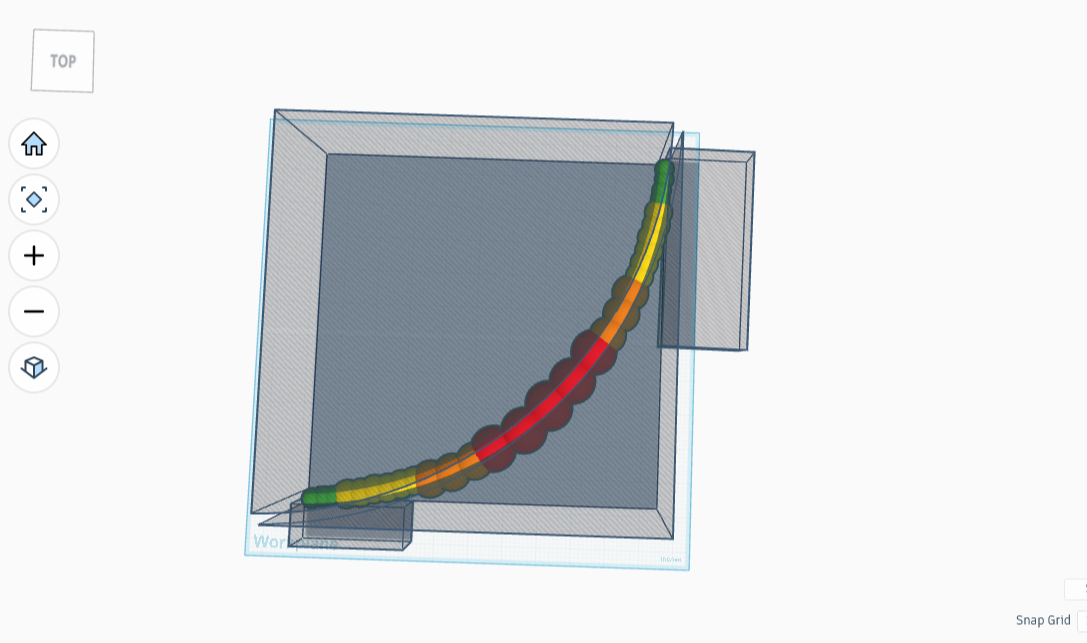
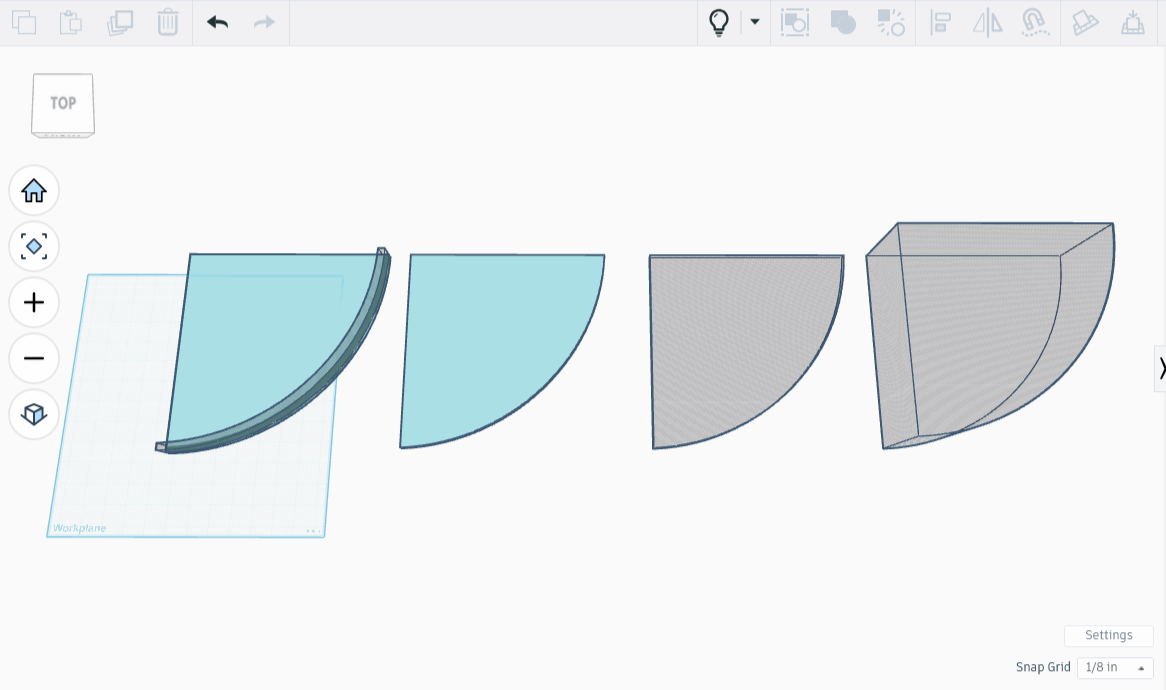
I made the sandwiching erasers, then placed the arc between them. The arc was so narrow that it was hard to see clearly, so positioning it exactly was tricky. The light blue color did not help either, as it was blended in with the shadowboxes.
When I thought I had the pieces snugly side by side, I combined them. If they were only touching, not overlapping, combining the erasers and arc would leave behind only my perfect arc.
The first time I tried this, I ended up clipping half the arc. Oops. I changed the color to hot pink for bettter visibility, then tried again. It only took a few more tries before I got the pieces perfectly in place. Once it worked I undid the merge and hid the shadowboxes, using CTRL-H.
For the next part, I’ll dot some spheres along the top in a pleasing pattern, reinstate the shadowbox erasers, combine the lot, and be left with a gorgeous wave-topped arc. In theory anyhow. Time to give that a go!
Adding the Curves
Now that we’ve got a solid base, good sides, a curtain wall for the front, and some flanking erasers, it’s time to add the curves along the top arc.
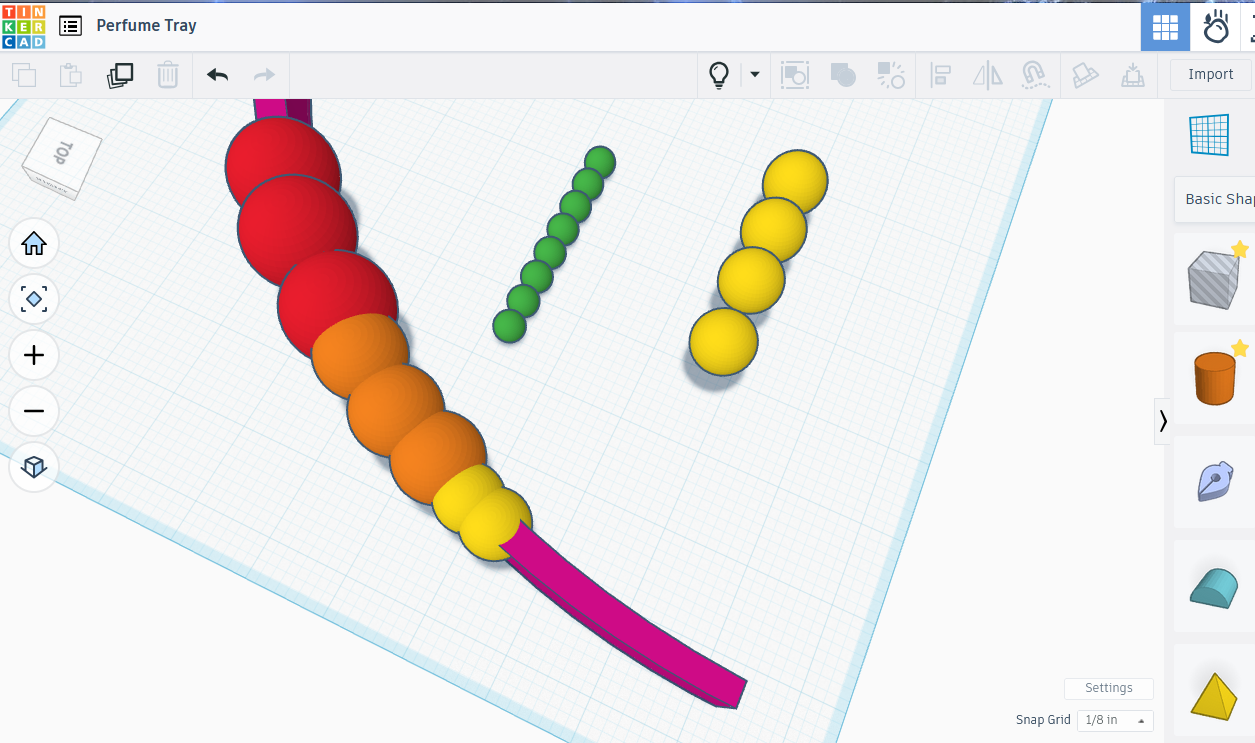
I created a 1.25” sphere, a 1” sphere, a .75” one, and a very small one at .375”. I then colored them red, orange, yellow, and green respectively. The biggest sphere will be in the center, so needs to have an odd number of curves for it to be symmetrical. I opted for three of the big ones, 4 orange ones, 6 yellow spheres, and 8 green.
According to google, the arc of a 10 inch radius quarter circle is roughly 15.7 inches. Half that (a whole line of these colors, squished together) will be close to 8 inches. I think these sphere sizes should do it - now it’s time to put the theory to the test.
I lined up the spheres, overlapping them so that they looked like they had a nice curving wave. That step was tricky because I kept having to shift the spheres along the arc. The process went very smoothly, except for one thing: the .75”d pieces were too small to span the arc properly, so I enlarged them to .5”, and used three instead of eight.
Once I finished, I bundled them together, made a copy of the string, flipped the copy around using the mirror command, then rotated it 90 degrees. It was very nearly a perfect fit, requiring only that I move the smaller beads a fraction.
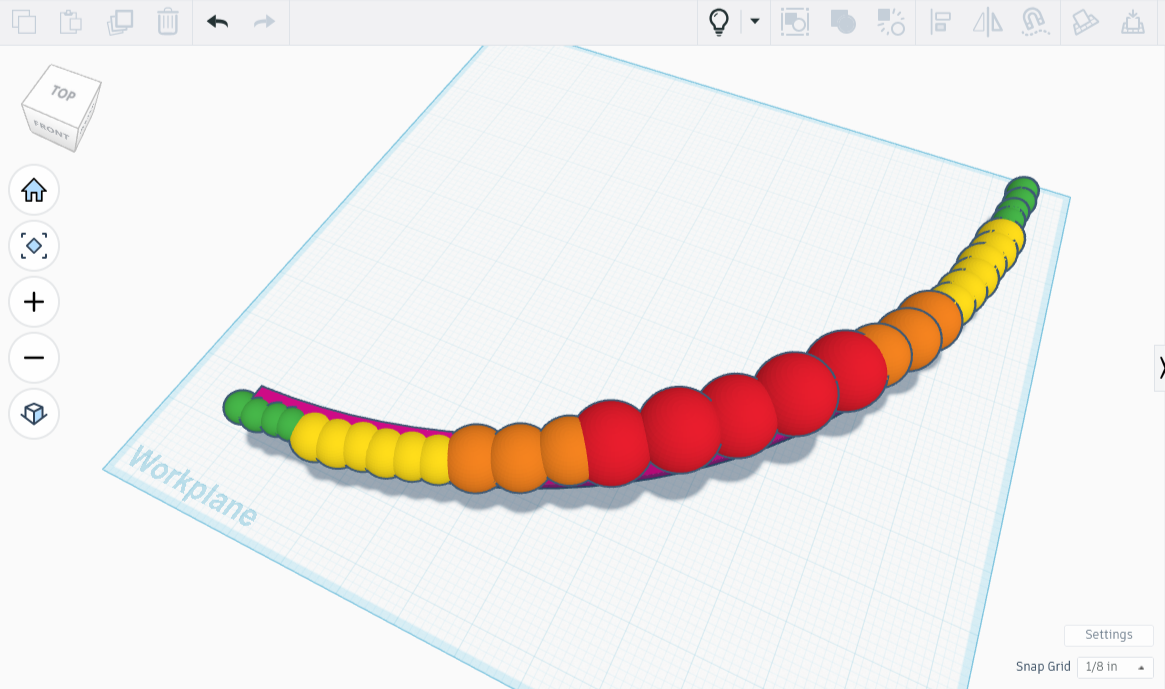
Everything lined up now, I added the shadowboxes back on either side (light bulb icon!) then combined the lot. Near perfect again, only a little trace because the box needed to be larger to accommodate the size of the spheres. No problem. I’m not messing with the boxes, they took forever to line up properly. Instead I added a couple tiny eraser rectangles over the offending spots, then tried again. Lo and behold, a beautiful front!
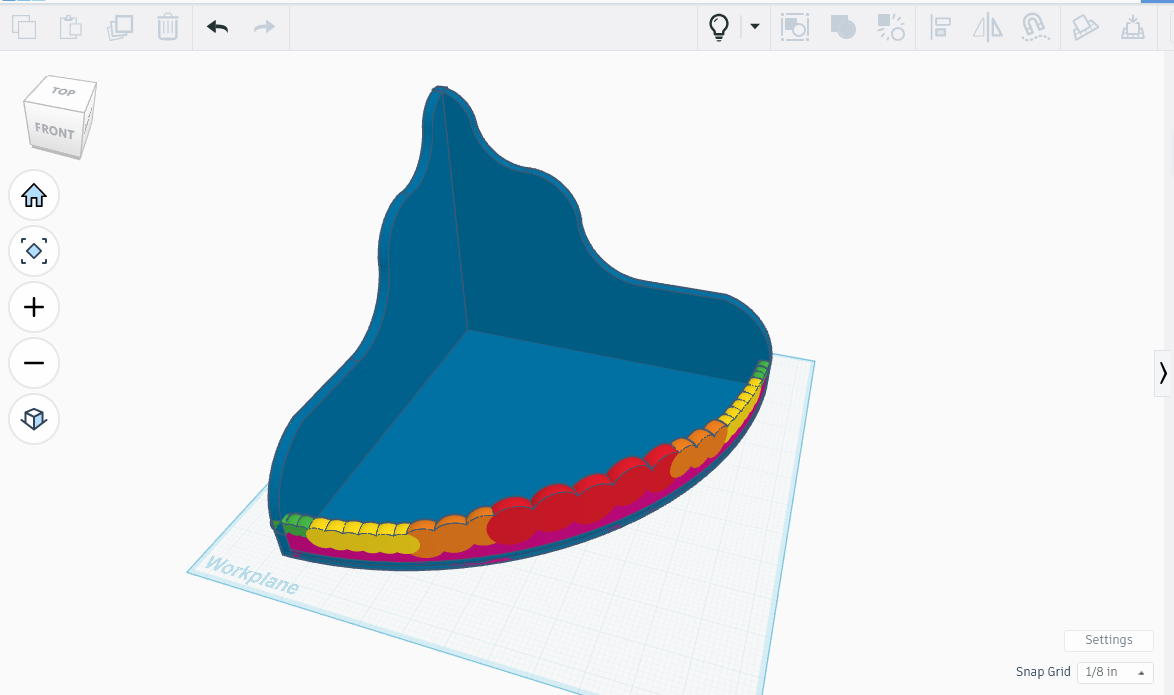
I attached it to the base. It kept all the separate colors because I used the bundle function to keep the pieces together while I moved them around. Neat. Except for one thing: at some point I lowered the center red sphere, and didn’t notice til now. No problem, I broke it all apart, moved the base out of the way, raised up the center sphere, then combined it all again, to make a perfect fence. I then recombined the absolutely perfect fence to the base.
I had made sculpted curved walls and flowing decorative panels in Tinkercad, using negative shapes, grouped cuts, and carefully aligned curves, and the result was beautiful. I copied the completed piece and shrank the copy to 2” tall. I’m going to print a prototype before moving on.