Making a 3D-Printed Print-in-Place Fidget Bracelet
My friend wants me to make her a print-in-place bracelet. She made me some pretty beaded ones, so it seems only fair. She especially liked the look of the cylinder bearings, which I’d done in wood-grain filament. Well, I’m going to make something!
I got out a brand-new sketchbook and got to work.
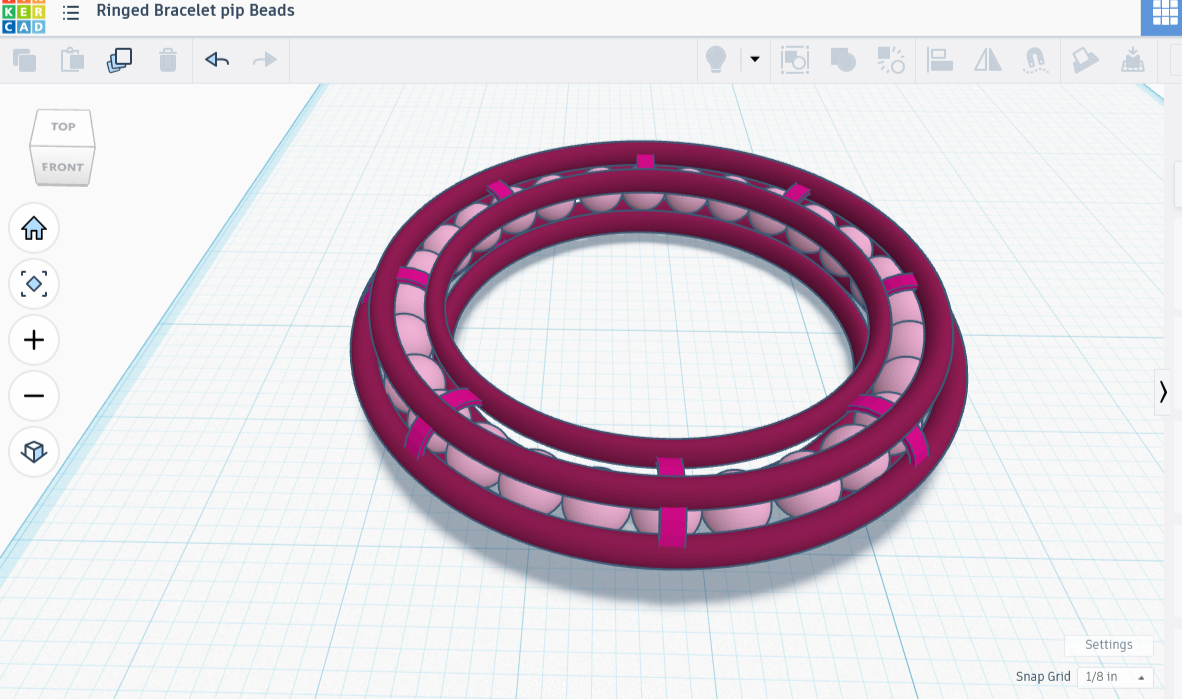
For the first bracelet, I’m thinking to do five slender rings, filled with beads all the way around. I made a technical drawing for it, even though the parts I knew how to make were pretty simple and I had to guess at the parts I didn’t, such as how many beads I needed. Good enough to go on with, certainly.
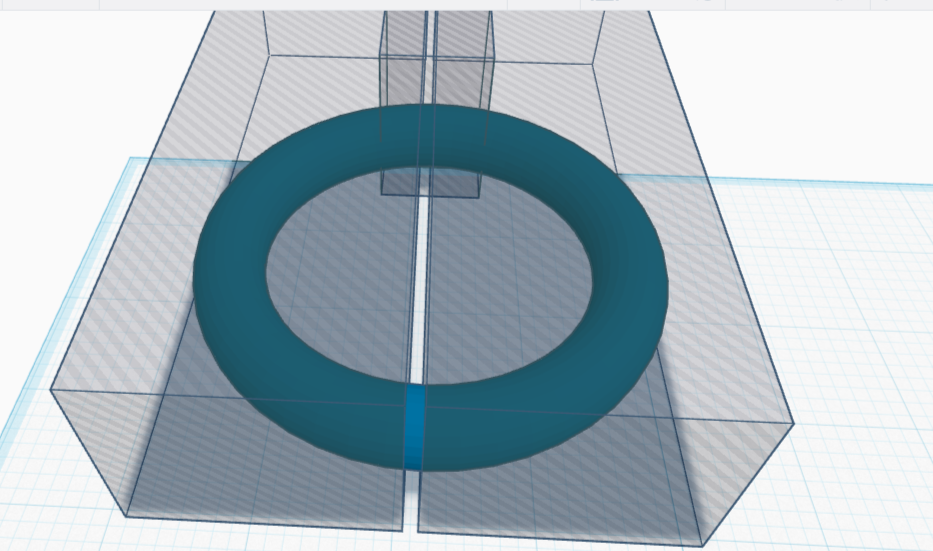
If the rings were going to form the outlines of a tube shape for the beads to roll around in, I first needed a tube to model the rings on. I used a donut shape from the shapes menu to make a tube 4” across and around .75” thick, like a fat donut. I then turned it into the familiar grey of an eraser shape so I could better see what I was doing. (Final Torus Dimensions: 4” diameter, .381” height, .295 radius, .05 tube, sides 24, steps 48)
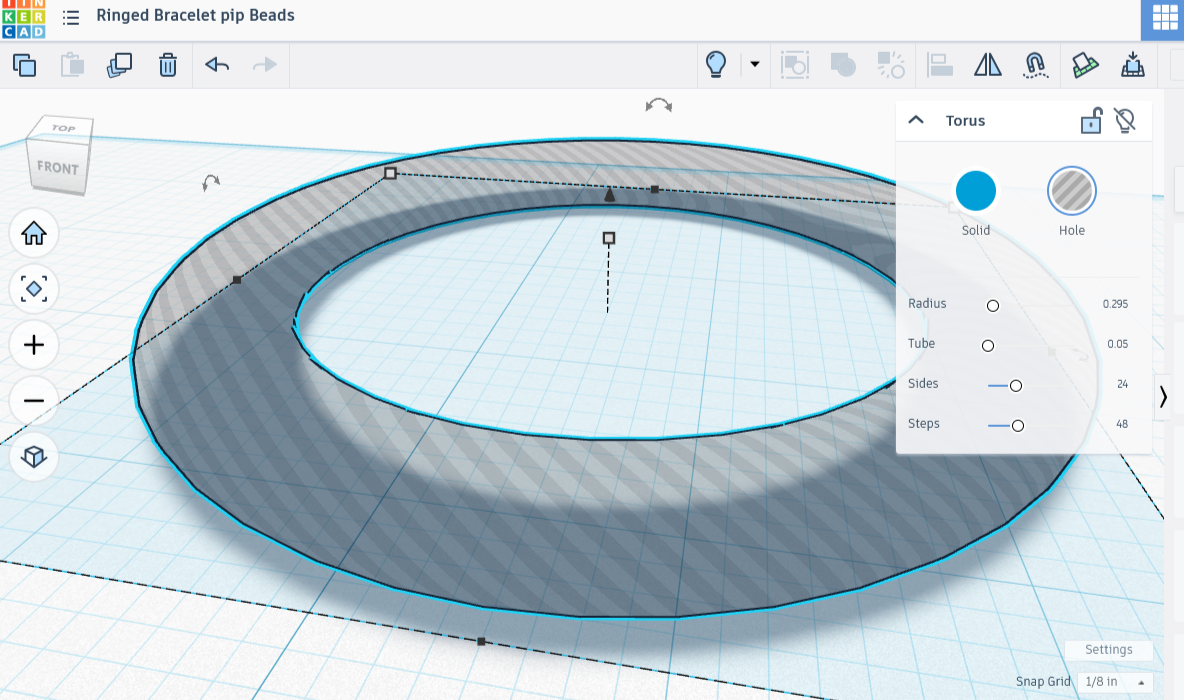
A Shadowy Torus Shape
Creating the Rings
Note: All the rings below only differ in radius and position, otherwise sharing the same height and the same four torus values. The shared values between all five constraining rings are as follows: ( .187” height, .375 radius, .015 tube, sides 24, steps 128 ). The diameter values in parentheses after creating each ring reflect adjustments made at the project’s end so that the spheres had a little clearance.)
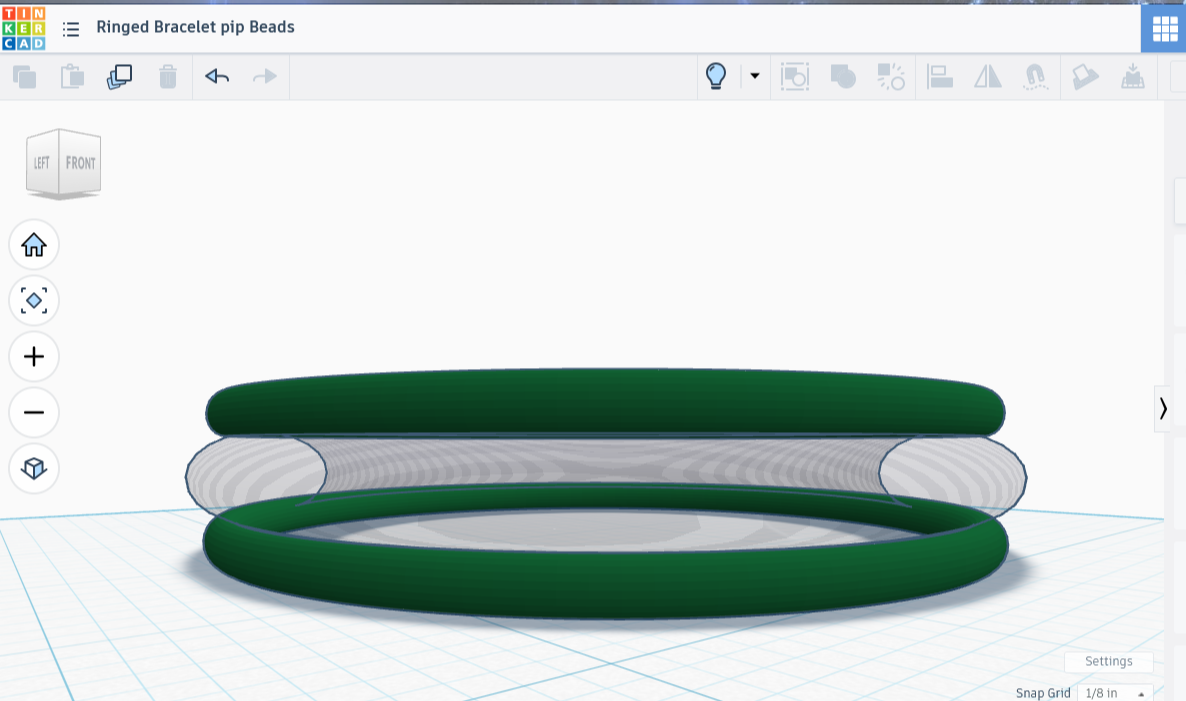
I then made another tube, adjusting it til it was as thin as a fine chain. I moved it underneath the donut shape, then expanded the ring til it was 3.75 inches across, just touching the outer edges of the wider shape. I made an exact copy of the fine ring and moved it up til it crowned the donut, leaving both rings just barely touching the larger shape in the center. (Top and Bottom Ring Diameter, After Adjusting for Clearance: 3.85”)
I copied one of the rings to make a third, lifted it up to the widest point of the donut shape, then expanded the ring til it just touched the outer edges, 4.125” across. (Center Ring Diameter, After Adjusting for Clearance: 4.2”)
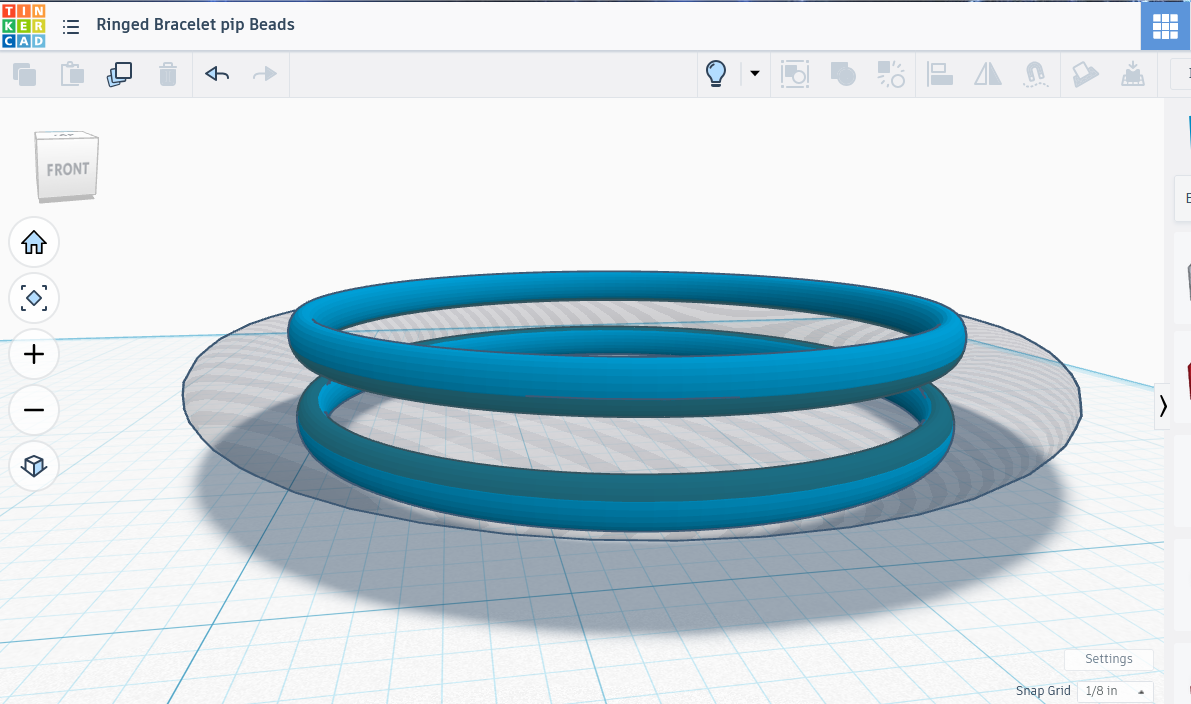
I then copied a ring, moving it so that it was exactly between the bottom ring and the middle one, a perfect fit! I sized it so that it cradled the inside, with a diameter of 3.125”, then copied it and moved the copy up to between the center ring and top. (Twixt Inner Rings Diameter, After Adjusting for Clearance: 3.15”)
After that I used the align tool to make sure everything was centered just so. I carefully moved the workplane around, checking to make sure everything seemed to touch the tube equally. Satisfied, I removed the tube-shaped eraser piece, then combined the rings. I set those aside, then turned my attention to the spheres.


A Circle of Spheres
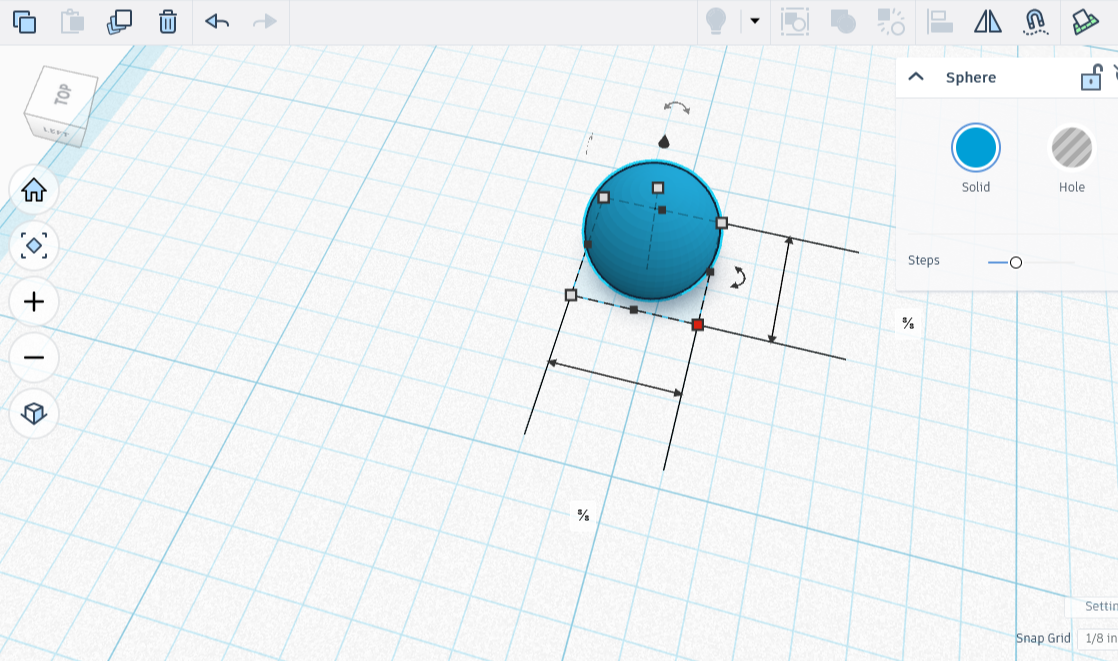
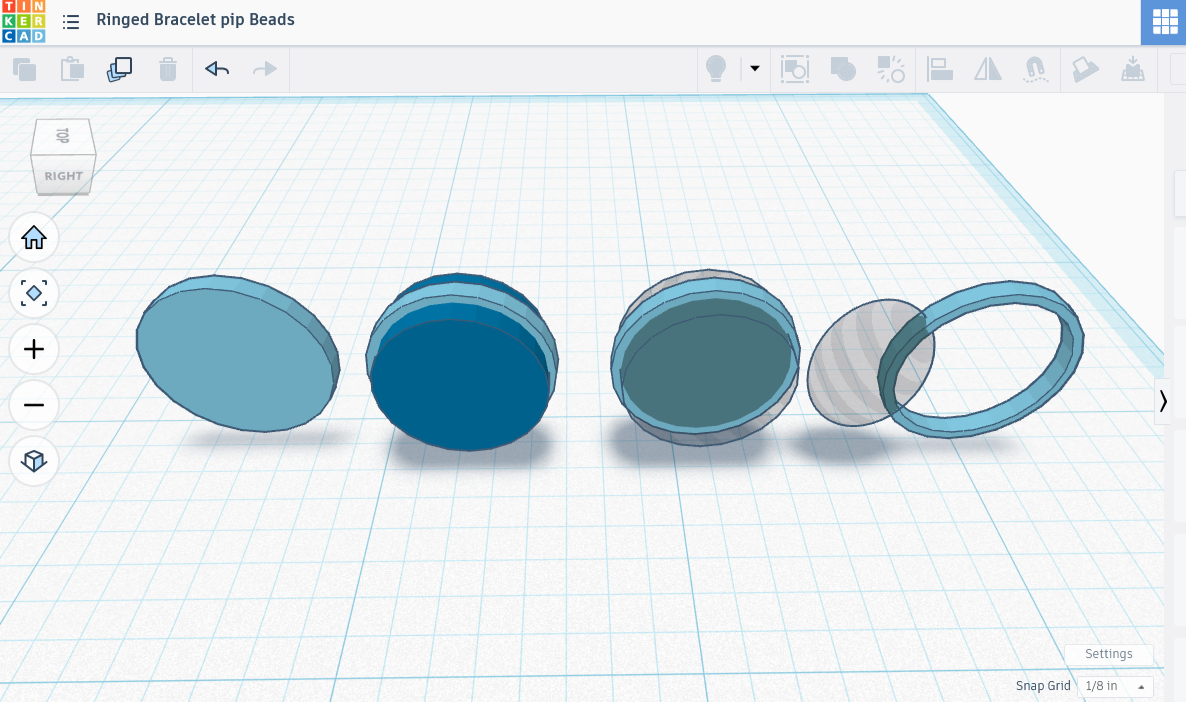
I got out the see-through tube again, placing it flat on the workplane. I then created a .75” bead, then put it in the shape. I copied the bead, then put it in the tube on the opposite side. When they were perfectly aligned, each centered in its portion of the tube, I combined them into a single pair.
I copied the pair, rotated it 180 degrees, then combined them. I had a dot on each cardinal direction. How quaint! I copied that, then rotated the copy 45 degrees. Now I had all eight important directions covered by a dot. There was a lot of wiggle room though, so I doubled THAT up, then moved it by half of what I had before.
That left too much room still; in an earlier post we saw how that turns out. If it’s going to work properly there needs to be enough pressure from the beads on the rings to hold it together.
I undid the move, then tried moving the set a mere 15 degrees, copying that, then moving the copy 15 degrees, leaving me with 24 beads altogether. I checked to make absolutely certain they looked good in the shadowy torus, and they did, so I removed the torus, then combined all the beads.
I then moved to the last step: some clamps.


Making C-Clamps
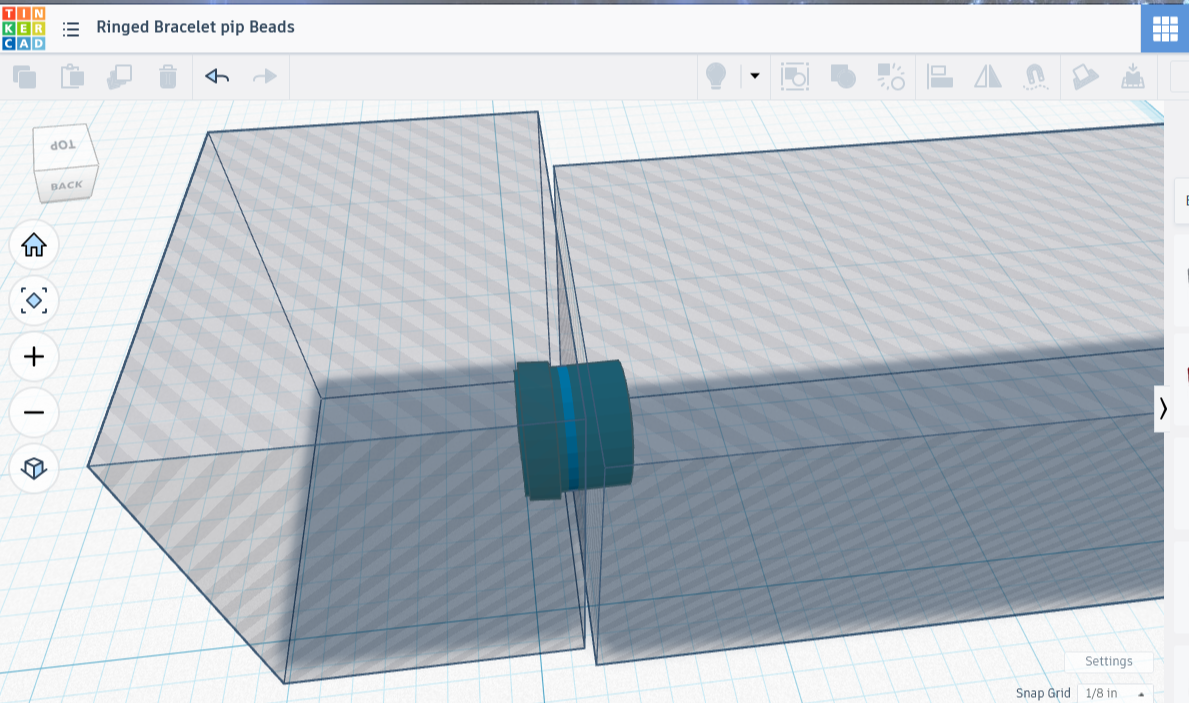
For the clamps, I once again pulled out the shadowy torus shape. This time I made a solid copy of it, then created two shadowy box figures, each significantly larger than half the torus shape. I put one on each side of it, then put yet another shadow box on the upper portion. I combined the lot, leaving me with a slice of torus that looked like the thinnest slice of bundt cake imagineable.
I wanted the clamps to run through the center of each ring, stopping with the innermost arc. That, I wanted free, and it was important to make sure no clamp parts stuck out because they could scrape wrists. A C-shaped clamp would do that nicely, which meant I needed to do add one more step.
I made a bead the same size as the beads in this piece, turned it into a shadowy eraser shape, and placed it over the clamp so that it looked like an enormous grey pearl topping a slender ring, then combined them, which left me with a C-clamp.
I placed that over the original torus shape, copied the clamp, then mirrored the copy so that it faced the exact opposite direction. I moved the mirrored copy to the opposite side of the torus, then made sure both clamps fit perfectly over shape.
Once I was satisfied that they fit well, I combined the pair of clamps, moved the copy 90 degrees, then combined it with the first pair, leaving me with 4 united clamps. I copied the set of 4, then rotated it 45 degrees so that I had 8 clamps altogether, then combined those, always careful not to accidentally combine the shadowy torus shape with them!

Combining the Set
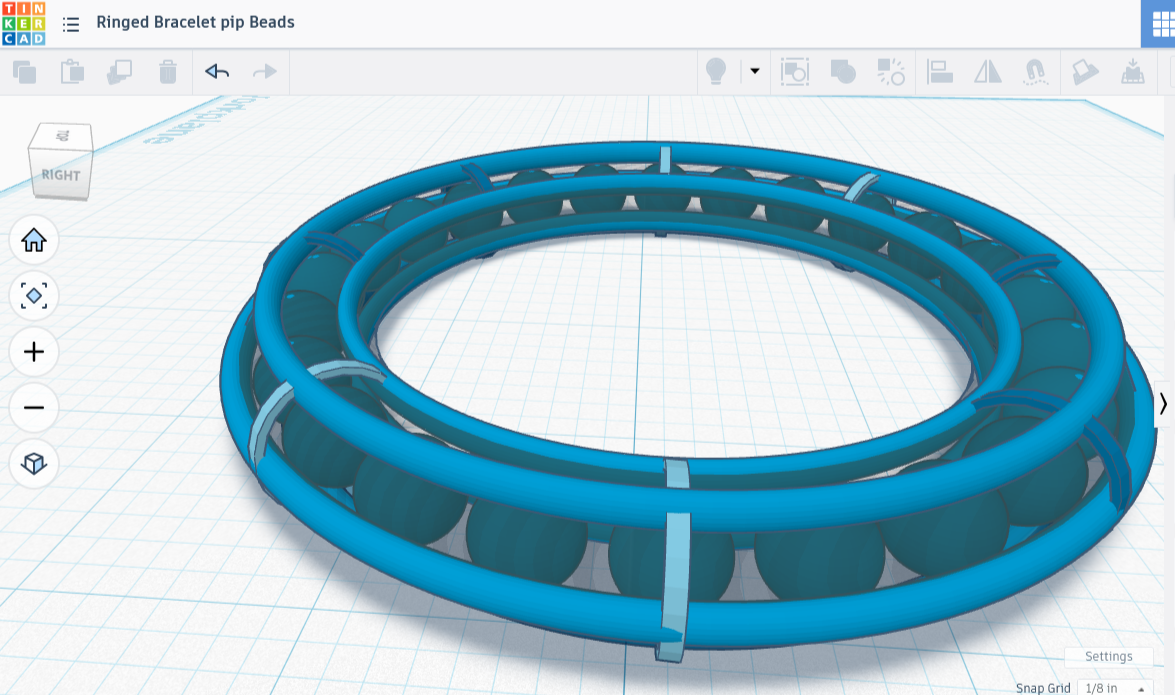
Now that I had the clamps, the beads, and the rings, I put them all together, aligned them on all three axes, and made any adjustments necessary. I wanted to ensure there was space between the beads and the rings so that they could roll around, and it looked all right. I was fairly certain the rings could fence the beads in at their size.
For the print, I checked the support box on, chose ‘type: tree (auto)’ and ‘style: tree (organic)’. Tree supports touch less of the surface area than grid, and I want as little support touching this delicate piece as possible. The ‘style: tree (organic)’ option uses more tree structure in order to have less support contact with the model. It’s a personal favorite, though I am fairly confident that more tree structure means more filament.
I also chose ‘on build plate only’ because it’s so much cleaner for these types of prints. I’ll show you a picture when it’s done :)
Except no, you aren’t getting a picture of that one! I’ll show you what I thought I was printing, but the actual result was a disaster. My clamps were too thin, firstly. There was also far too much room between the spheres. Consequently one worked its way out, then another, then it was raining plastic spheres all over my desk. I had already realized that there weren’t enough spheres, but it took me a hot minute to realize that at some point I had shrunk the inner rings.
It Did Not Work
The design may not have worked, but it was remarkably close. In fact, every technique I had used was fine — it only needed resizing in places! I needed to widen the clamps, fatten the rings, add more beads, and possibly make some adjustments. Let’s fix some stuff!
Fixing Some Stuff
I redid the clamps, making them twice as wide. That meant breaking apart the set, deleting all but one of them, making it twice as wide, then creating the whole set again the same way as before. I couldn’t help but think that if I’d figured out how to make this piece using codeblocks, I would have only had to change a single variable, then I’d have a brand new piece without all the work. I’m filing that thought away for later.
Somewhere along the way I had changed my inner ring’s ‘tube’ modifier from .01 to .04. I fixed that, then plumped up all the rings by a small amount. I moved the plumper inner rings further apart by moving one a smidge up and the other a smidge down. I joined the two inner ones together, then turned my attention to the outer rings.
They were plumper, nice, but they also squished into the beads by a bit. This would not do. I broke the outer three rings apart, deleted the lower one, widened the middle and top by just a smidge, then joined the pair. I duplicated the set of two rings, mirrored it, then flipped the mirror upside down, and manually aligned the two pairs along their shared wide ring. I combined them, leaving me with a perfectly symmetrical set of three rings.
I aligned this with the set of two along all three axes, then joined them. The set allowed a tiny bit of room for the beads to move in, but practically none. I added the clamps, and it was a perfect fit.
Lastly, the beads. There was far too much room for them to move around. I broke apart my beads, then tried placing them in 10 degrees apart, 12 degrees etc until I got them all to fit. I ended up with 28 beads, although their spacing wasn’t perfect. A perfect fit on the first try would have been nice, but knowing the necessary number of beads was good enough. I pulled up the calculator: 360 / 28 = 12.857. That’s how many degrees each one should span.
I duplicated and paired a set of beads, as per usual. Then I did something a little different: instead of copying the set and moving it 90 degrees, for perfect symmetry, I moved it an uncomfortable 12.8 degrees. I did this all the way around. There was little room left between the spheres now, barely enough to move. There is enough though, and I’ve no doubt it will be surprising how much space that can turn into when the beads are all smushed to one side.
Well, all the pieces are here, so I put them together, made sure they were aligned on all the axes, then combined them. It’s off to print now, and I think this one will work! I’ll share a picture when it’s done, really this time.


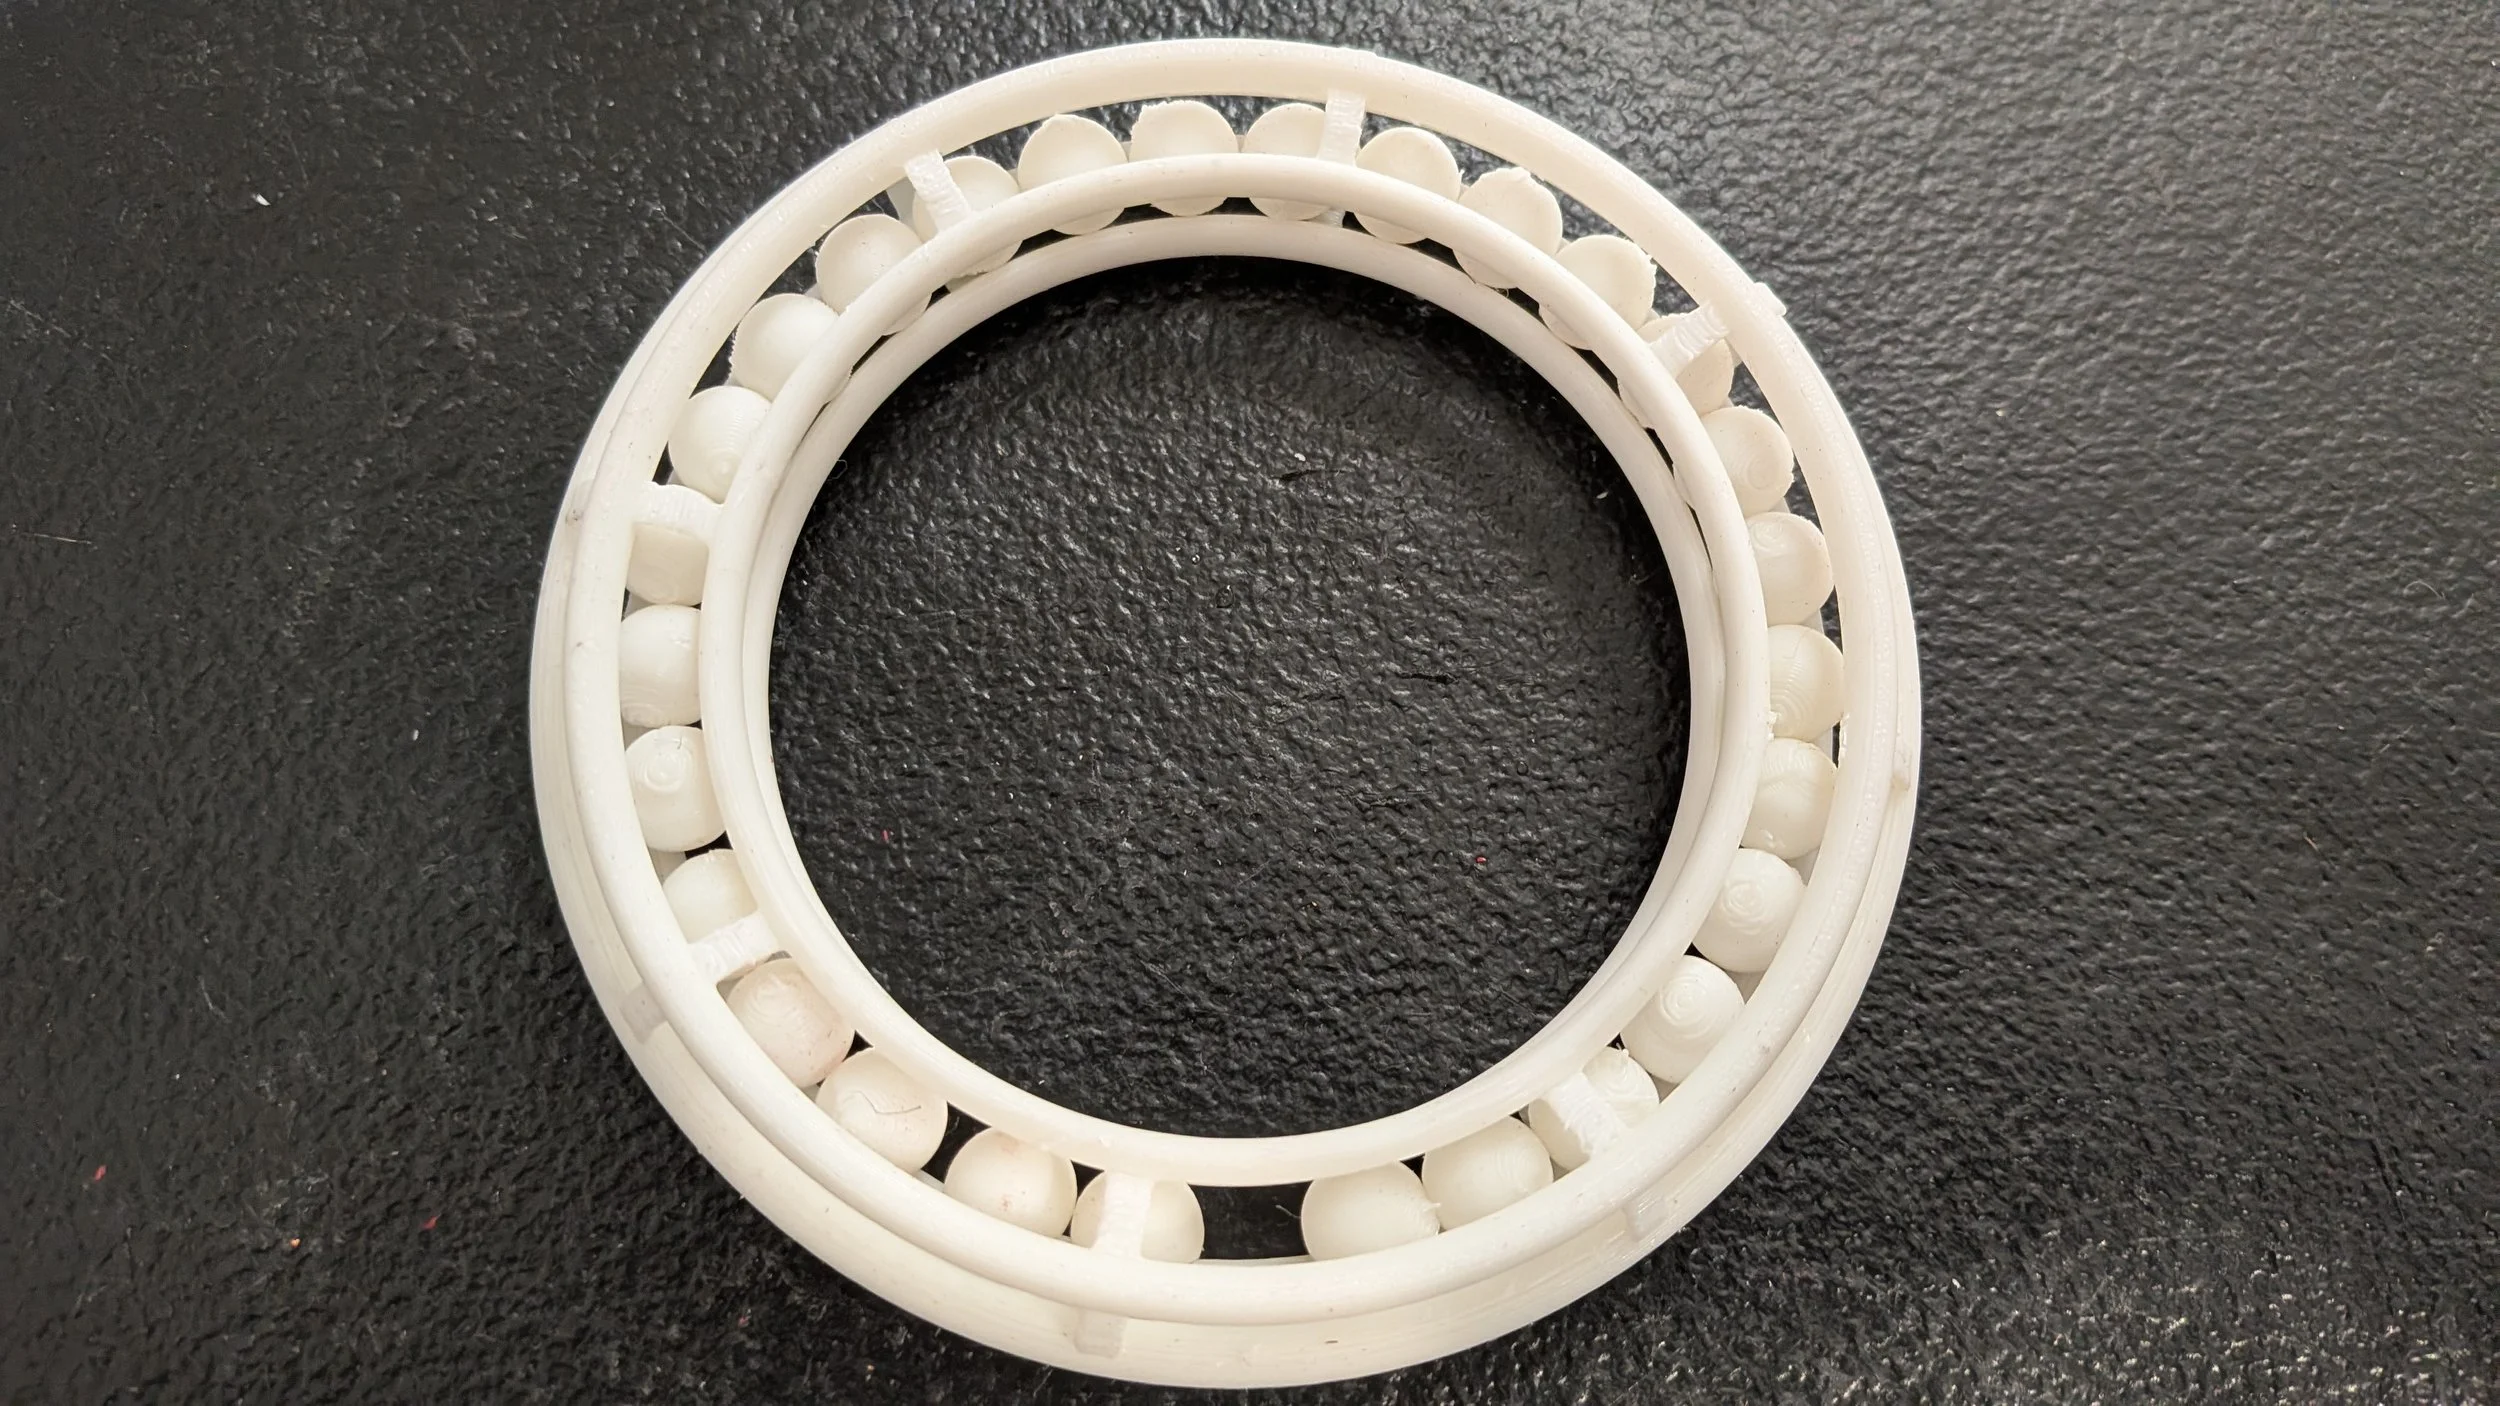
It worked, though I broke a piece of arc when removing the scaffolding. UGH. I’m thinking to glue the nub back on, but I might just print a fresh bracelet. I hate to waste it though, as the rest is nice, only needing a bit of sanding to smooth out some rough edges and a working-loose of the more stuck spheres.
I pried any remaining stuck spheres loose using the metal brim of a tiny paintbrush. That worked, but I had to hold the whole piece down tightly but gently with one hand while poking the brush at the sphere, between the rings. I had to push hard enough to break the sphere free of the plastic nub that held it, but not so hard as to snap the ring loose or break an arc.
If I print this again I’ll allow for the tiniest fraction more diameter on the outermost ring, where the spheres occasionally printed stuck to the outer wall. Prying them loose was time-consuming and difficult, although not how I snapped an arc (that came off along with a long strip of tree support).
I enjoyed making this, mostly because it’s for my friend but also for the challenge! I taught myself how to place rings of different sizes around a curved shape in such a way that the joined rings could constrain beads, and felt pretty good about it.
The spheres in the rings go round n round