3D Printing Simple Machines (Screw)
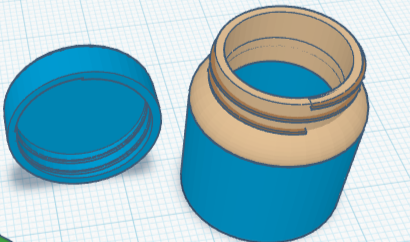
According to the AI overview, a screw is an inclined plane wrapped around a cylinder. This makes me wonder why an inclined plane by itself is a machine, yet is also listed as a machine when it’s combined with a cylinder, i.e., is a screw. I’ll find out when I get to the inclined plane section, but for the record I am curious.

3D Printing Simple Machines (Lever)
I thought it might be fun to test out my very own balancing scale! A triangle base made a fine fulcrum. I drafted a red bar and added two cube-shaped cups to either end, then added a wedge-shaped dent in the bottom center for the bar to rest on.

Same File, Different Fit: Testing Printers and Filaments (Part 2)
The difference in printers was rather shocking to me. I had seen it in videos, but didn't realize it affected our own so much. I have learned that with the settings as they are, the Bambu printer is more accurate, producing tighter and more consistent fits. The family prefers it for detailed prints, and it's demonstrably clear why. I mean, I just demonstrated it! ;)
Same File, Different Fit: Printers and Filaments (Part One)
Understanding this helped me realize that fit isn’t just about the model itself. A lot depends on the printer and the filament, even when everything else stays the same.

3D Printing Simple Machines (Part 2: Wedge)
With that cleared up, I considered what other things might be actual wedges as opposed to wedge shapes. The first thing to come to mind: a doorstop. I’m going to make one right now. While I’m making it, I’m going to be thinking about other examples. It would probably help if I defined ‘wedge’ first.

3D Printing Simple Machines (Part 1: Pulley)
I printed it, and it was super cute! But would it be effective? Time to find out! I wrapped a piece of string around one of the wheels, then placed that on the axle slotted near the top of the scaffolding. I tied my phone to the other end of the string, but the axle was too thin and the scaffolding too weak to hold it. I then threaded two wheels side by side on the same axle, expecting and receiving no advantage. After all, the single pulley is meant to change the direction of force. Adding more wheels shouldn’t make it go in the opposite direction even harder, and one wheel alone wouldn’t change the heaviness of the phone. Still, this was a chance at experimenting, so try I did, and of course the phone was still too heavy.
Importing STL Files into Tinkercad for Mash-Ups and Remixes in Tinkercad
With my newly acquired knowledge, downloading a font was a snap. I created a folder just for fancy fonts and unzipped it into that. From there, it was super easy to import select letters and add them to the design. Adding the font was as simple as stringing the letters together and aligning them horizontally, combining them into a single long shape, narrowing it to fit the box, shrinking it so that it had a nice look, flattening it so that the text protruded only 2 mm, then rotating it and sticking it on. While aligning the text was slightly time-consuming, the rest of the steps were done in only slightly more time than it took to type them.
Welcome to Golden Leaf 3D Printing
I have been having so much fun making things with the 3D printer. Even though I’ve only been designing for a few weeks, I’ve already learned how to model and print things that have made our household nicer. And what’s more, I love doing it!


.