Basic 3D Modeling in SketchUp Free
Today I’m going to try out the free version of Sketchup 3D Modeling Software, with only my textbook as a guide. Tinkercad, the software I normally use, utilizes something called CSG, or Constructive Solid Geometry; Sketchup uses the more common Direct Modeling method of drafting, making use of things called Sketches, Constraints, and Extrusions. It’s a completely different way of drawing!
On opening the software, I’m greeted by the figure of a man standing on field of green, with three axes (plural of axis, not the things you use for chopping wood) at his feet. A blue horizon gives the image depth. The man can be removed by clicking on the man, then hitting ‘delete’.
The look can be further changed by clicking on the ‘styles’ menu, which has a sampling of looks for the environment. I chose a style labeled “blueprint” for the aesthetic, then started using the tools.
Making a box, easy. Making another box, also easy. Stacking them on top of each other? After a few attempts, I checked with my AI assistant. Using select and move got the job done. Neat.
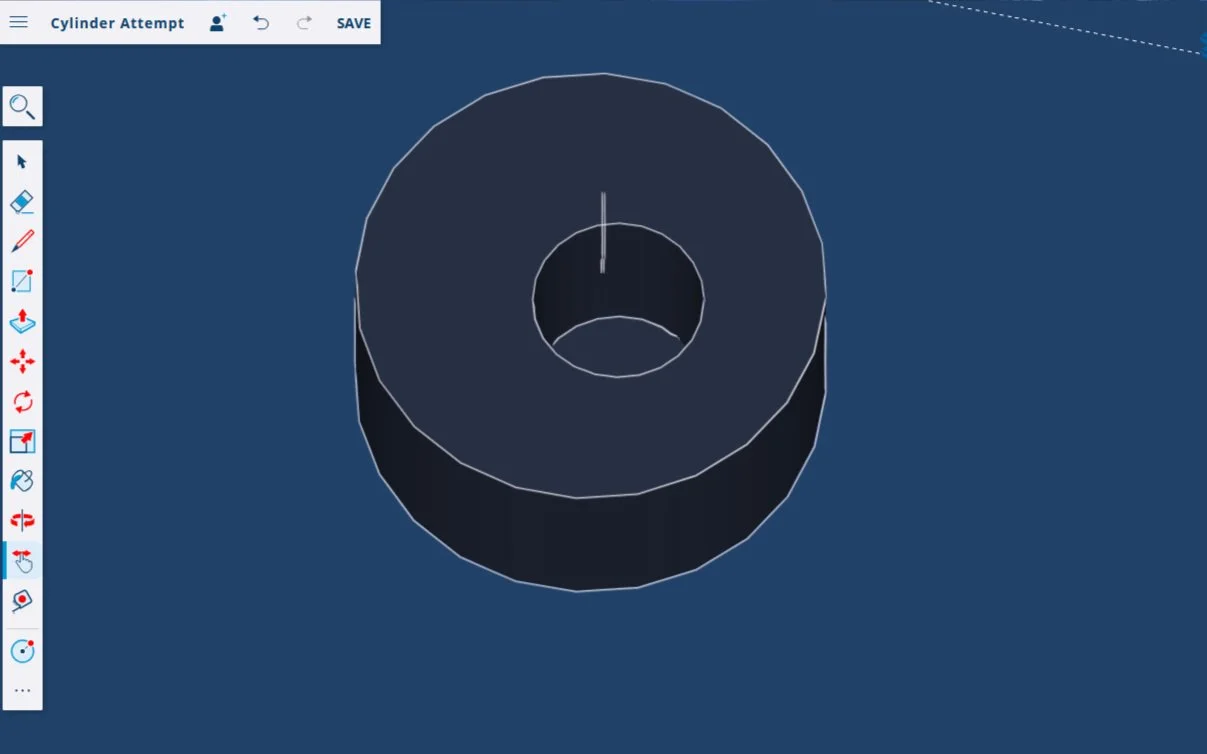
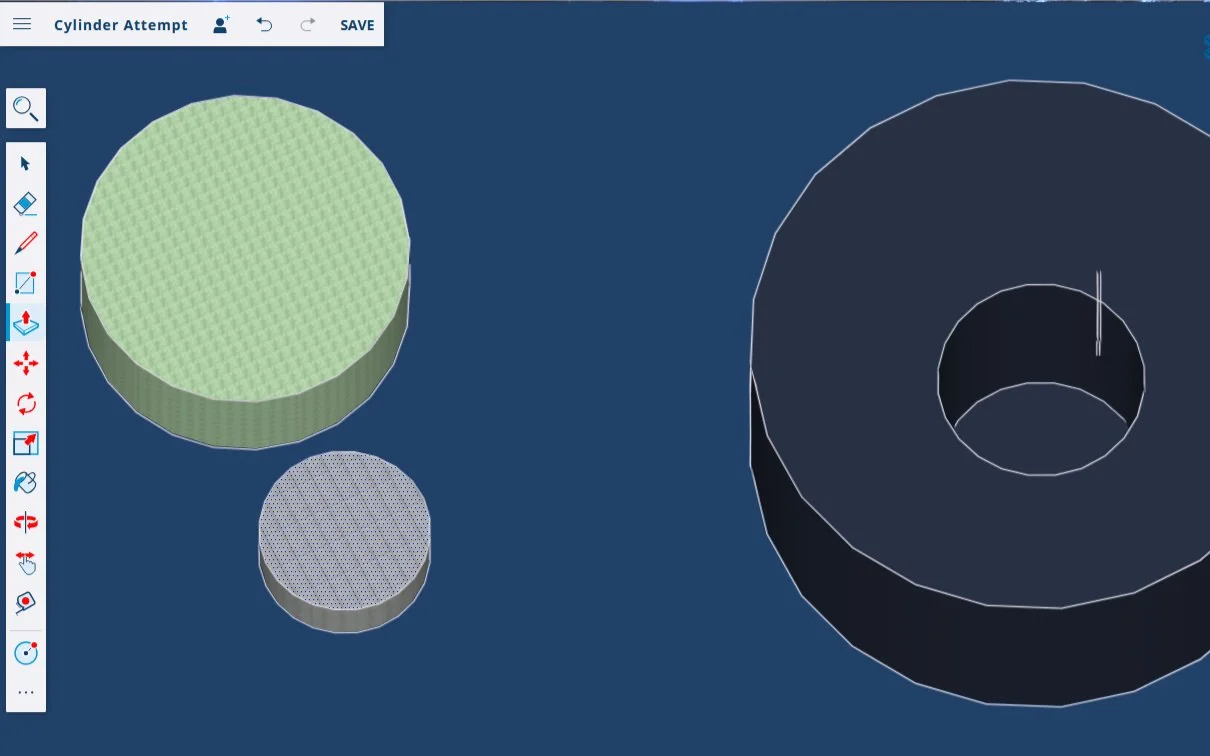
After the box-stacking exercise, I moved on to trying to make a hole in a cylinder. This software doesn’t have a negative space option - instead you have to push a solid object through another, basically carving out a tunnel.
The circle tool on the bottom of the left-hand menu allows for the creation of a flat circle, which one then raises into a cylinder shape using the push/pull tool. I made a large one, then put a smaller one next to it.
Using the select tool on all faces of the smaller cylinder let me move it on top of the larger one, then I pushed the smaller one down until it suddenly popped back up again. I then pushed more slowly, but it kept popping up as I got to the bottom. Maybe I was doing it wrong? I stopped pushing before the bottom, and ended up with a cylinder that had a thin bottom layer.
Undeterred, I set out again.
My second attempt succeeded. Hooray! I had to hit that sweet spot between the very bottom and the reflexive bounce-back, but I did it.
Now to push a holed cylinder through a cylinder. That working exactly as expected, I moved on to more interesting shapes, pushing and prodding my way through the ‘verse.


My first experiments in Sketchup taught me how to stack boxes, create holes, and push solid objects through cylinders. Neato :)
I absolutely love the different styles. There are also textures which make me think of building a house in Sims, what with all the different looks available. I see why Sketchup appears so commonly as a requirement for Interior Design jobs - it looks like it’s well suited for making beautiful landscapes and buildings.