
TtRPG Abandoned Riverwheel (Part 3): Creative Destruction of 3D Printed Spoked Wheel, Axle, and Gear
I made several copies of the star-shaped blob, then stretched out each copy until I ended up with several jagged bits of varying size. I strategically placed these on the wheel and board remnants until I had only two boards remaining. One I left alone, the other I split in two lengthwise.
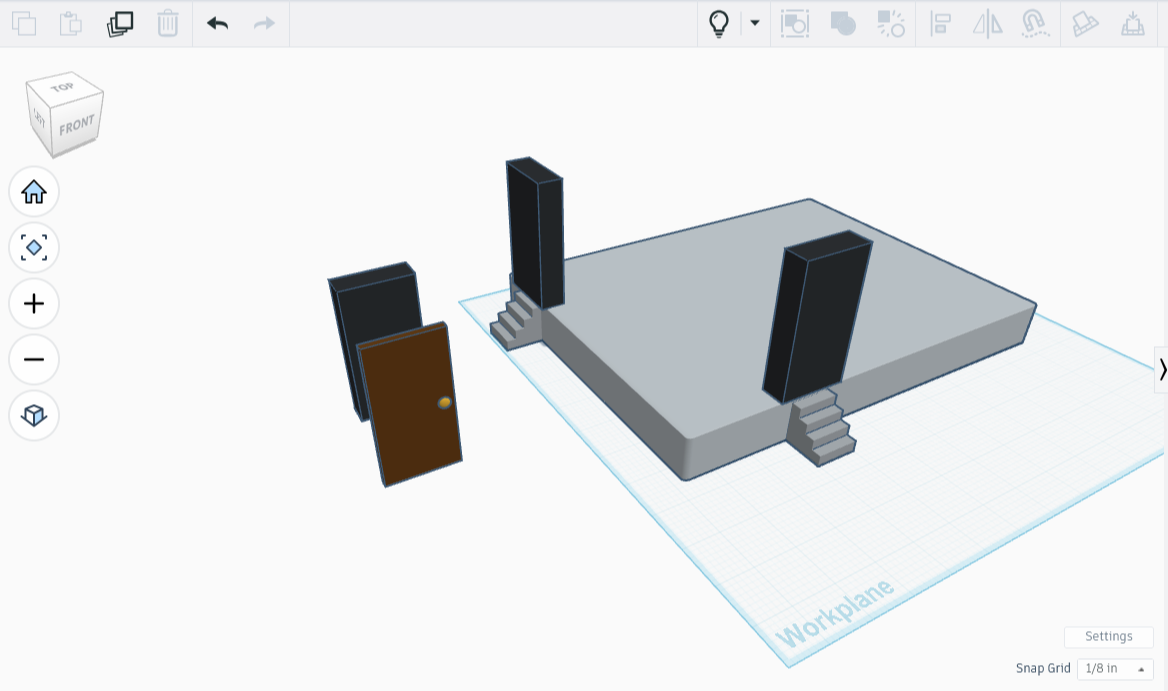
TtRPG Abandoned Riverwheel (Part 2): Stairs, Doors, and Modular Floors
I had made a door during an earlier project, and liked it so much I saved it to my library. I pulled out my original design, still saved under Tinkercad’s ‘Your Creations’ tab, and plopped it on the grid. A quick resize made the doors 3.3” x 1.65”, with .25” thickness.

TtRPG Abandoned Riverwheel (Part 1): Planning and Design
I have wanted to make something with gears and wheels for a WHILE now, and I am SO excited. It doesn’t need to work, in fact pieces of it have likely been carted off over time. It does however need to be believable.
Designing a Roof and Gables for a 3D Printable TtRPG Blacksmithy (Part 3)
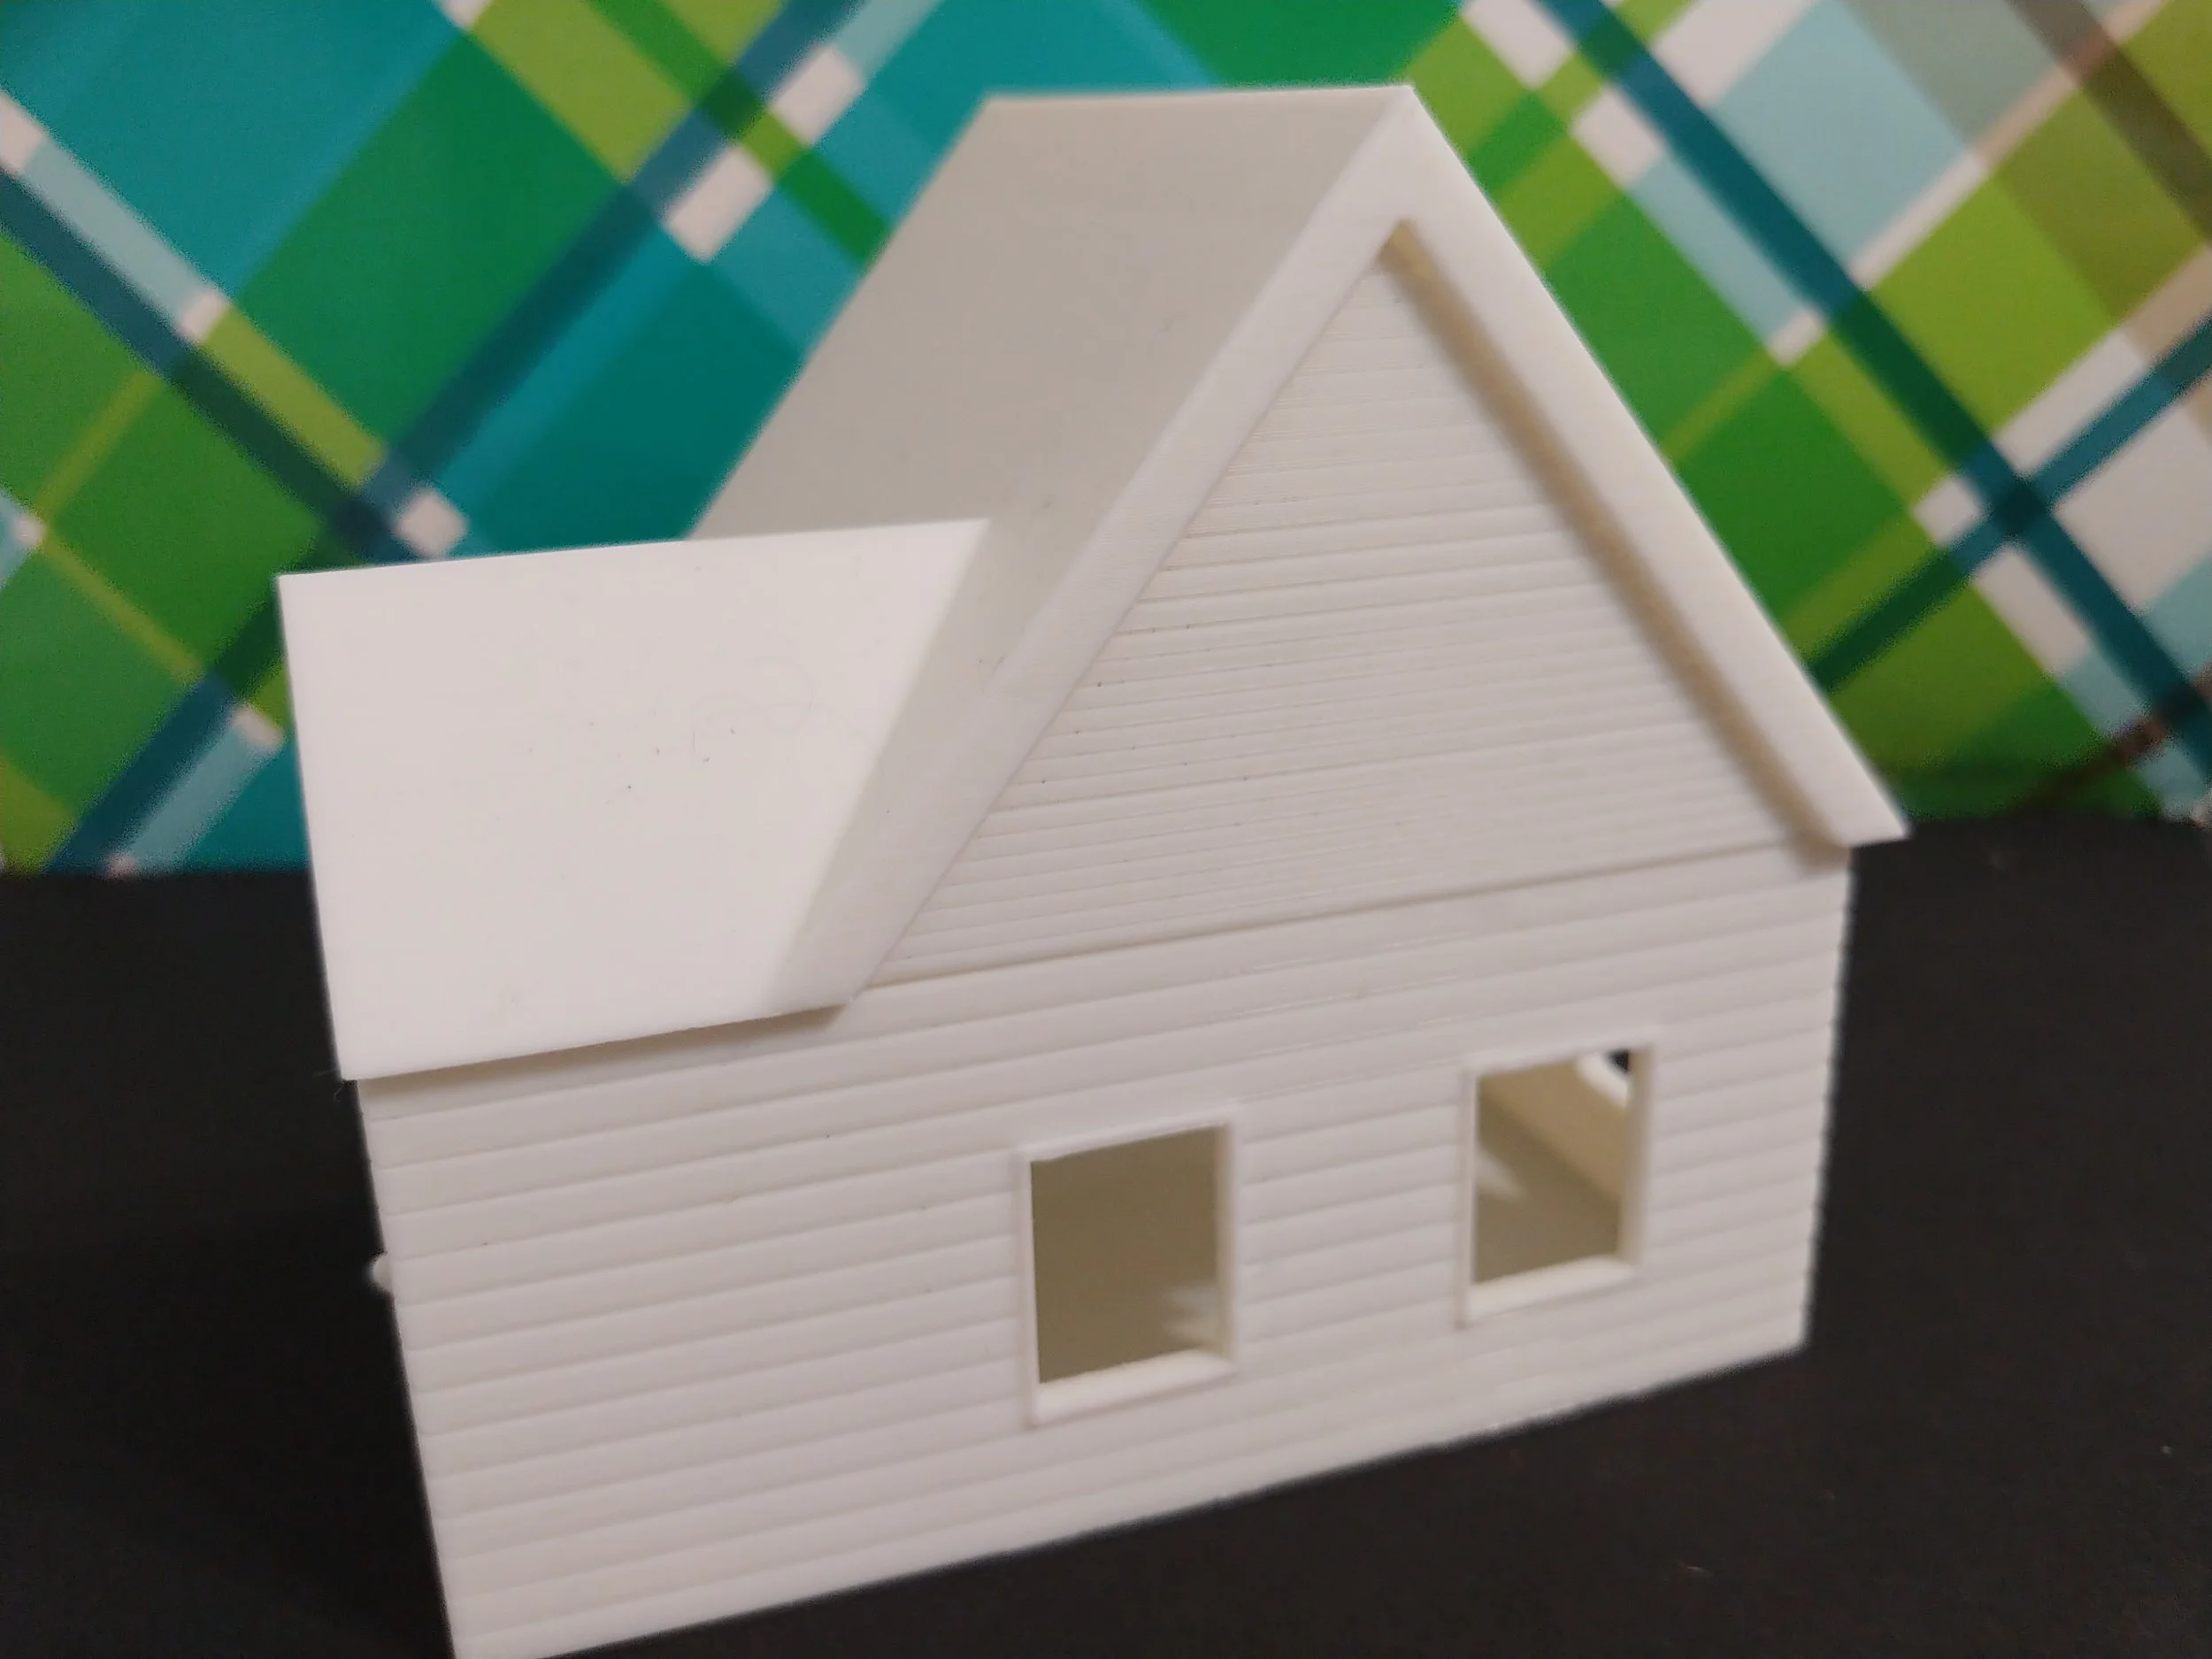
I am now the proud owner of a 3D-printed Colonial-style smithy that I researched and designed myself. While the smithy needs equipment, the building is now printed and ready to paint!
Designing Floors, Walls, Windows, and Doors for a 3D Printable TtRPG Blacksmithy (Part 2)
I now have an extremely cute 3D-printed model of a Colonial-style smithy. It could use sanding in a couple of spots, but overall it came out nicely. Now on to the roof!
Designing a 3D Printable Blacksmithy for a TTRPG (Part 1)
The research and planning stage for the Colonial-inspired 3D-printable smithy for my TtRPG was done, the layout and lighting appropriate. With that in mind, it’s time to put the idea to work. In the next post we’ll explore turning the plan into an actual model.


.