TtRPG Abandoned Riverwheel (Part 2): Stairs, Doors, and Modular Floors
Foundation and Stairs
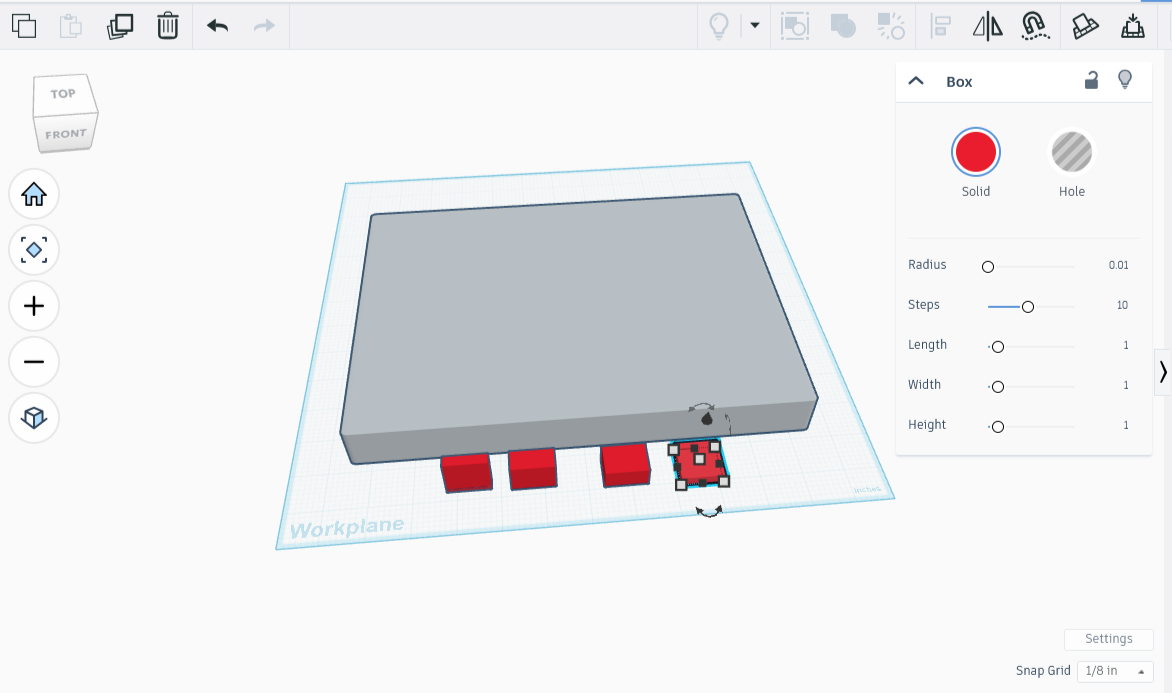
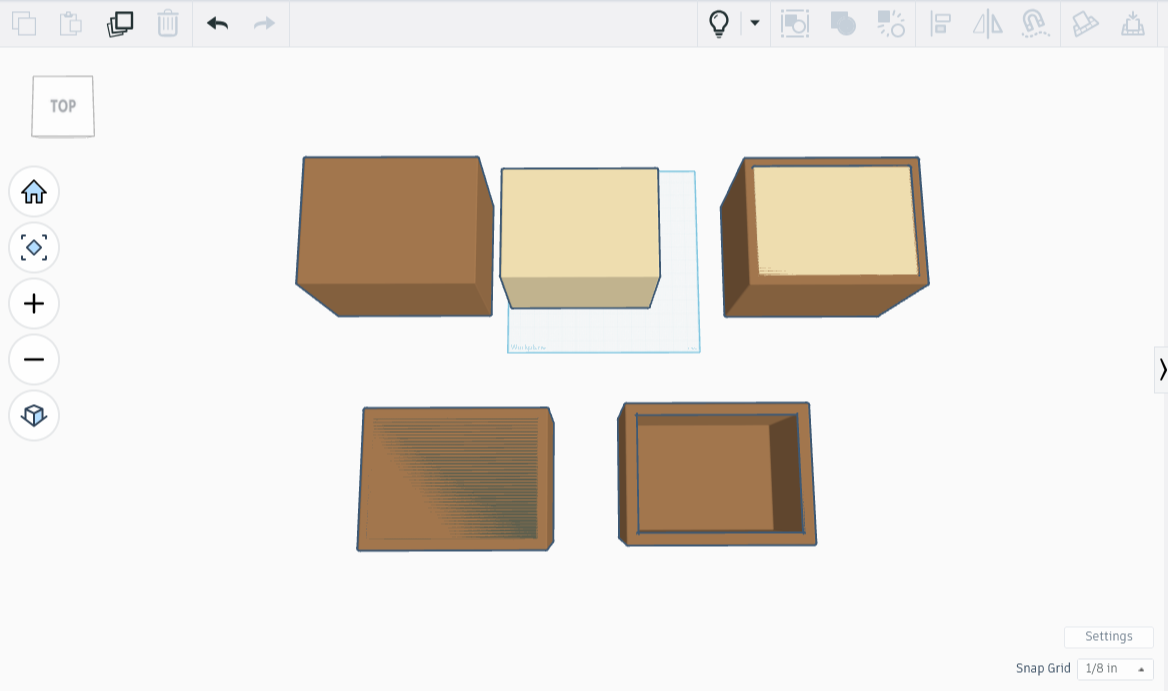
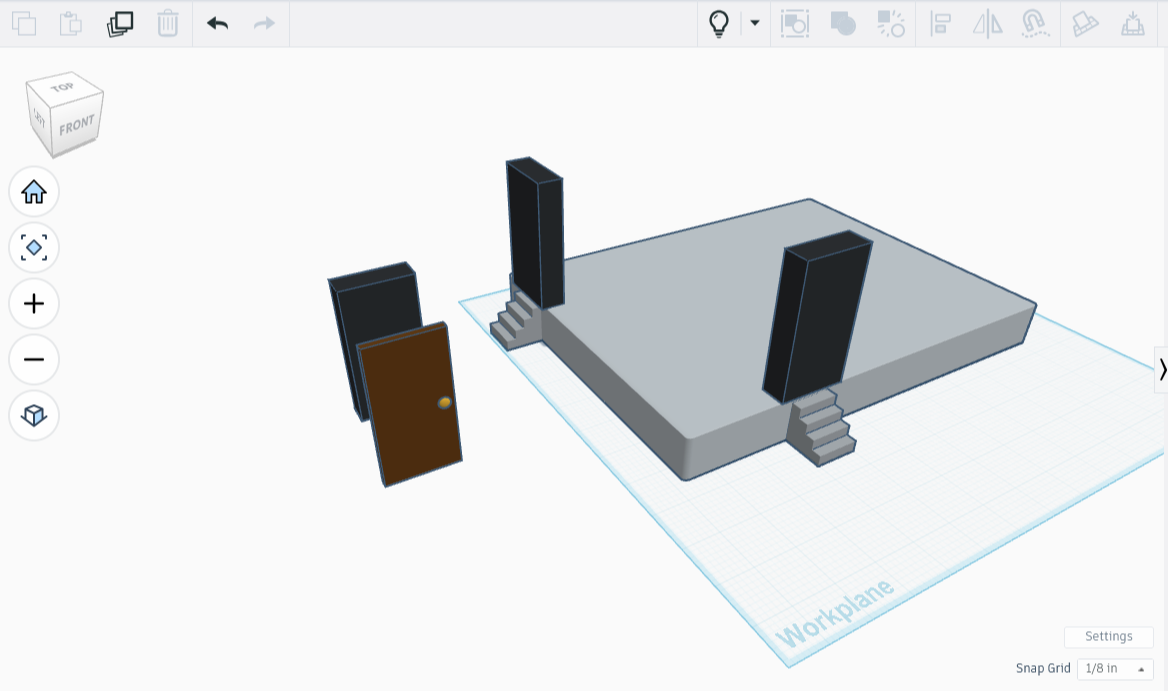
First I made the foundation, a ‘stone’ block 2’ high, 20’ long, and 15’ wide (1.1”H x 11”L x 8.25”W). For the foundation steps, I threw together four cubes, each .25” lower in height and .25” longer than the previous one, then rounded their edges by .01 radius for ease of printing.
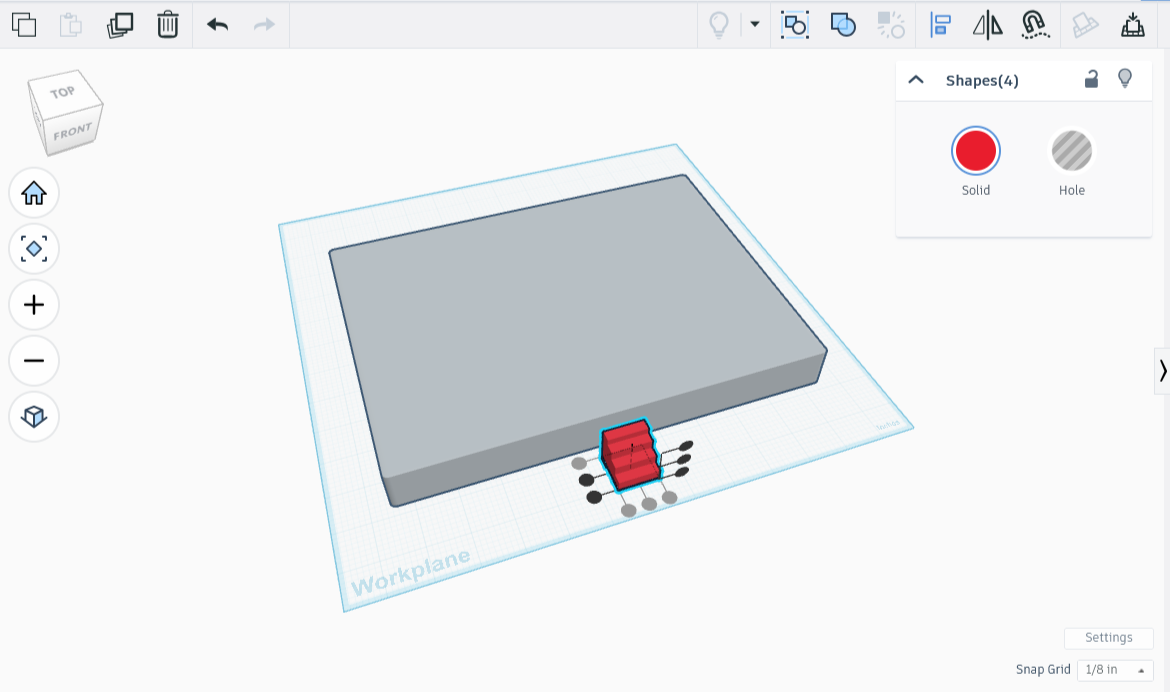
I then aligned the four smaller blocks together on one side so that they resembled steps, taking care to align them along the center as well.
After that I permanently combined them, made a copy, and placed each set of steps up against the foundation, aligned under the places the doors will go.
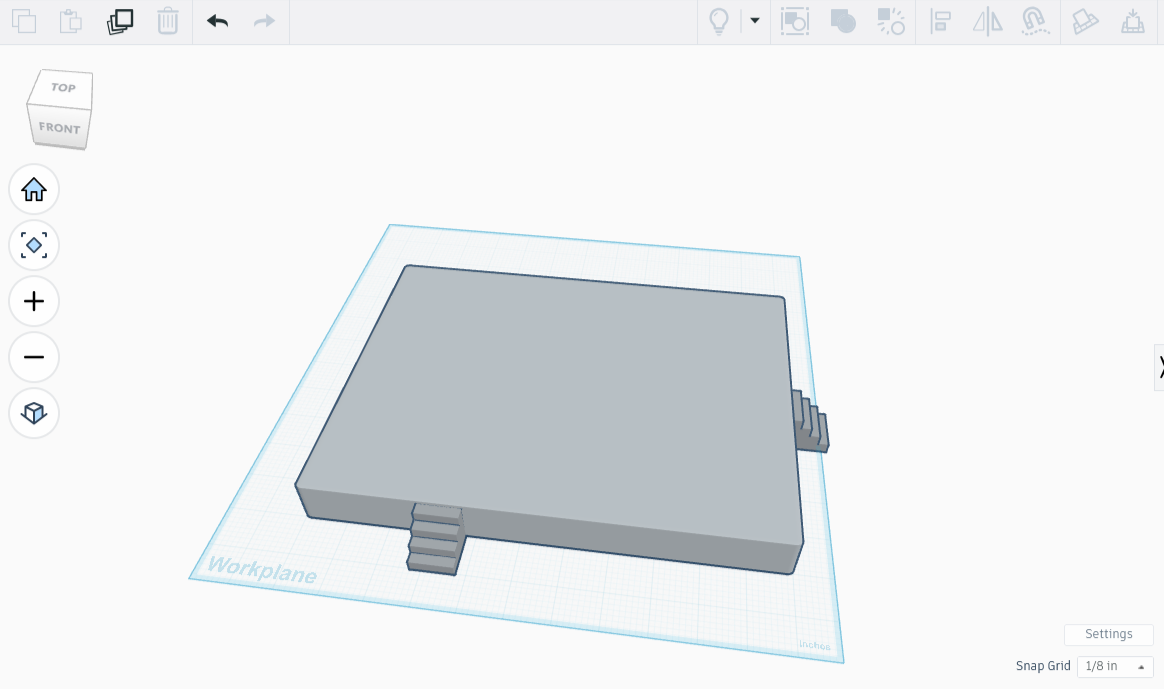
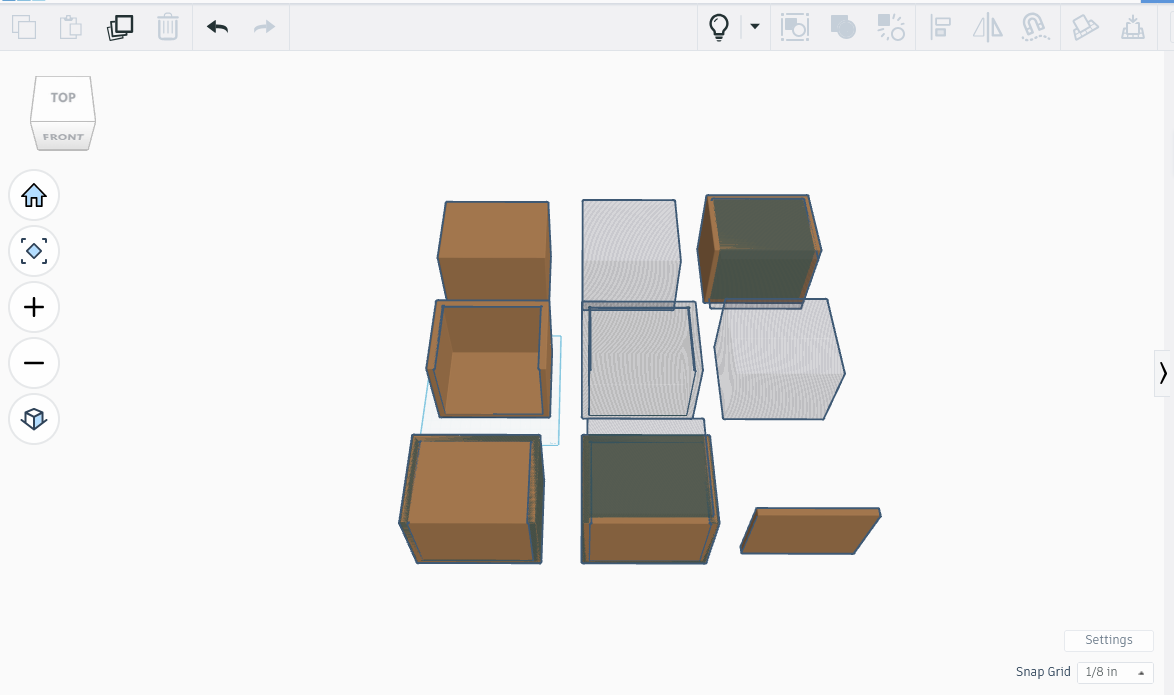
I used copies of the stairs gratuitously, stacking them on quickly drafted cubes and connecting pieces until I had a very tall staircase split by a landing. I set the tall staircase aside and moved on to the next part of the project: the bottom floor.
The Ground Floor
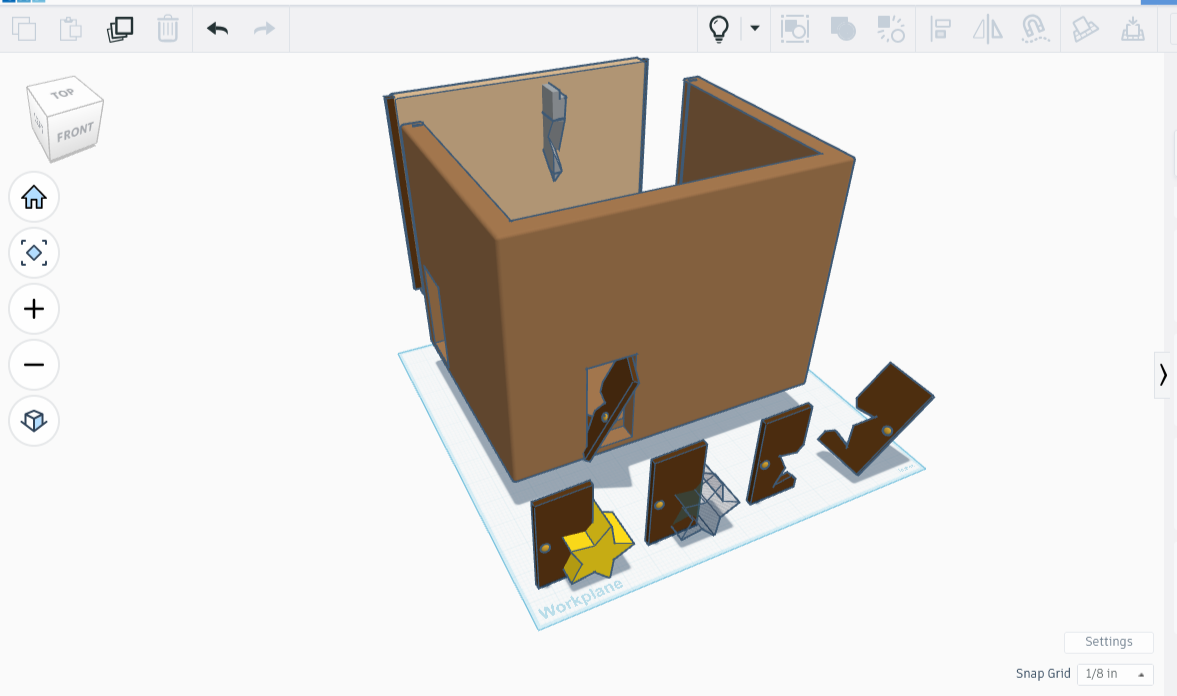
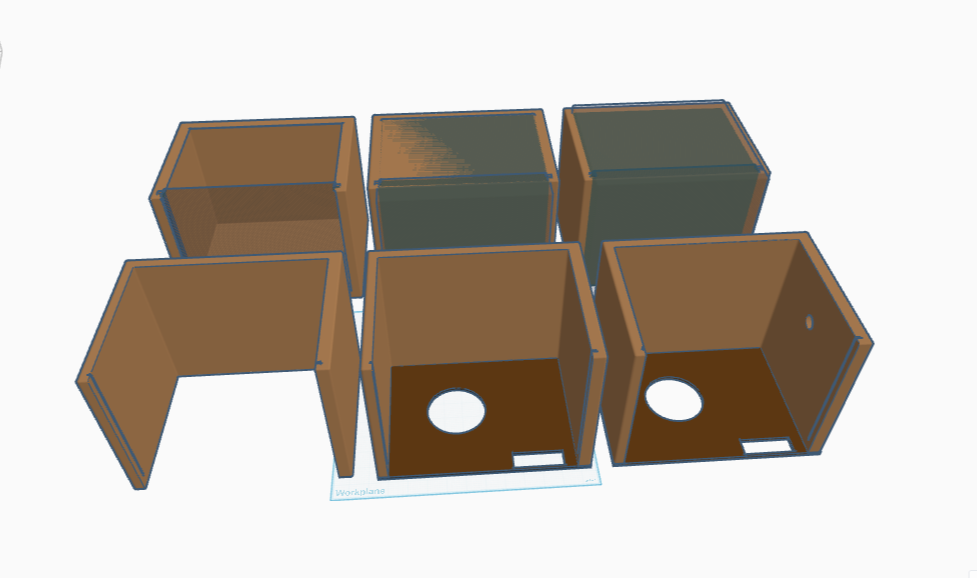
The ground floor is supposed to be 15’H x 20’L x 15’W, with walls 1’ thick. I made an 8.25” x 11” x 8.25” box for the outer walls and the floor. To give the walls and floor thickness of 1’, I created a box that was .55” smaller on each side and on the bottom, centered the smaller box inside the larger one, then aligned them both at the top. After that, I turned the smaller box into a shadow and erased the entire section, leaving me with four sturdy millhouse walls and a thick floor. (Inner Box: 8.25 - .55 = 7.70”H; 11 - (.55 * 2) = 9.9”L; 8.25 - (.55 * 2) = 7.15”W)
After that I needed an access panel so that we could move pieces around. I took the original box shape, added the same small box as before, but made the small box a little bit wider before turning it into an eraser. This had the effect of leaving behind three walls and a floor, like a diorama without a ceiling. I turned that into a shadow, and set it aside. I added another original box, merged it with the shadow-diorama, then merged the remaining piece with a shadowbox that clipped all but .55” of the wall.
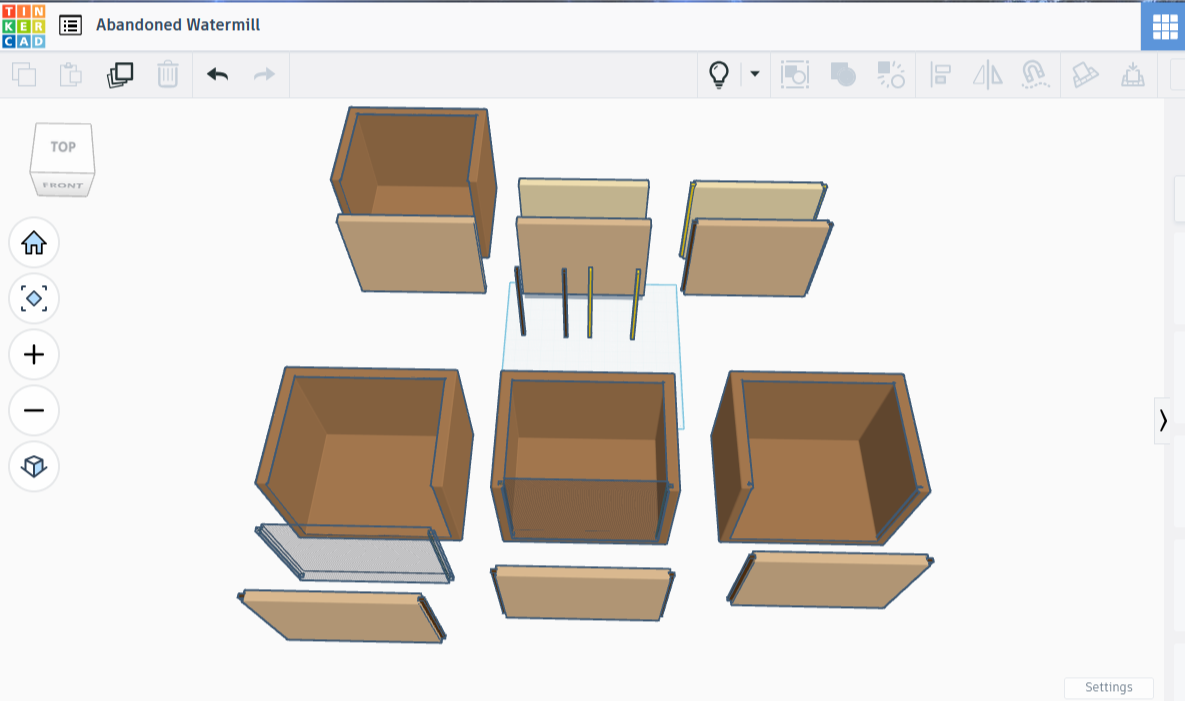
The panel done, it still needed slots to slide in and out of. I created a slim pole and one .2” larger, then made a clone of each of these. I affixed the slimmer pair to each side of the panel, then added the larger pair to a copy of the panel. After turning the panel with the larger poles into a shadow, I placed it where I wanted the panel to slide, combined it with the building piece, and left behind a pair of thin lines that this piece can slip into.
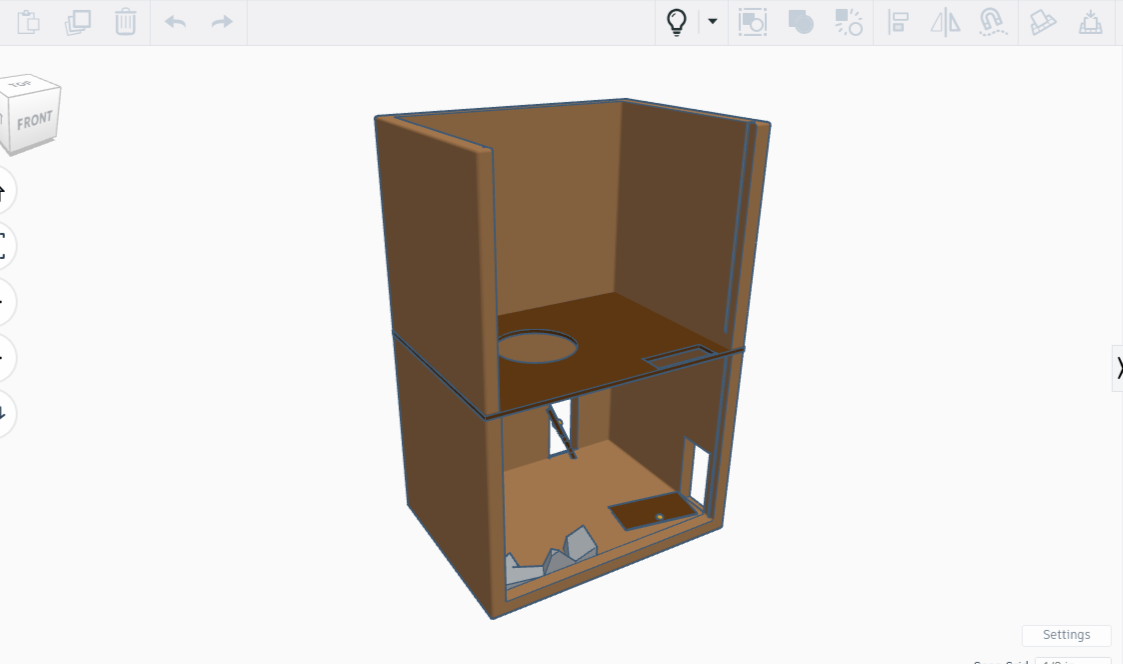
A unique feature in this room is the crumbling staircase. I made a big blob of rectangles that met in the middle, united them, turned them into a giant shadowy starry mess, and threw that in the middle of my beautiful staircase. Poof, only remnants left. Good thing I made a copy, I might want that later! I broke my crumbling staircase in half, leaving half on the building and attaching half to the panel. It will be easier to print this way because the floating bits of stair will be connected to the panel, which I can print on it’s side.
Doorways and Doors
A careful observer might notice at this point that the inner stairs are mirrored and the outer ones moved. I forgot to change my notes when I moved the stairs from the middle floor to the bottom. A potential doorway ended up blocked by the newly placed stairwell, so I moved the outer steps, then moved the other set of steps as well, making the doorways make more sense.
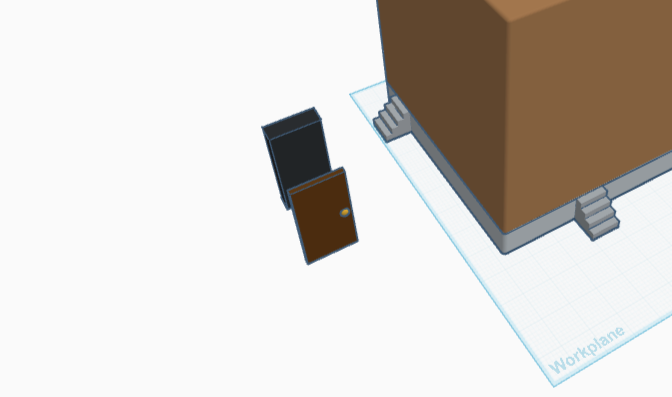
I had made a door during an earlier project, and liked it so much I saved it to my library. I pulled out my original design, still saved under Tinkercad’s ‘Your Creations’ tab, and plopped it on the grid. A quick resize made the doors 3.3” x 1.65”, with .25” thickness. I made a very thick black rectangle only slightly larger than the door, intending it as a doorframe.
I placed a copy of the doorframe in front of each set out foundation steps, then carefully aligned the rectangles with their respective stairs.
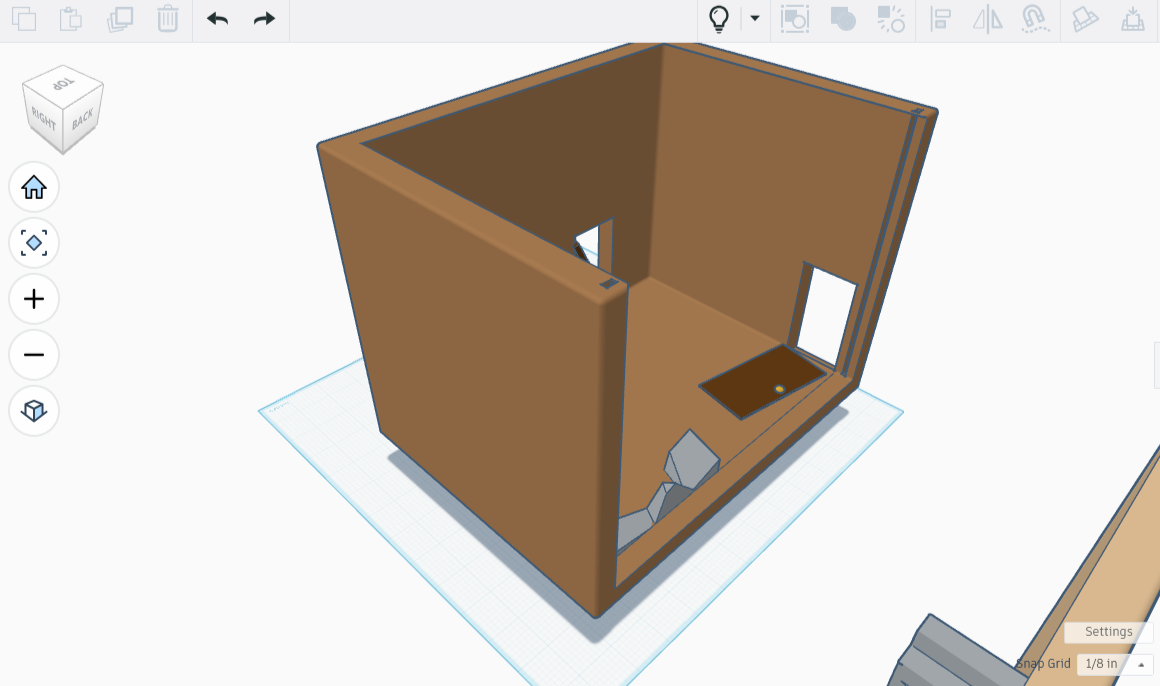
Next I revealed the previously hidden-in-place wall and floor setup, widened the black rectangles a bit (they didn’t quite reach through the wall!), turned the black rectangles into erasers, and removed the side panel so that it didn’t get hardwired into the work I was doing next. The panel had to remain separate, as did the foundation. I disappeared the foundation, then combined the doorframes with the remaining room parts.
I revealed the foundation afterwards so I could see how the doors looked. A smashed side door would be great on one of those frames! I put a star shape on its side over the door, stretched it out a little, turned it into an eraser, and poof, there was a door with a jagged bit missing. I put the door in the frame, then tilted it sideways, so it looks like someone jammed a broken door in place. (strength check dc 30 to bust, as the wood is swollen in place, otherwise it will take a while to chop through).
The other door in this building is flat on the ground. Mostly - the door is angled ten degrees, just enough to be a tripping hazard (spot check dc 12 to avoid, otherwise balance check dc 8 to not trip and fall into gravelly splinters for 1d3 subdual damage). The wood is warped from the humidity.
Holes For Machinery
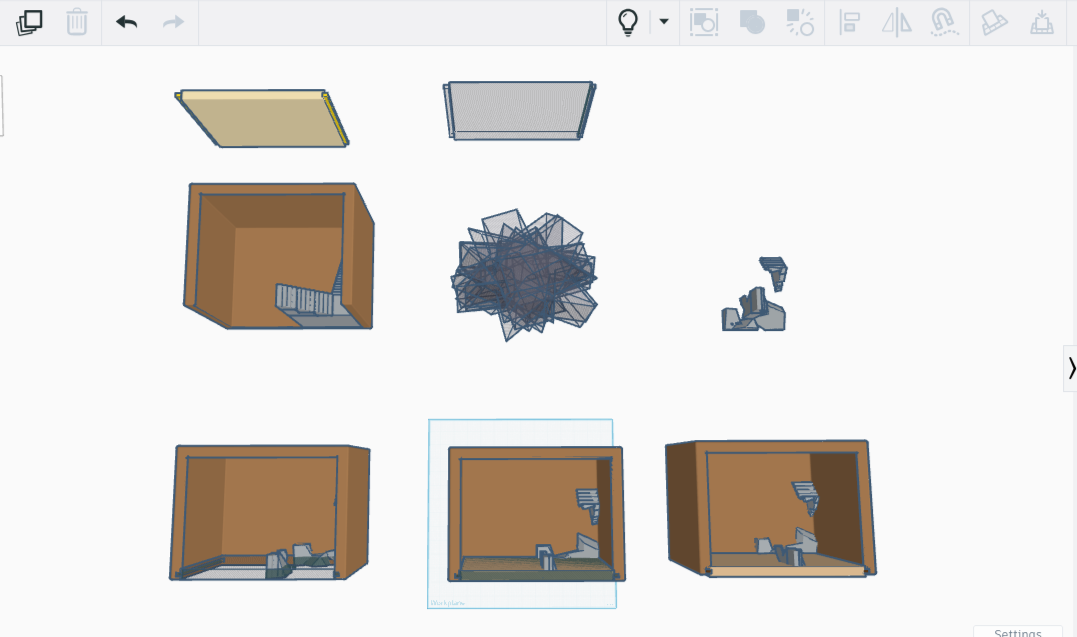
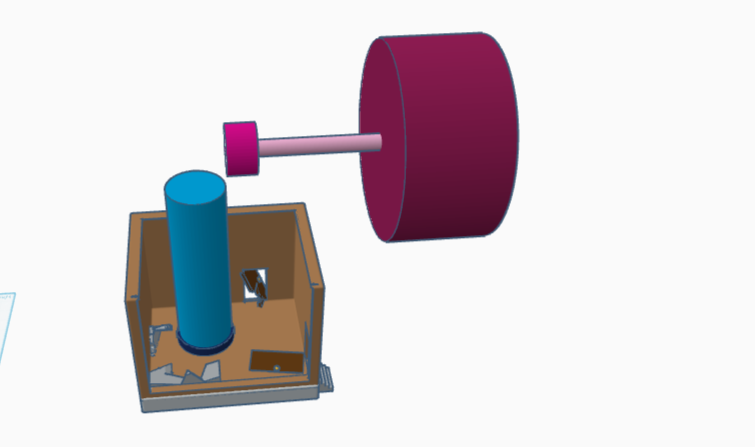
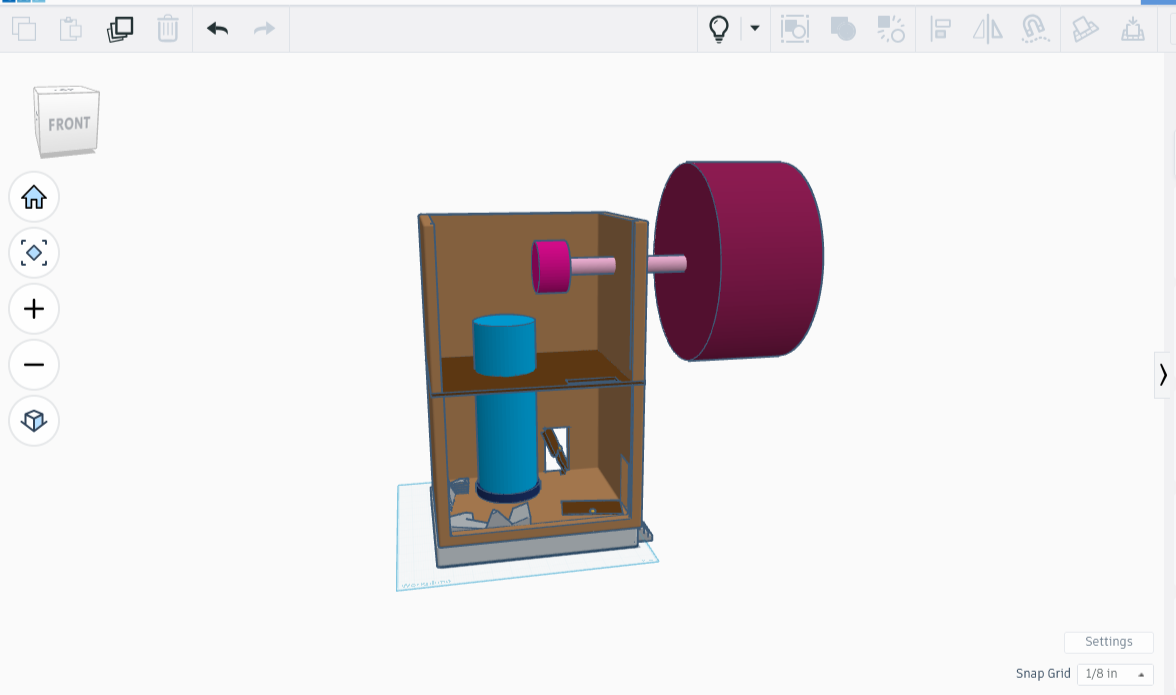
To place the holes for machinery that no longer existed, I needed to know where the machinery used to be. I threw a second floor up, using some eraser work to get rid of the original flooring, and replace it with a thinner ‘wood’ one, then stacked the second floor on top of the first, and that on the foundation. I then designed an outline of the machinery by using fatter cylinders where the gears would be and a couple long cylinders for axles.
I placed them so that it looked about right, froze them together, then added them to the building. I then turned the machinery into eraser pieces and voila, there was now a hole in the bottom and one in the wall.
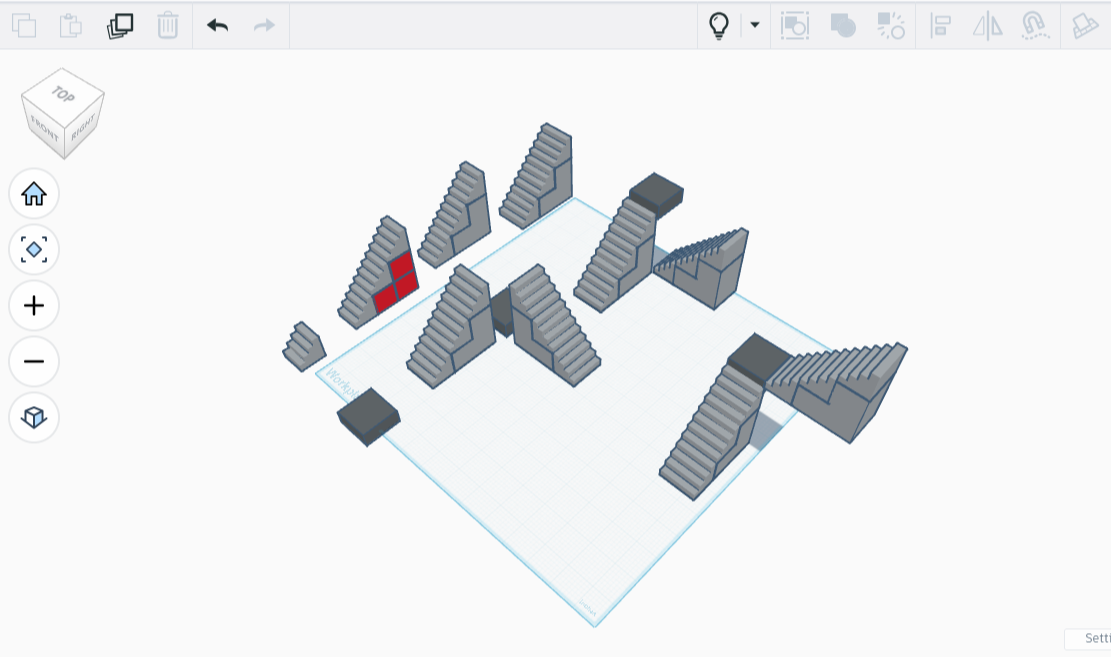
I took some snaps showing the evolution of the upper story, as well as the completed mill.
As soon as the Sovol is fixed, I will 3D print the concrete foundation, the bottom floor, the second floor, and two side panels. The building is finished, though I plan on adding some finishing touches, such as a broken ladder and an abandoned firepit made in some old machinery.
O joyous day, the Sovol is working again! I am printing the foundation as we speak. The Sovol is bigger than the Bambu, but is a bit more spirited, so we’ll see how the print goes. Meanwhile, I’ll continue to print and update you. Until then I’ll be working on the finishing touches, as well as writing the last portion of the Abandoned Riverwheel scene: the environs.