Designing and 3D-Printing a Custom Set of Dominoes Splashed with Color!
I’ve had in my mind an idea for a set of dominoes; today is the day I turn my dream into reality. Today is the day I use layers of white and color to design a uniquely pretty set of dominoes for home use. I have dreamed about designing these beauties. Having done it in my sleep in a literal sense if not a real one, I feel like I’ve got a head start on this project ;)
Before making them, I thought it might be neat to learn a bit about the history of the game. Why are dominoes called bones? How long have they been around? Have they always been this shape, with this number of pips? Has the scoring method changed over the years? I turned to the internet to find out.
A Little Bit of History!
The first stop: History of Games, on Jacques London. According to the site, the dominoes game is likely to have originated in China, then spread to France and England via Italy in the 1700s. Early written references to the game first place it in the 12th century, during the Song dynasty nearly a thousand years ago.
The Chinese game used dice, and had some rules that made it look like an exotic domino variant. The earliest written records of this game don’t have a zero-pip face either. They do however involve matching numbers of pips. Wikipedia wasn’t as certain that the cited records were referencing the same game, nor was it positive about the Italian connection, but the Wiki entry offers no real alternative to its rather unromantic ‘dominoes appeared in Italy and spread’ story. As the truth of the matter is anyone’s guess, I’m going with the version I like best: “Made in China, traveled through centuries, gathering improvements, variants, and lore along the way”.
Regardless of the game’s true origin, the table game clearly caught on in popularity. I can see why: it’s simple enough that a child could learn to play, yet it requires some strategy to play well. The game is small enough that it’s quite portable, and could be made with things a person might reasonably run across, like wood or bone or apparently ivory. That gave me a little pause, as it’s hard to imagine that as common. According to Jacques London, they were often made from bone and ebony, which is where they got the nickname ‘bones’. And because priests wore black cloaks called dominoes that had white on the inside (the lining perhaps?), some think that’s how the game got its name.
Designing the Domino: the Plan
In my mind, the dominoes are already finished and in front of me. They’re ivory in color save for two bands: a band of red in the center, and another around the top, where the matching pips are. The center band of color isn’t very wide, only thick enough to prevent the color of the pips from showing through. The top band, made colorful via the filament-swap technique (like the center layer), is not only decorative, but also hides the raised pips when the dominoes are face-down.
To make this, I’ll need a rectangle, 1” x 2” x .375” thick, with a pair of rectangle-shaped dents in the top. The dents need to be extremely shallow, but I need enough layers of color to the pips and border that the white doesn’t show through, so I’m going with six layers deep. Each dent holds from zero to six pips, and every combination of numbers from zero to six exists. There are no duplicates — one with the pips 2, 6 doesn’t have a corresponding 6, 2, as that would be a duplicate. That means that there are 28 dominoes all together.
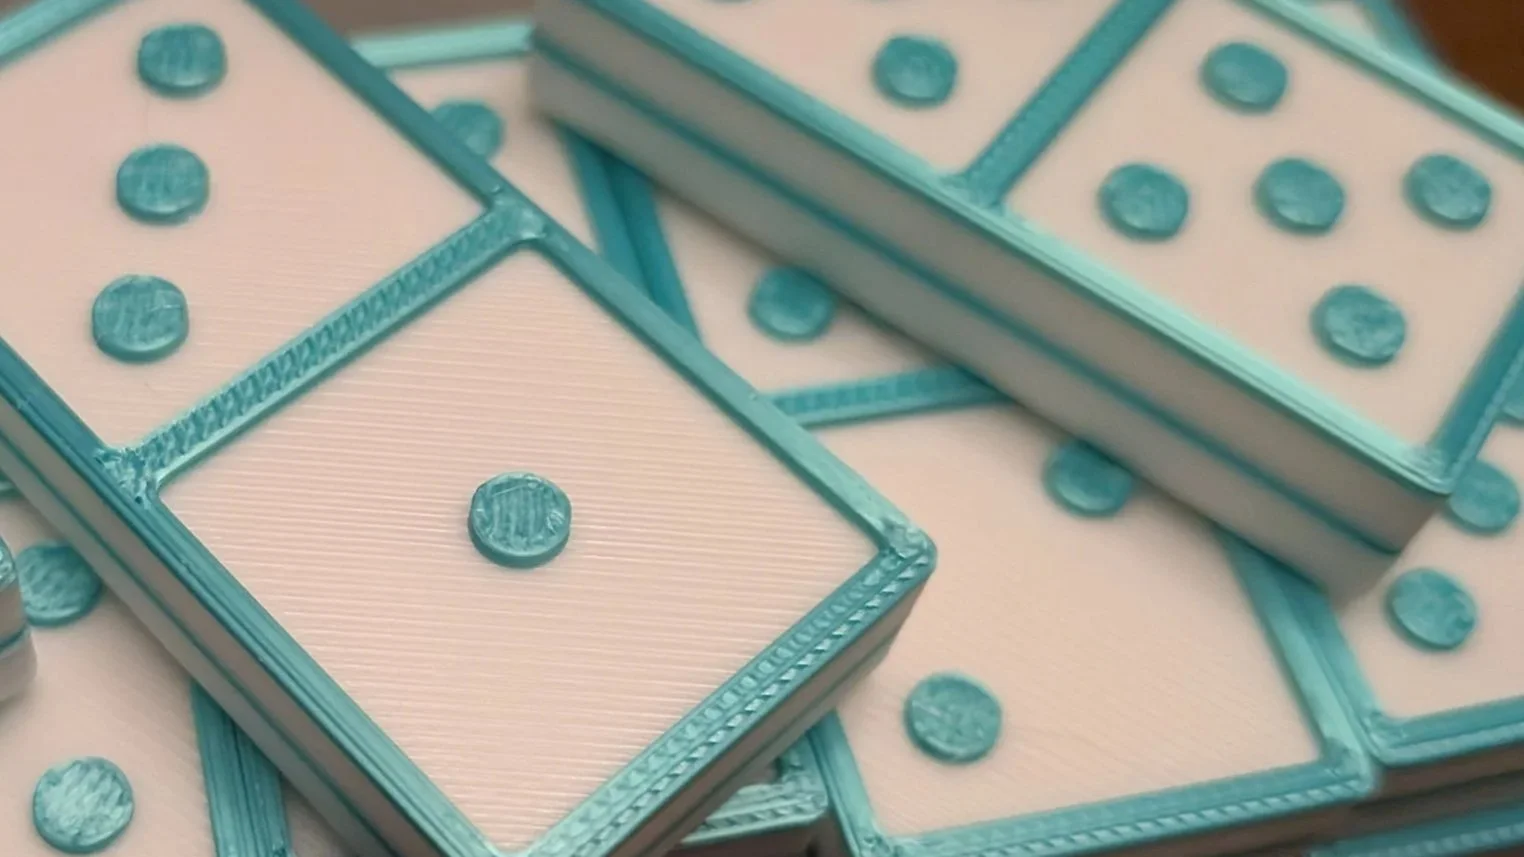
3D Printed Dominoes made with Color Swap technique
But I don’t actually have to add a dent, then add pips. Instead I can make a rectangular dent with holes for pips, so when I turn the holed rectangle into an eraser shape, it will cut away a rectangle and leave the right number of pips behind, sticking up from the newly created space. This idea has particular appeal not just because it saves a step (one less step in which to make a mistake!), but also because it guarantees my pip height will be the same height as the outer band.
I also don’t have to worry about modeling the center layer, since I’m swapping the filament by hand. If using or designing for someone who has a multi-color 3D printer, this is where actually modeling how it would look with the center layer would be useful. Those kinds of printers can be set to switch when it switches on the model, so neat. But you gotta work with what you got!
Aside from rounding the original rectangle (domino), and the rectangular dents, I feel like I’ve got this covered. Here’s hoping it works as well in reality as it did in my head :)
The Finished Dominoes
I was not at all prepared to be as wowed as I was. I ended up doing them in teal and white because I made this for a friend who loves those colors, so it wasn’t the red and white that I saw in my dreams. But WOW.
When I prepared the model on the printbed, I put it pip-side up, set the printer to white PLA, then moved to mess with the Bambu slicer settings. I marked it to pause near the center, then pause again six layers later — the pauses were when the filament got switched from a white PLA to a gorgeous teal silk one, then back to white again, leaving a bright white domino with a perfect wafer of teal in the center. I also set one more pause 6 layers from the top, so that only the topmost layers, the ones sticking up, would get the last color swap.
Besides stopping the filament at strategic moments, I also changed the infill from the default 15% to twice as much, 30%, so that the dominoes would have some weight to them.
Lastly, I made a box for the set. That was the easiest thing I’ve made in a while, quite frankly. I took a box long enough to fit 7×2×2 rows of dominoes, gave it a small amount of wiggle room on both sides, then made a copy. I turned one copy into an eraser, and the solid copy I made big enough to leave me with .125” walls when I combined the two boxes into a single perfect domino box.
I then placed a long cylinder shape lengthwise across the domino box, positioned it so it was slightly pressed into the box on either short side. Turning that cylinder into an eraser, then combining it with the box, made a curved divot on either side, so a person could reach in and take a domino out without needing a prybar.
I made a lid that could just fit over the box, with sides that went all the way to the bottom. Using a script generator let me get her name in a font I liked, then turn it into an SVG file, which I was able to import and place on the box. Lastly, I took the double-six domino, made a copy, shrank it by 50%, and put it on top of the lid, under my friend’s name. When I printed the lid, I swapped the filament for the very top: her name and the double-six mini domino — I printed the rest of the box and lid in white.
The dominoes are great, and I printed a set for myself using a wagara technique that I learned recently. I’ll be writing about making those kinds of patterns using filament-swap and high-contrast colors, article coming soon. As for the dominoes I made for my friend, she keeps them on her coffee table, telling everyone that asks that her friend made them for her. <3