Custom 3D-Printed File Separator with Cherry Blossom Branch Design
I had made some electrical switch covers, the kind you plug into the wall so that kids don’t stick things into the sockets. These particular covers had interchangeable plates, each with a different flower I had made using Tinkercad Codeblocks. Not wanting to waste those gorgeous designs, I started thinking about what else I could make.
Bookends using the cherry blossom and branches would be pretty, I thought. I intended to make a set, but dragged my feet a bit. Meanwhile, someone else gifted me a pair of very cute bookends (they have cats on them!!!!). The idea of cherry blossoms hanging from branches on a vertical surface had caught my imagination, but I no longer needed bookends. And that is the story of how I ended up making a file separator with a cherry blossom sprawling across it instead of creating a pair of bookends.
Drafting the Base
The base (the actual separator, sans design), was relatively easy to make. I had taken measurements earlier, then made a technical drawing showing how the making of this piece would play out, so I just needed to follow my own directions.
I made a file-sized rectangle, rounded the edges, then put a few horizontal bars across the rectangle, like slim boards across a fence. I then ran a long thin cylinder across the top, notching it on the bottom of each end so it could slide along the rails in the filing drawer. I could have stopped here and had a functional piece, but I wanted the cherry blossom and branch decoration.
Changing up the Blossoms
For the blossoms, I took a copy of the one I created in Tinkercad Codeblocks, and made numerous copies of it. Some blossoms I left alone, while I tilted others, stretched a few, and minimized a couple, with a precious small number of them combining both a tilt and a size change. I also rotated some. In the end I had 25 blossoms to work with, many of them unique.
Using the Scribble Function to Create Branches
The branches were more challenging. I made a couple of attempts at forked branches by stacking angled twig-like rectangles, but they were still unnaturally straight. After a bit, I hit upon the idea of trying Tinkercad’s Scribble tool. Hah, this worked and it was great!
In Tinkercad’s Shapes menu on the right there is an icon depicting a scribble (just under the sphere icon). Clicking on it asks us to click a spot on the workplane. After so doing, we get an up-close view of an empty workplane. We can click and drag one scribble or multiple, so long as they fit on the plane. Once we have a shape that looks like a branch, we can click ‘preview’, to see if we like the look of it, and ‘done’ if the shape is good.
I made a few branches using the scribble method, adding forks to the branches each time I made a new shape. I then put the branches together, put them at the right height, and added them to the divider. It looked like branches growing on a trellis, quite pretty.
Putting it Together
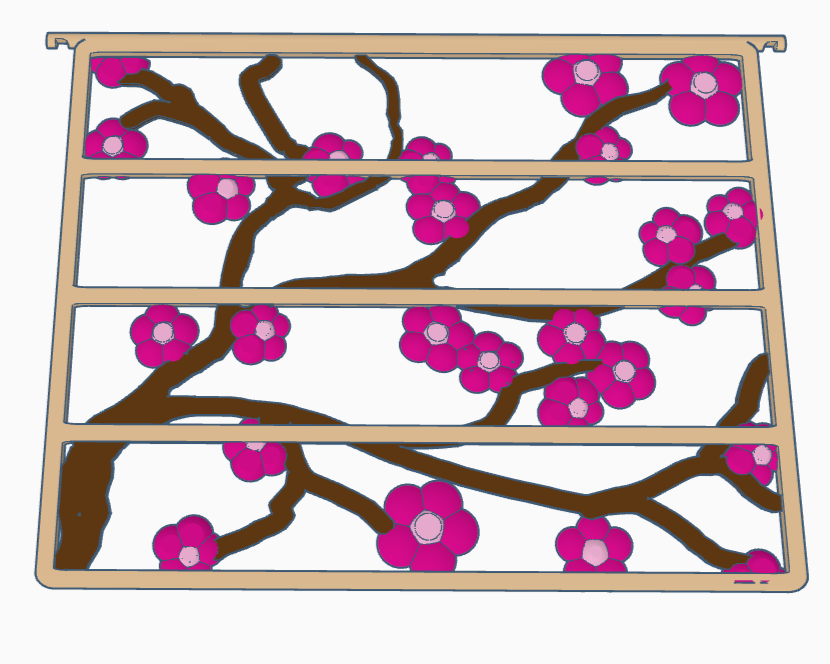
File Separator with Cherry Blossom and Branch Design.
I added the blossoms, making sure they had something to attach to. I then placed a file-sized eraser up against the cherry blossom-and-branch face, removing any slight bits that stuck out beyond the size of the divider. I didn’t want the pretty artwork to catch on anything!
All the pieces arranged just so, I combined them, and voila! I had a beautiful divider for my filing drawer. I printed the design from the screenshot, though a thin panel behind the flowery branches would likely improve the functionality. I did try adding such a panel, but it took away from the barely there that I was looking for.
I hadn’t played with the scribble tool before, so it was kind of cool to use it to solve the problem I was having making branches. It was so cool, in fact, that I wanted to share the technique, as well as show my very pretty cherry blossom trellis divider.