Reworking A 3D Printed Packet Organizer into Game Storage
The food packet holder I finished earlier looked like it could fit DVD cases for movies and video games. I tested it to be sure, and it was close enough that I could repurpose it, were I so inclined.
I’m not inclined to use the piece for either of those things because it is clear that the container wasn’t designed for them. The games fit too snugly but have too much room on either side; the movies also have too much room on either side, nor do they look good with the wave design that worked so well with the packets.
We could use a DVD holder. I could make a nice one based on this, reworking it once for movies and a slightly different version for the games.
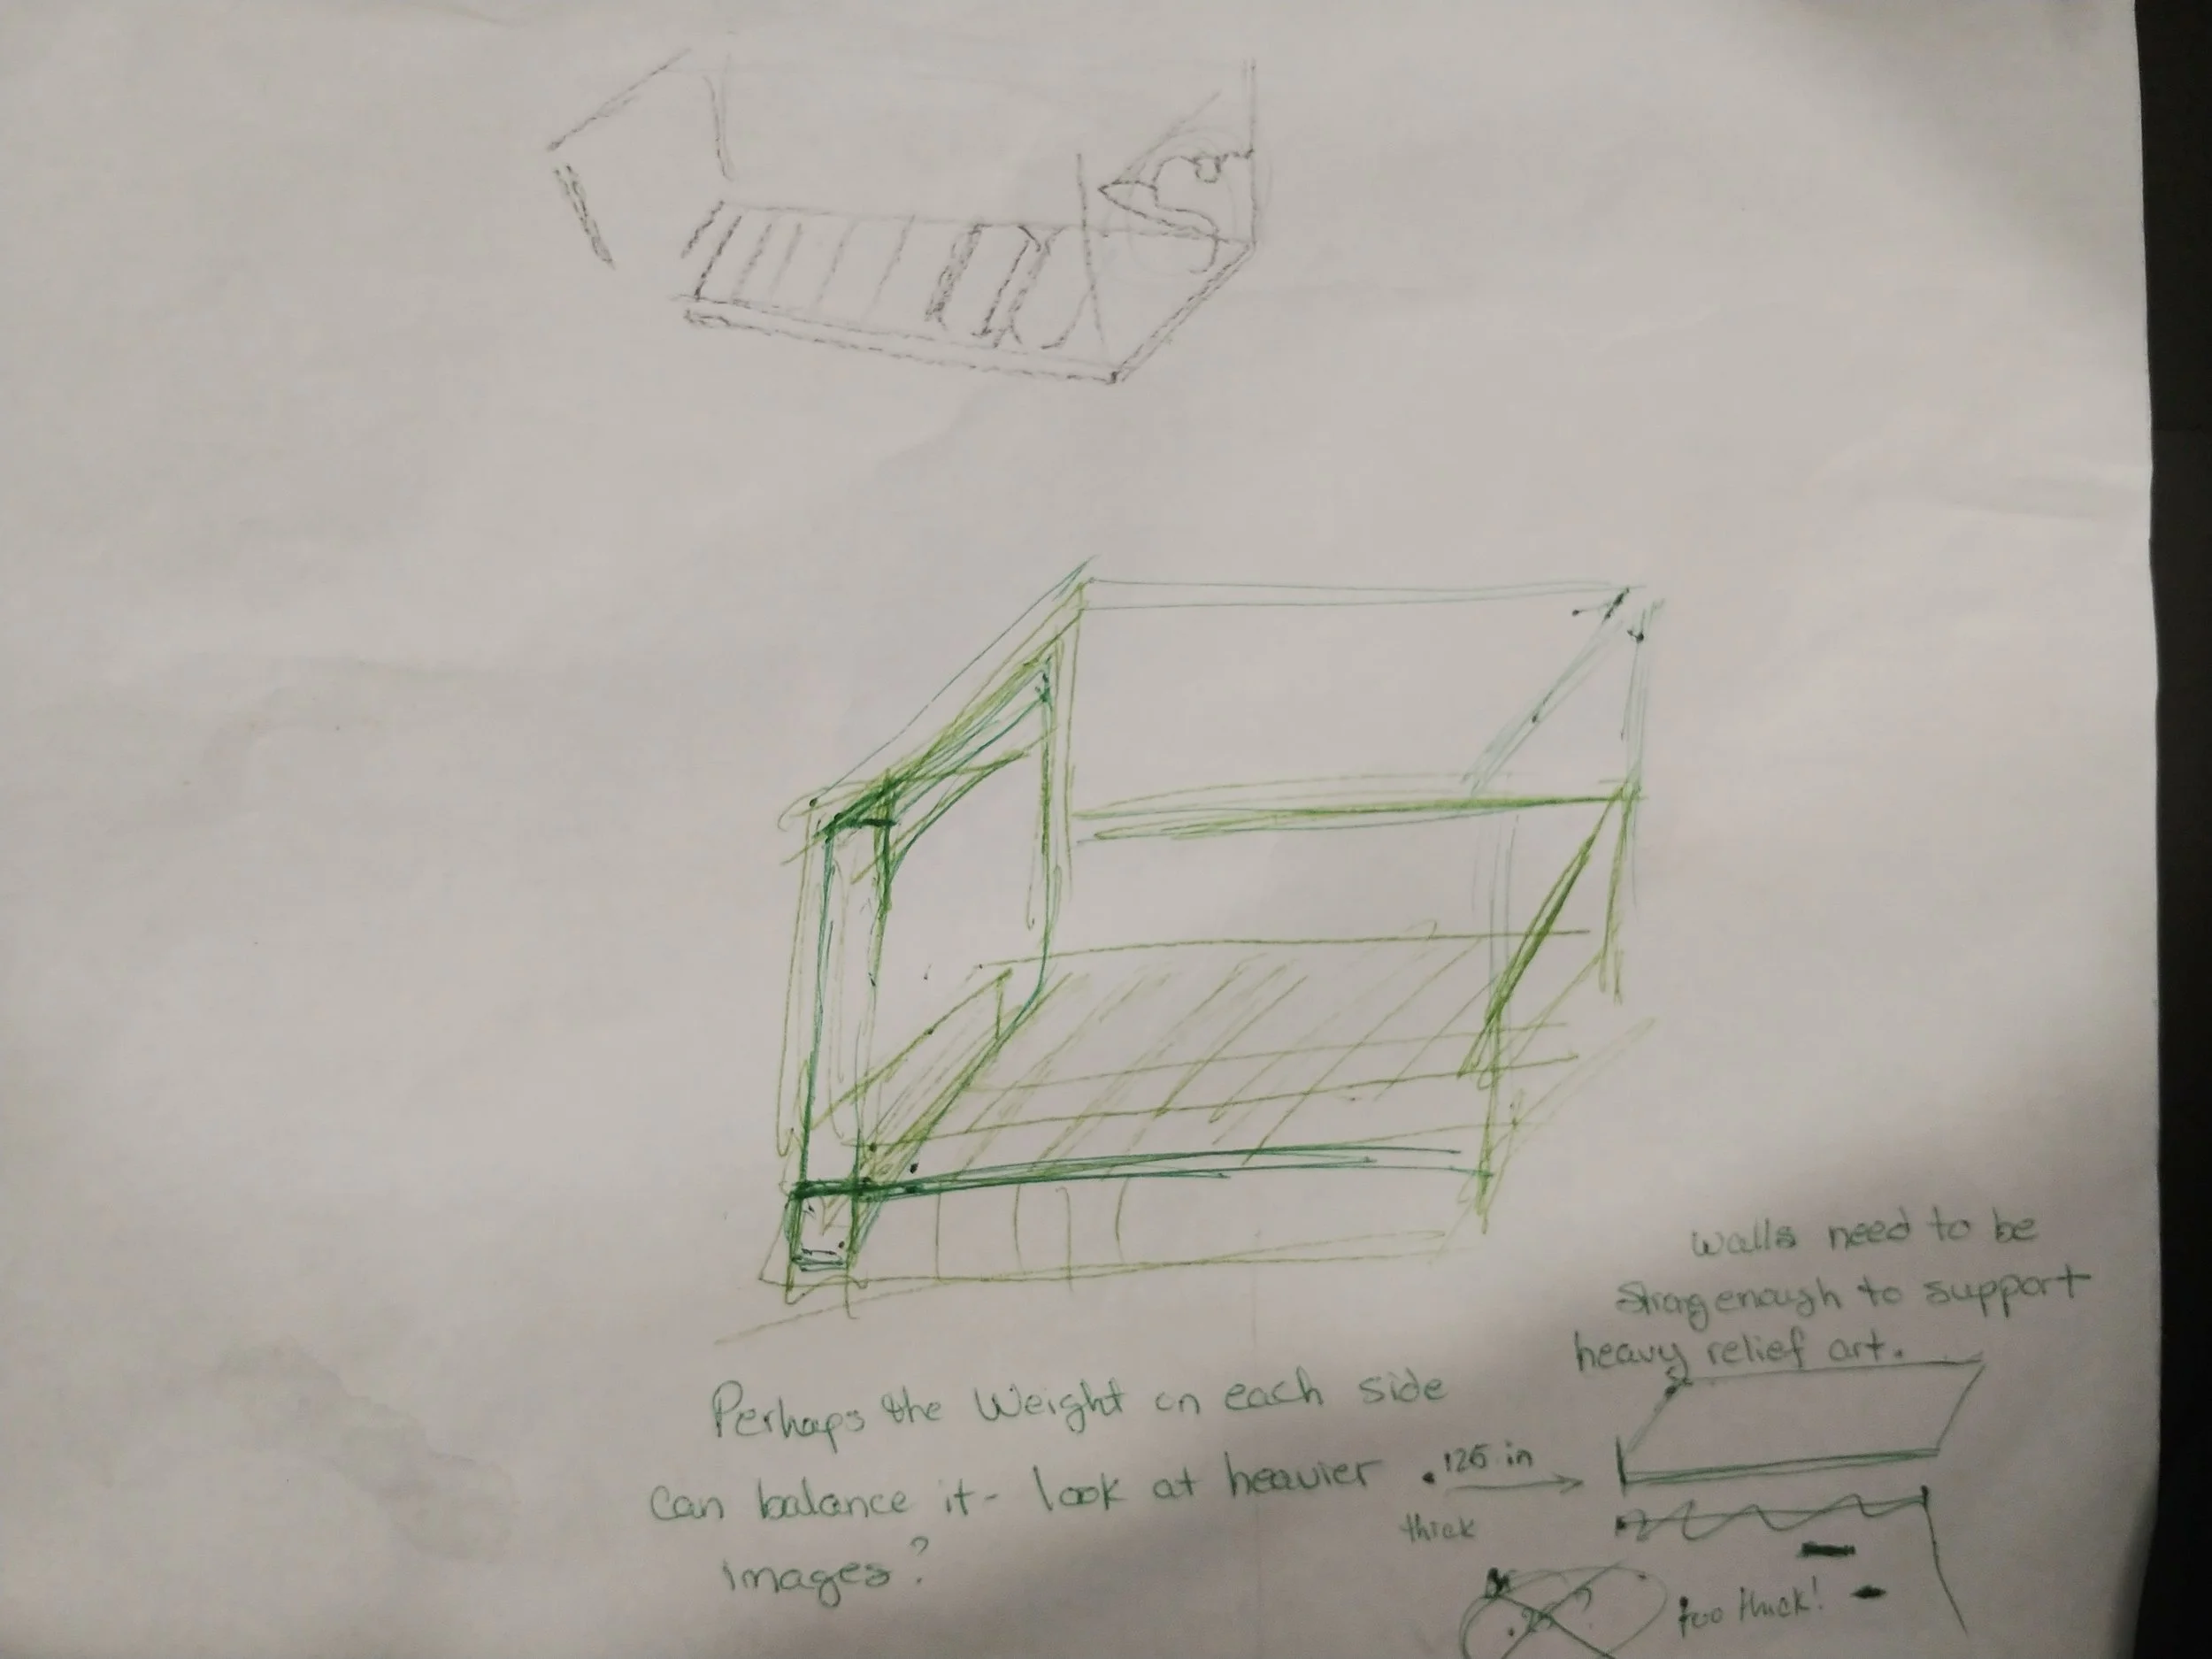
My imagination on fire, I grabbed some pens and started making some sketches. In no time, I had another person join the brainstorming session, so you can see the results of our ideas.
It needs to be front-facing, meaning one of the long sides needs to be removed, leaving only a lip to hold the DVDs in place.
The back does provide support, and keeps things from falling behind the holder. However, the space looks so much cleaner with nothing behind the DVDs. After some discussion, we decided to try removing the back, trading some sturdiness for increased visual appeal.
The wave shape will need to be replaced by something that draws to a close in both front and back. Since the front and back will be as low as they can go, I’ll try making the lip the same height as the holders.
The sides are going to have relief art added.
In sum:
Video Game Holder
Make the original box a quarter inch shallower, so the DVDs fit more snugly.
Make the walls of the box slimmer by enlarging the shadowbox.
Remove the panels on what will be the front and back, replacing them with a single shadowbox.
Lower the dividers so that they’re the same height as the front and back.
Add decorative pieces to the side panels.
DVD Holder
Using the video game holder model, shrink the space between the dividers.
Give the dividers an interesting shape, perhaps rising up in an arc?
Narrow the box appropriately.
The planning done, it’s time for action!
I started remodeling a packet holder into a 3D-printable video game holder using Tinkercad, adjusting the design so that it can fit DVD and game cases instead.


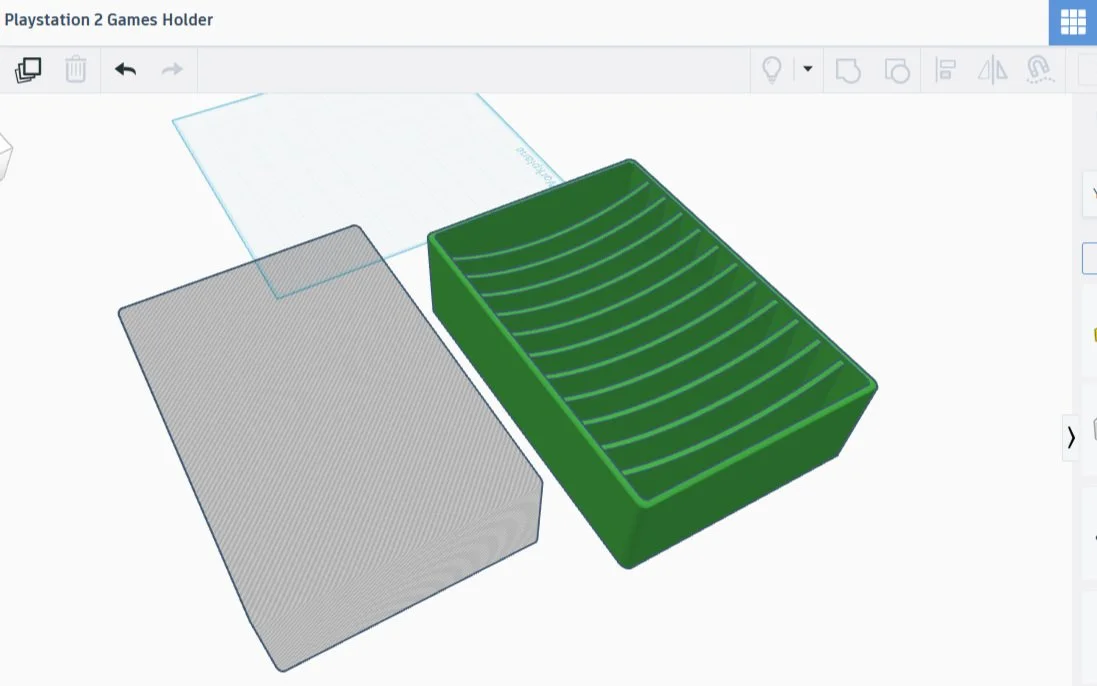
I first opened up Tinkercad, then made a copy of the original design to work with.
I shortened all three pieces by a quarter inch. It would have saved me a step to do them all together. A missed opportunity! Well, they’re all the right size now.
In order to make the panels thinner, I need to make the shadowbox (currently represented as a solid light green shape) bigger.
To achieve a thickness of 1/8 of an inch on all four sides, the erased part needs to be smaller than the big box (dark green) by a mere 1/4 inch in both length and width. I adjusted that, then attended to the height.
Since the big box is 2 1/2 inches in height (2.5), I shaved off an eighth of an inch by lowering the height of the shadowbox to 2.375, except really 2.37 because the software cuts off anything after the second decimal.
I then aligned the boxes both widthwise and lengthwise, aligned them both at the top, then merged them together.
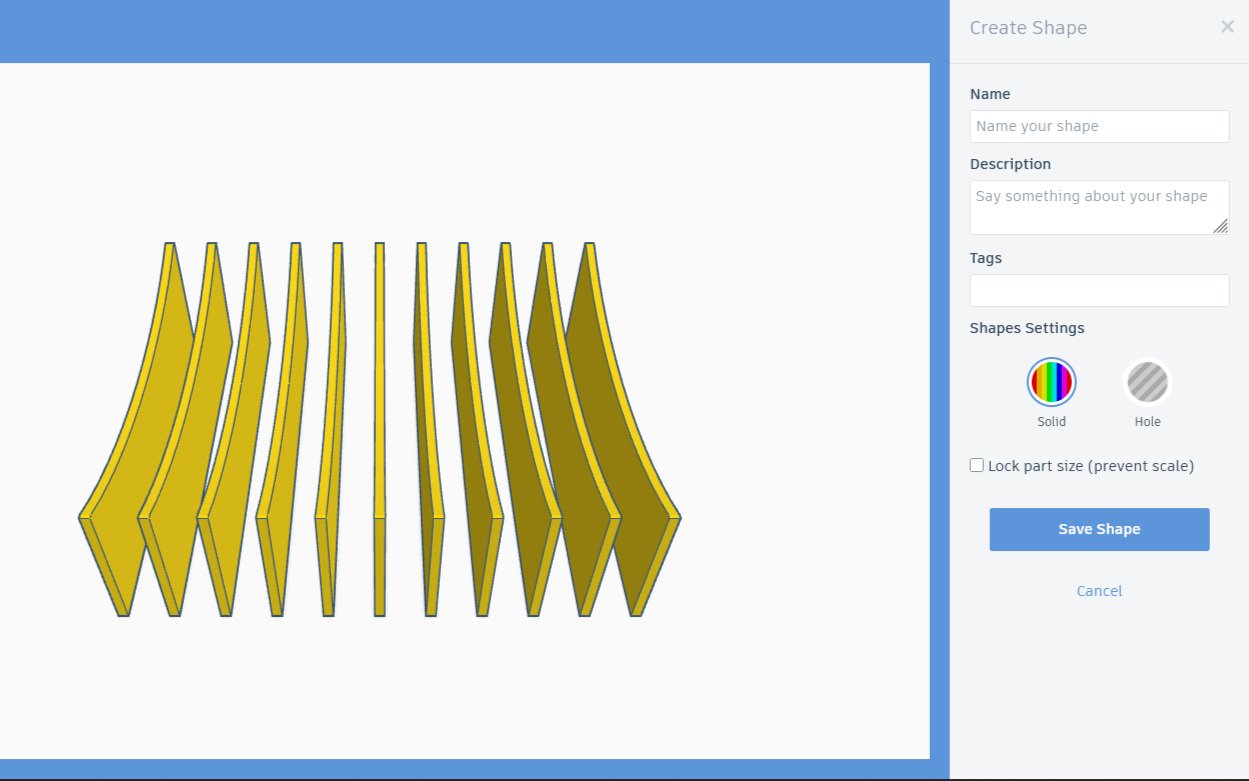
I’m going to do something different with the dividers for the DVD holder so I’m first copying the divider shape to my library, where I can pull it into any Tinkercad project.
One does this by highlighting the piece you want to add to the library, then going to ‘Your Creations’ on the shape menu. There’s an option called ‘create shape’ - click on that while your object is highlighted, and it will allow you to add it to your Tinkercad library.
Now that that’s done I can work on these dividers and not worry about changing them - I have a forever copy of the original until such time as I choose to delete it.
I also made a copy of the shadowbox for later use, then set it aside.


I aligned the dividers over the box, lifted them up 1/8 inch so that they no longer had grips on the bottom, then lengthened them a little bit because they didn’t quite go end-to-end. That done, I combined it all together. I could have saved a step here by doing the next one (a shadowbox one!) at the same time, but I feel like the quality of my models is better when I take the extra steps.
You aren’t imagining things - I did a recolor: dark green plus bright yellow equals bright green.
The shadowbox that I copied earlier is going to be a little bit longer than its progenitor. It needs to span the depth of the box, lopping off the front, back, and dividers equally, without touching the side panels. I made it eight inches deep, more than enough, and centered it. The box is only 1/8 inch thick at the base, and we want the slots to be as shallow as possible while still functional. I’m going to try lifting the shadowbox 7/8 inch off the plane and combining it there, leaving 3/4-inch depressions and a clean front and back.
I like the look of it, it’s sleek and clean and fits the games neatly. While I’ll modify this for personal use, including some cool graphics on the outside of the side panels, I’m leaving this perfectly functional modifiable copy available for download, gratis. Enjoy :)


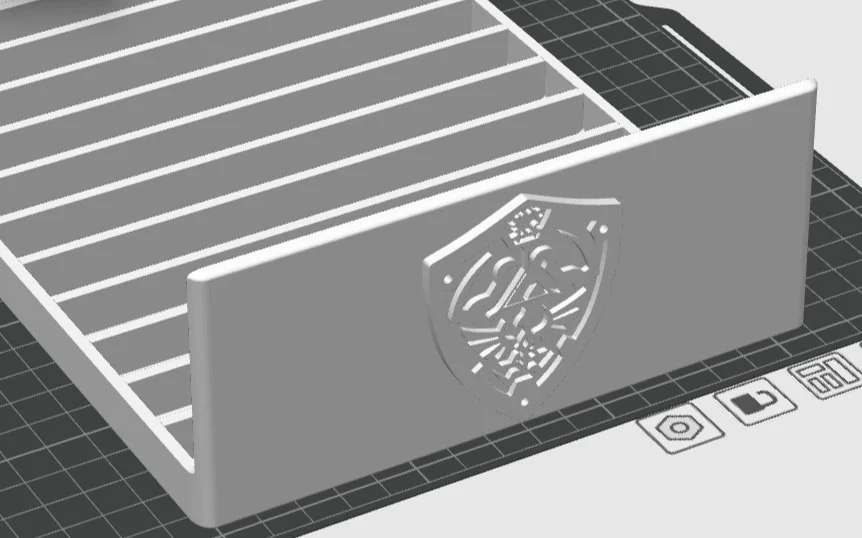
The shield on the end was an original creation by RustyVince63, made available using the Creative Commons License. I shrank the shield, duplicated it, reoriented the copies, then added them to my own original design.