Repairing a Drawer via a Custom 3D Printed Patch: the Compound Wedge (Part 2)
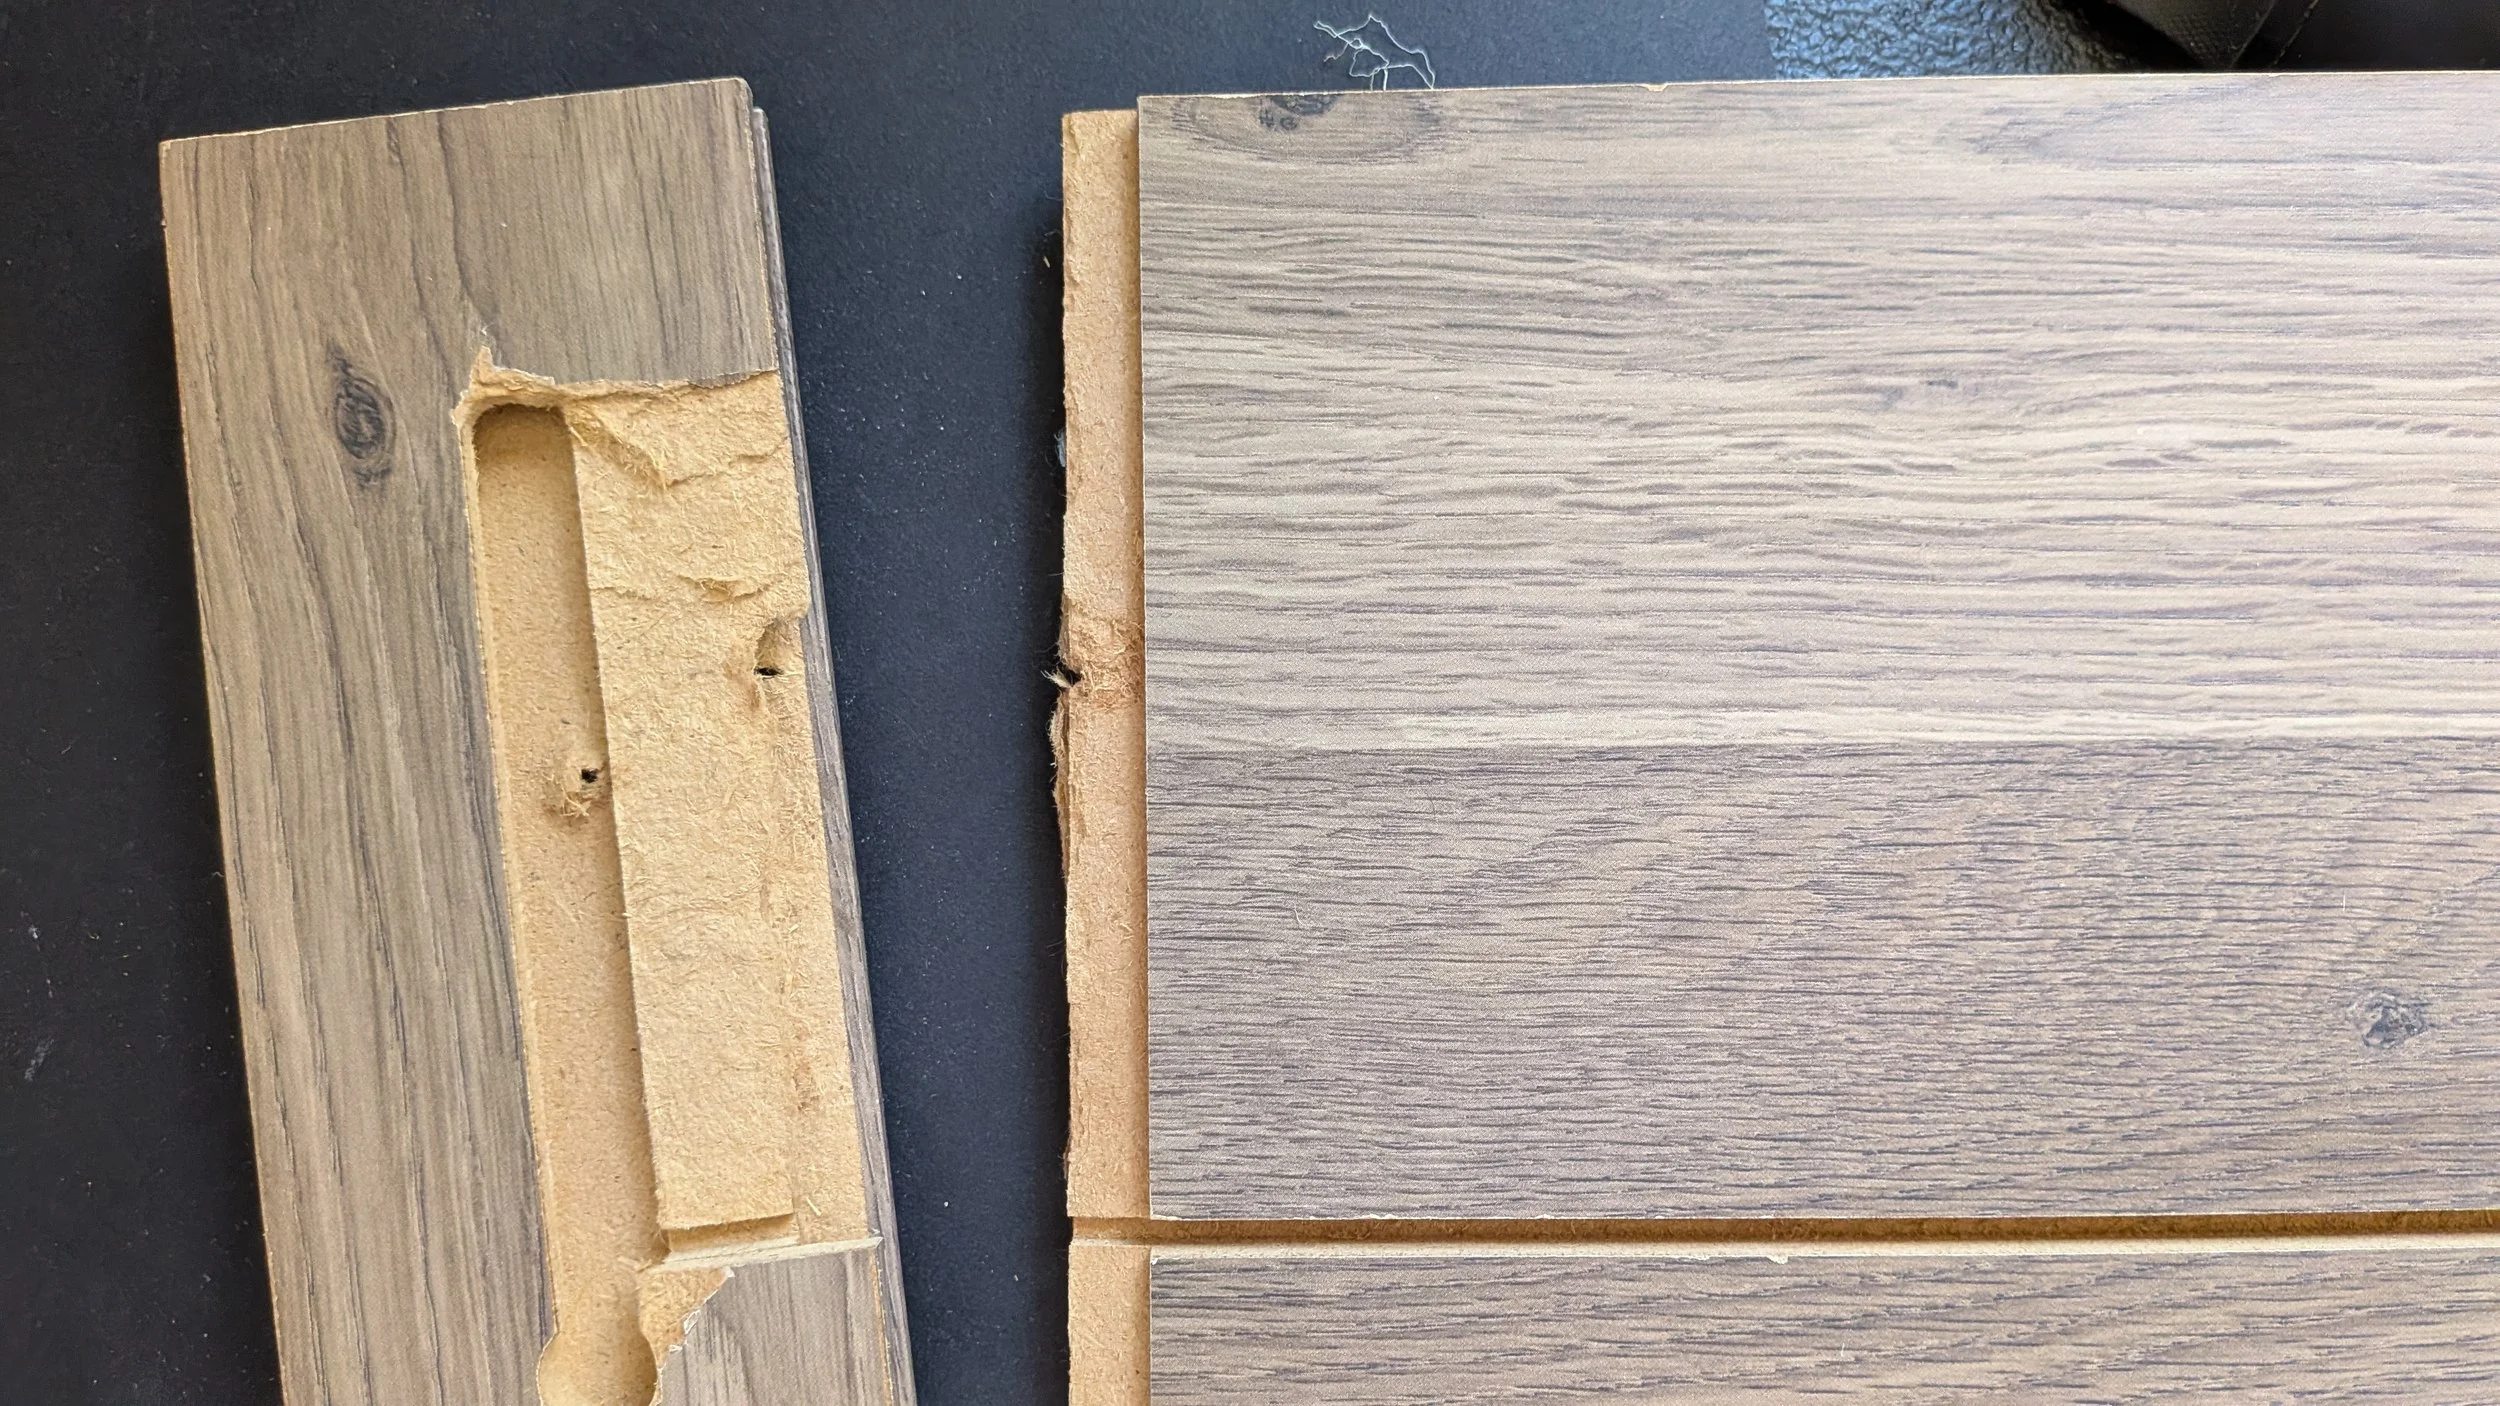
The second area has a particularly bad break. At first I thought I could fix it with a simple rectangular piece, but my caliper told a different story: even after cleaning up the piece, the missing portion was shaped like a wedge, but with two distinct measurable drops. And all this was only 4mm high at most, so fine work. But I’m getting ahead of myself. Allow me to start from the beginning.
The Broken Panel
Without the missing piece, this panel won’t attach to the dresser drawer.
Deciding on a Compound Wedge
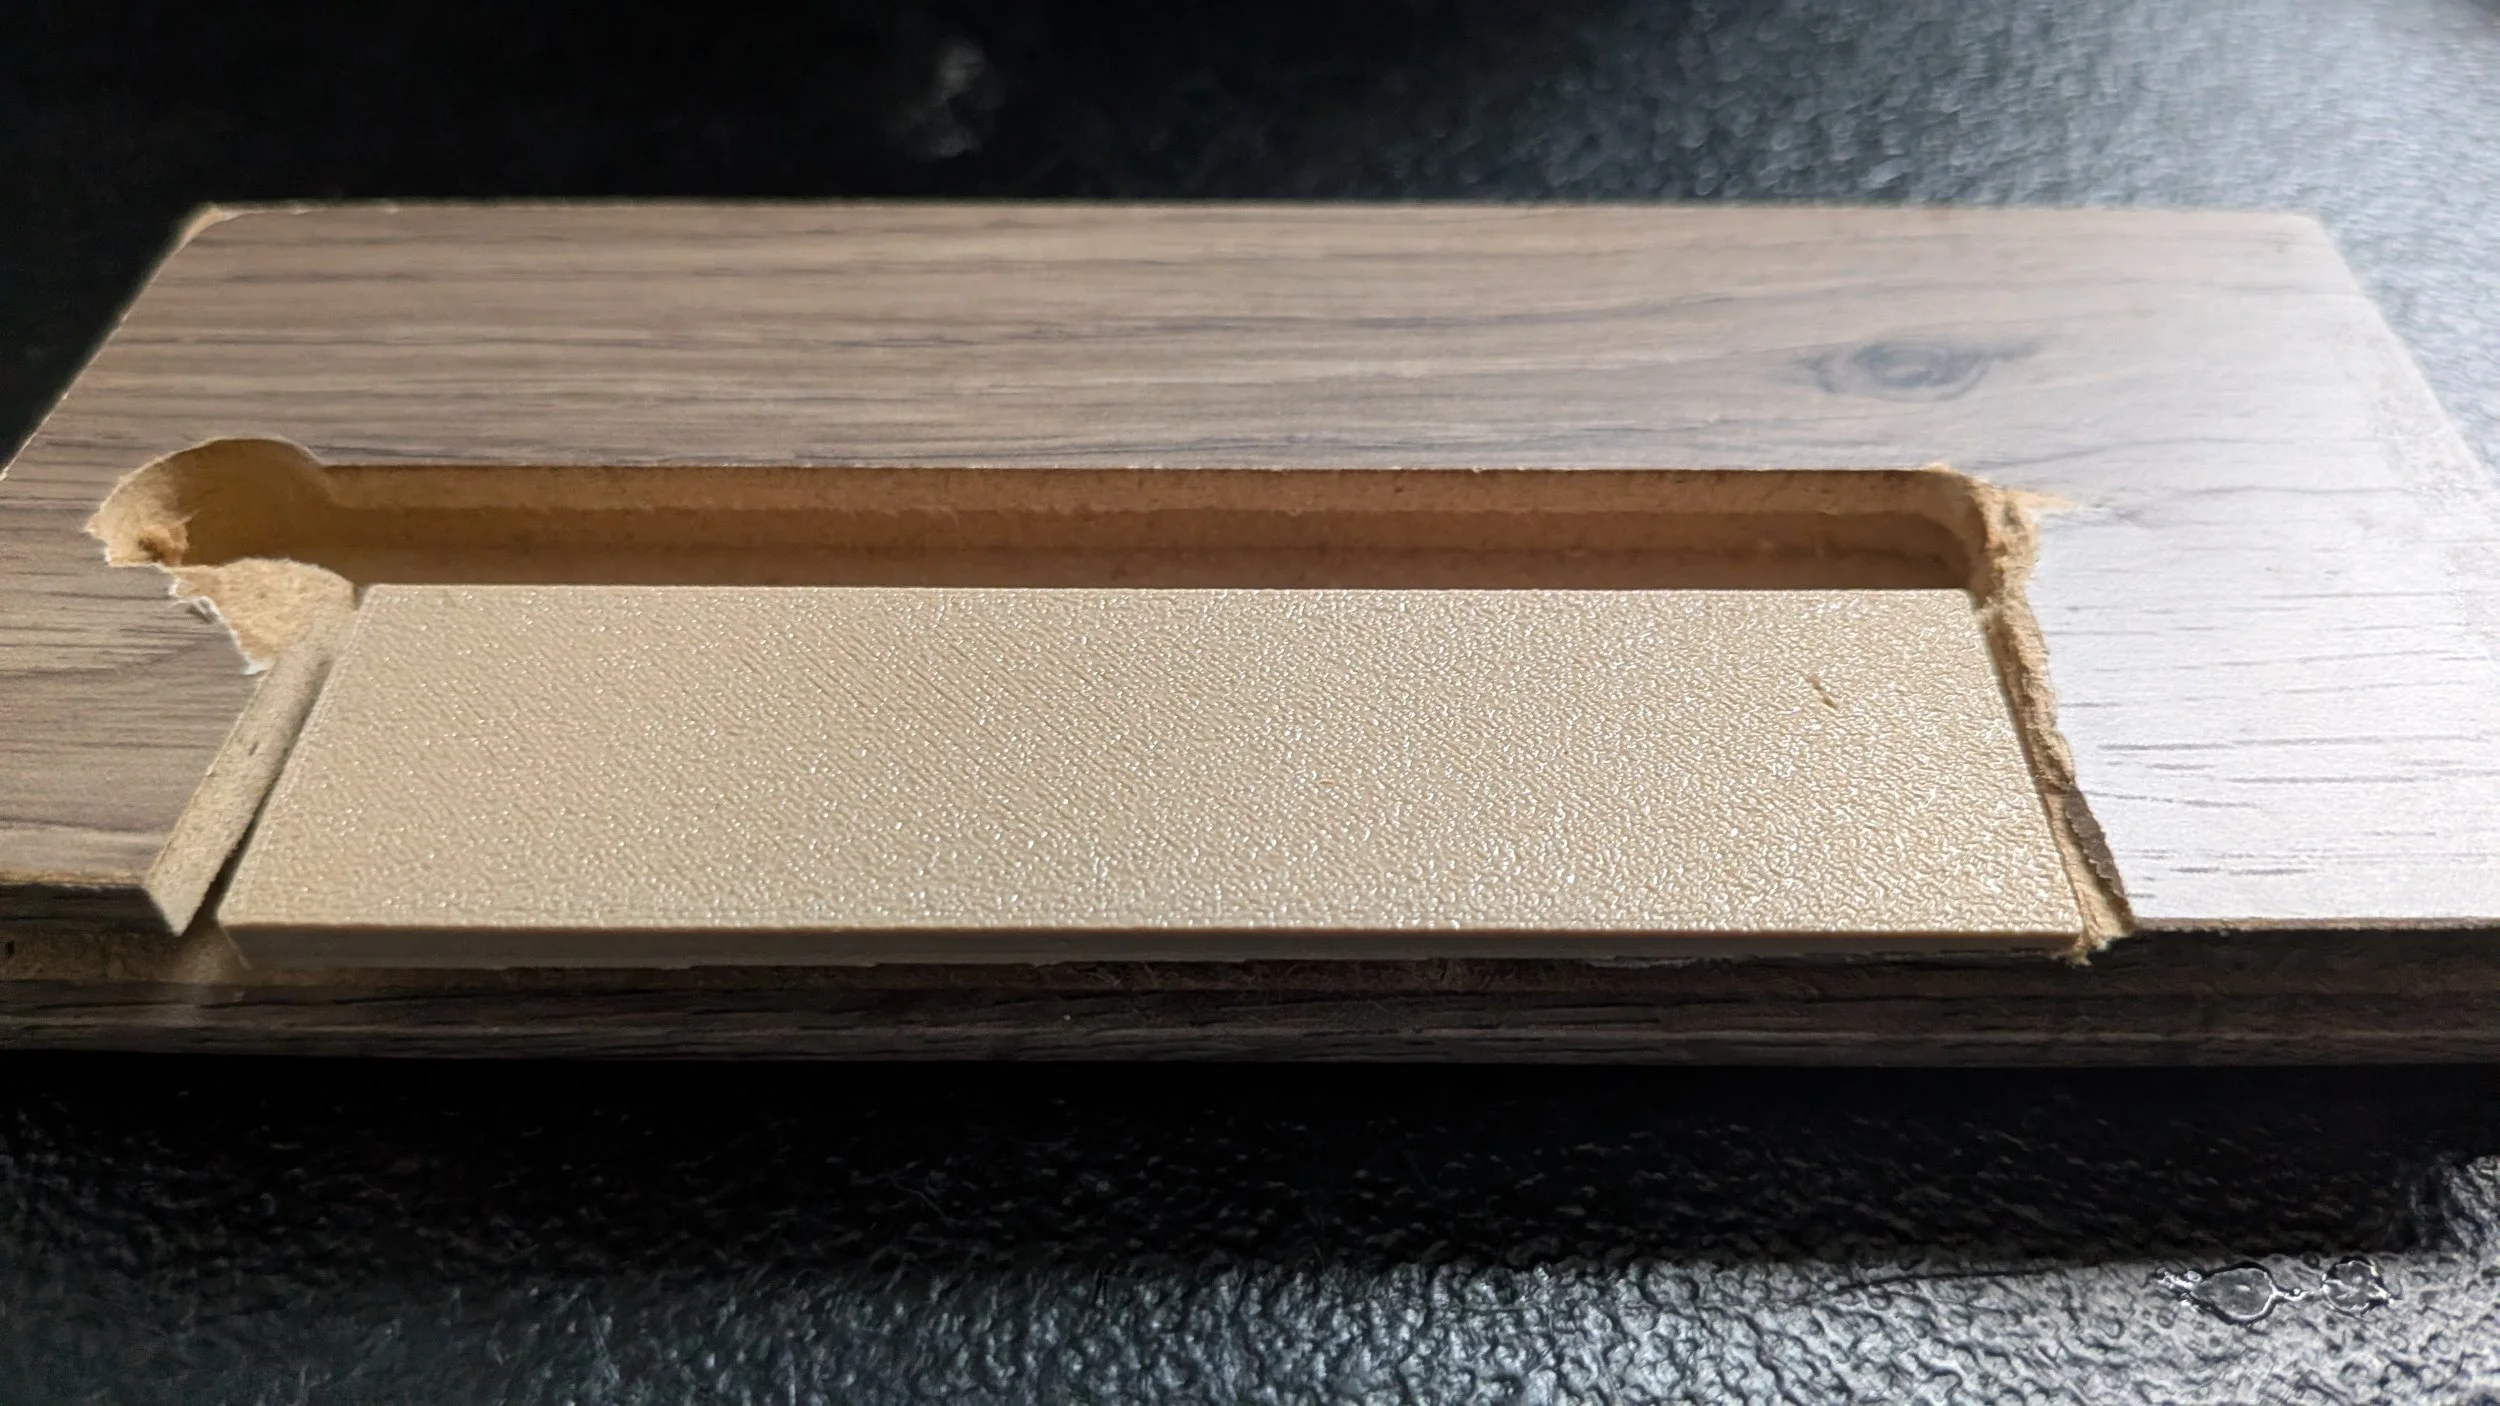
First, I got out the X-ACTO knife, using it to remove pieces that stuck up. Then I took the purple sandpaper and lightly went over the areas, making sure they weren’t too rough in texture. I wanted to measure the actual depth of the missing space, without the interference of wood fluff.
After preparing the surface with the knife and sandpaper, I took some measurements with the digital caliper. The missing space was 25mm across and 95mm long, like that of the trapezoidal piece from part one. However, it was 1mm deep on one end, while a full 4mm deep on the other.
A perfect wedge shape would have been relatively easy at this point, involving a well-placed shadowy wedge from 1mm high to 4mm on the other side. Poof, wedge, ready to insert. Of course it wasn’t that easy, notably because this panel wasn’t missing a simple wedge: it was a wedge missing a wedge, a sloped angle that suddenly sloped up even harder, a compound wedge, if you will.

Creating the Shape
After deciding on the compound wedge, I set about making it. I was going to need a rectangle, an angle to create the first wedge, and another angle to cut part of that wedge.
I opened up Tinkercad and placed a red cube shape on the workplane. I changed its dimensions to 25 × 95 millimeters, with 4 mm of height, turning the cube into a rectangle.
I then made an angled piece by placing the roof shape, making it 25mm wide, and nearly double the length at 180mm. I pushed it down to 2mm high, so I had a really long green roof. I created a huge eraser shape, covering half the roof along the peak, then joined the two shapes, leaving half a roof on the workplane. After turning the half-roof into an eraser, then joining it to the rectangle, I was left with a wedge.
The next step was to create a much smaller eraser-shaped wedge. The end that suddenly upturned did so for about 30mm before coming to an end, so I made the wedge 30mm long, 25mm wide, and 1.25mm high.
After placing the eraser-shaped wedge so that it would clip a small portion of the larger wedge, I combined them. Wow, a beautiful compound wedge that would perfectly fill the gap in the panel (probably). Since I finished it before I finished typing, it actually finished printing and I’m going to test it as soon as this paragraph is done!


Result and Redo
Result: the angles are mostly good, but it needs a little more height. Also, there is a slight tilt that can cause it to dip at one corner. It will still work, but it’s extremely annoying. You can see it in the close-up. While a well-placed clamp after the glue phase should solve the problem, I really want this to be 100% perfect.
The angles on the bottom leave the top flat, but still a little short on height.
Redo: I’m going to do a reprint, adding .5mm in height to the whole thing via a 25 × 95 x .5 mm rectangle stacked on top, then add a wedge on the narrow end, tilted so that a piece of wedge slightly protrudes from one corner. I’m calling this a Thrice-Angled Wedge (lol). I’ll share the first two photos of the finished piece for now, and a photo of the finished piece when the redo is done.

A Thrice-Angled Wedge on the bottom and a smooth top surface make this a perfect patch.
The piece fit perfectly — the little bump on the edge was just what it needed to level out the bottom, and the extra .5mm in height helped it fill the gap. Between this part and the trapezoidal dutchman from earlier we have everything we need to restore the drawer panel. Once the panel is repaired, the drawer itself can be fixed.
Without these 3D printed parts we wouldn’t be able to salvage the drawer. Designing something useful like that is extremely satisfying.