Finishing the Model (Part 2): Pre-processing Methods ie Speed, Layer Height, Ironing
Pre-processing Method: Printer Settings
I feel like this one will be extremely important. Changing the printer settings can apparently make a huge difference in your print. I’m going to get to test that out today with the wedding flower from earlier.
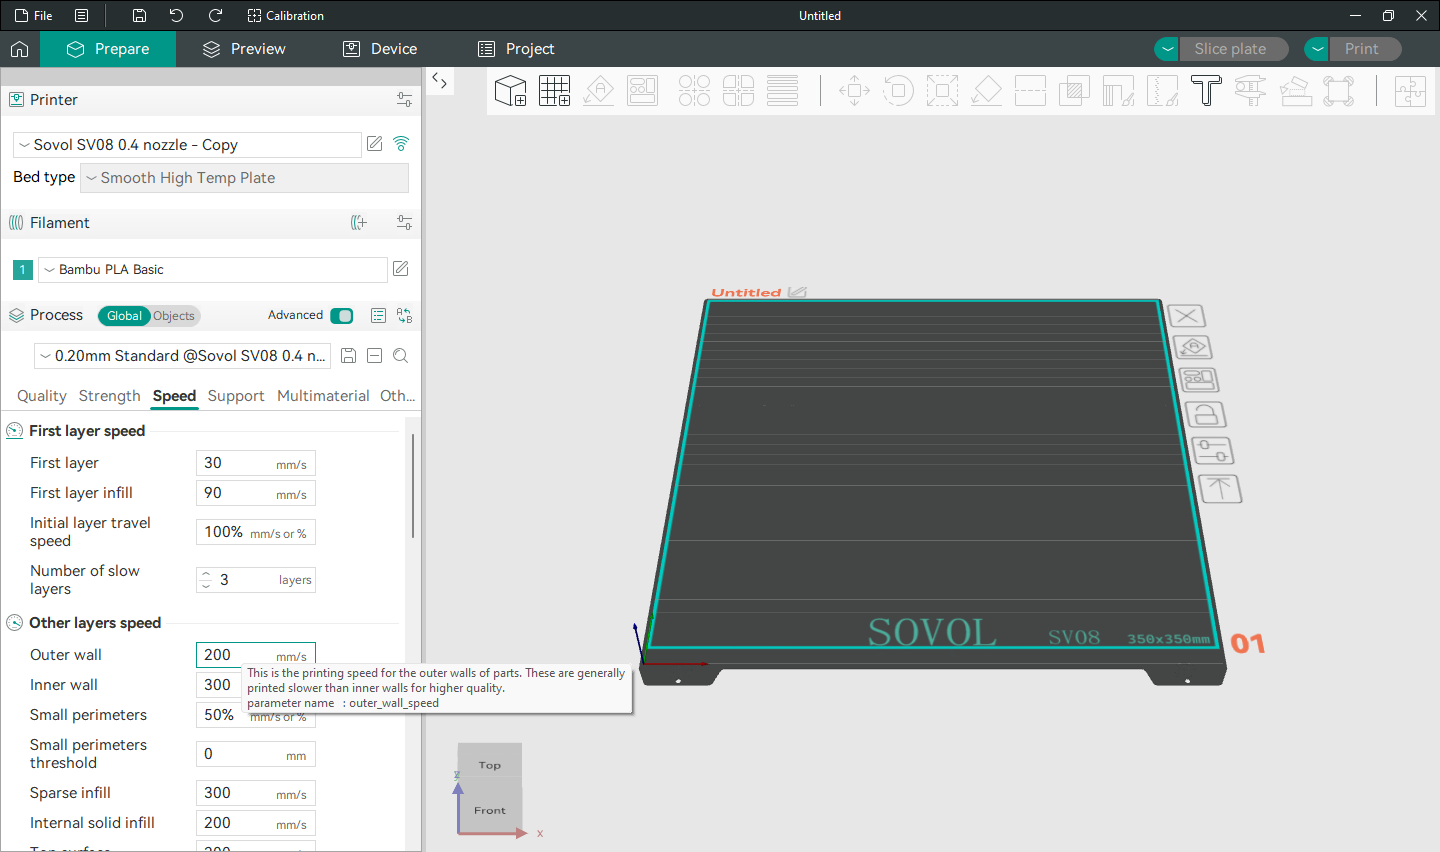
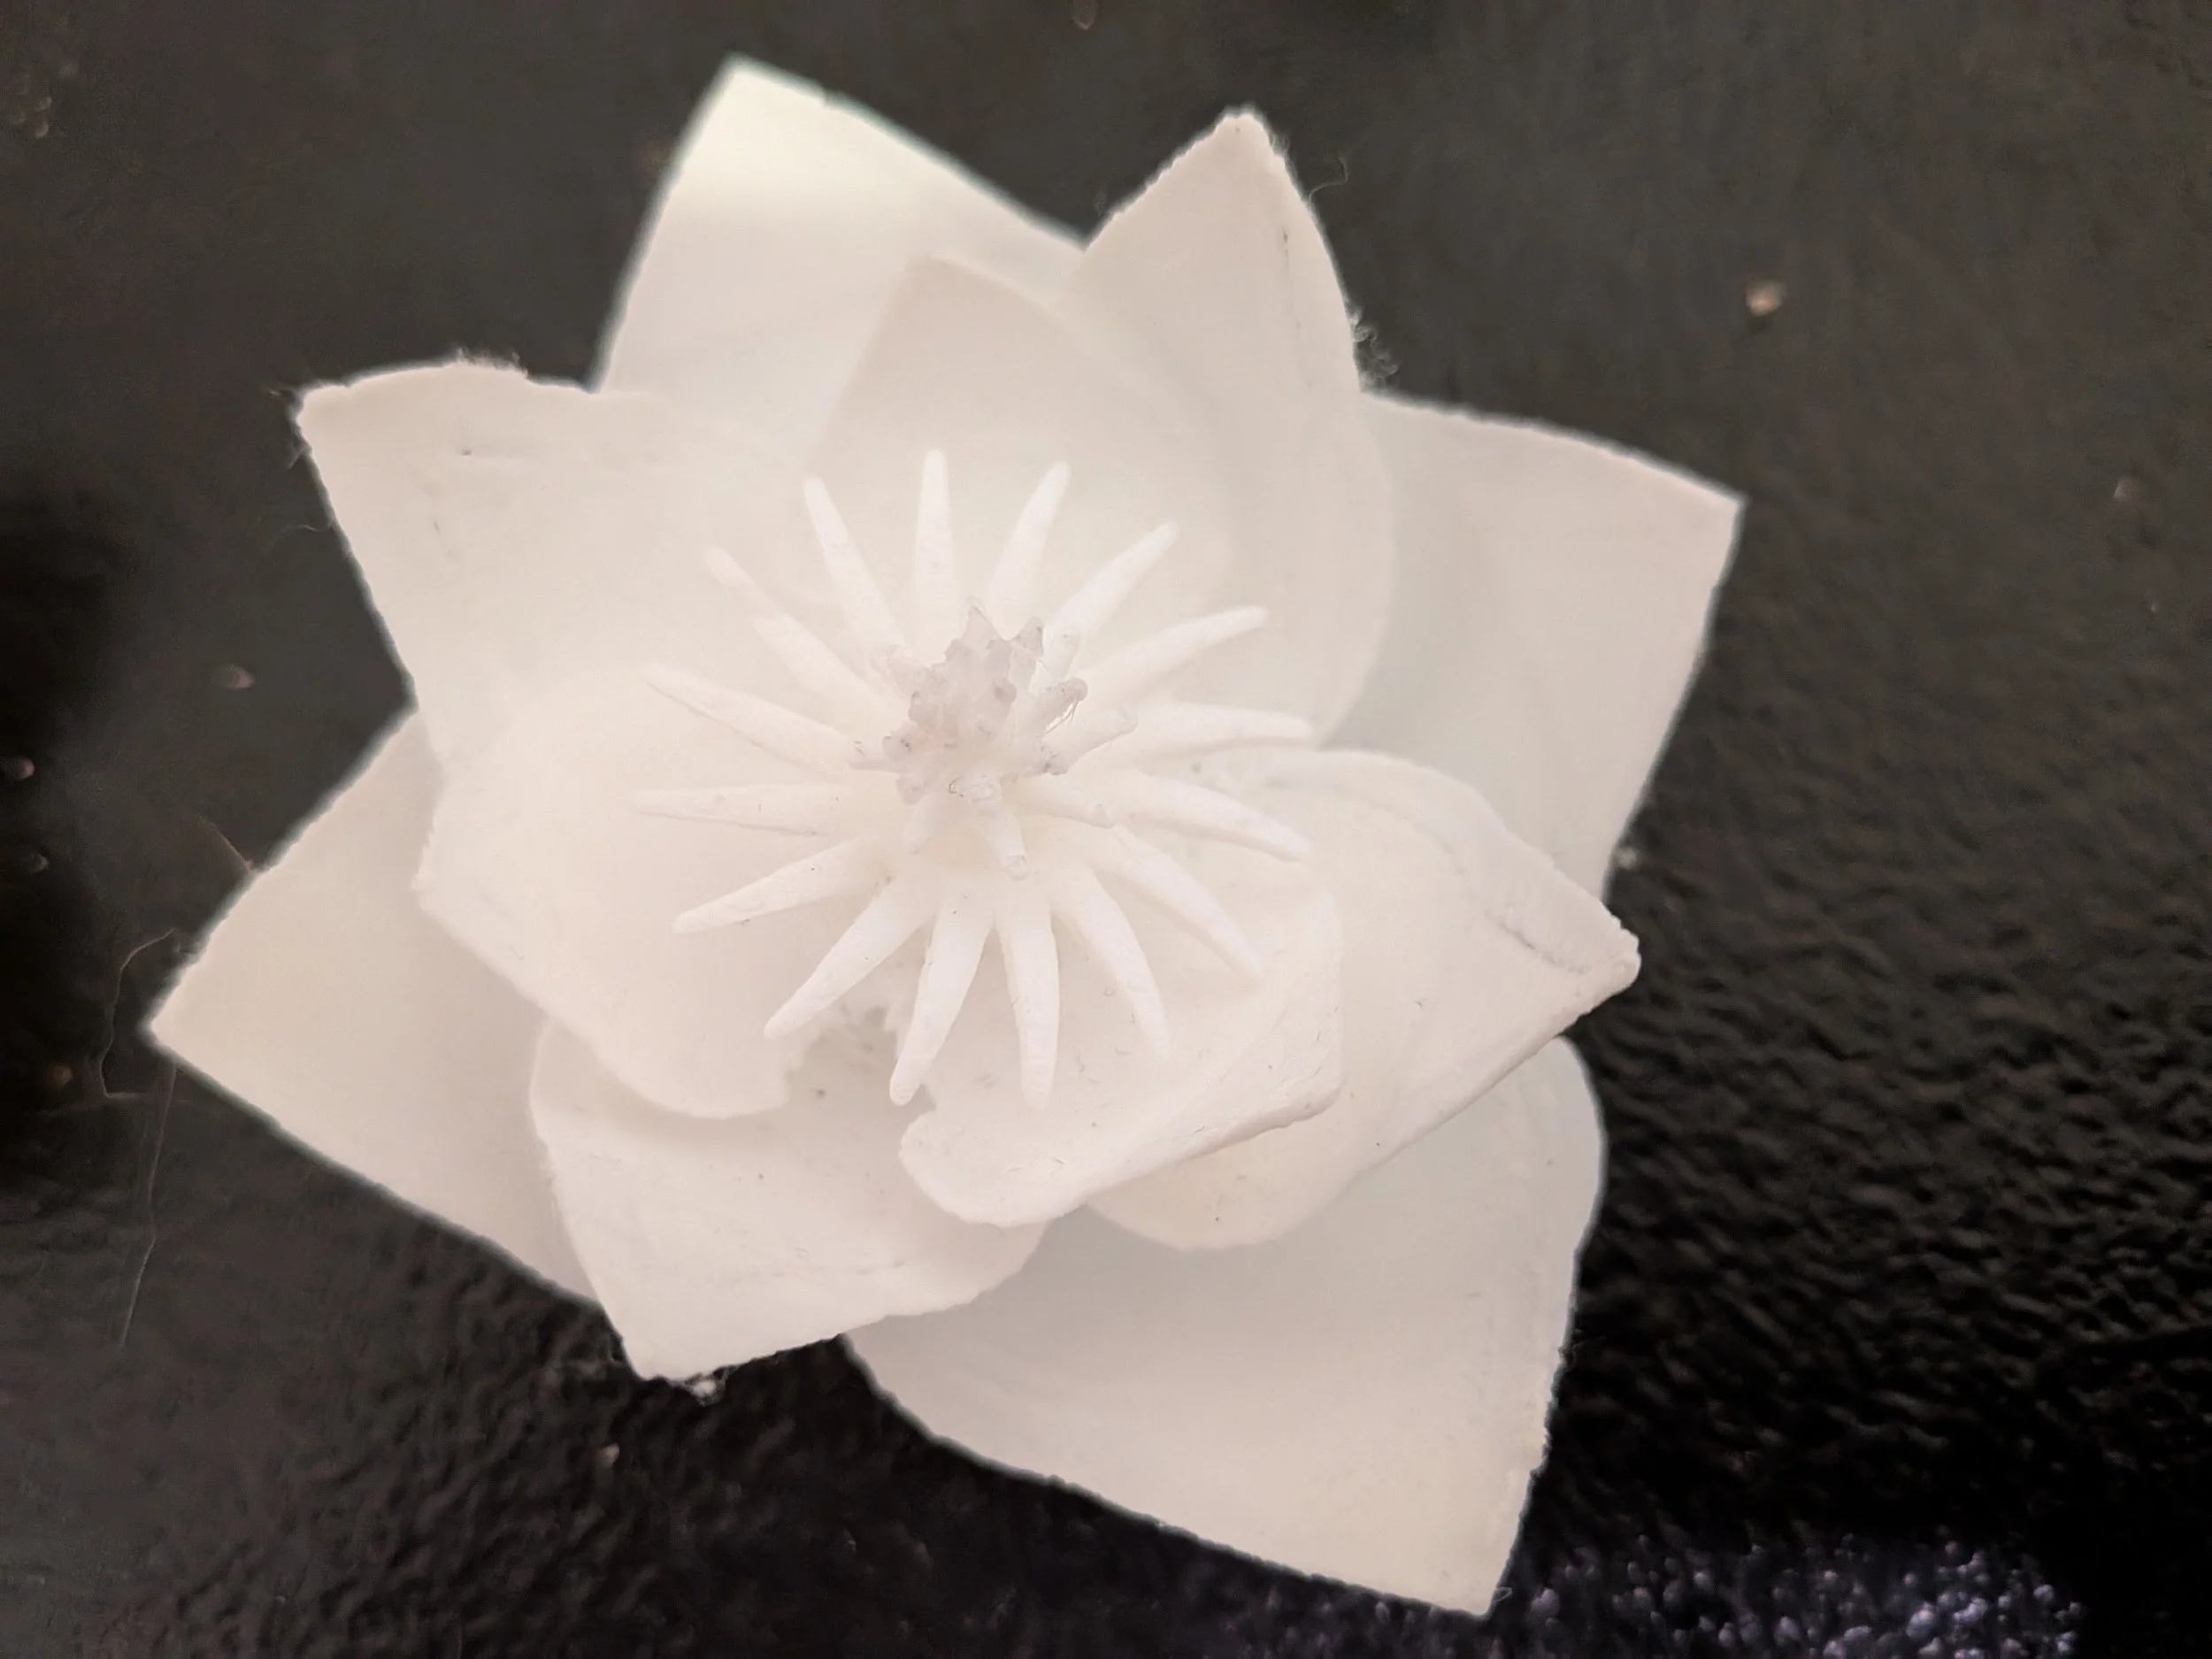
The design has very delicate parts: magnolia flowers have tepals, which form in spirals. I made this one with a spiral of 3 tepals on the inner ring and 4 on the outer. The most commonly recognized magnolia blossoms are wide, billowy, and curvy, so I sculpted several individual tepals. The model came out beautifully, though it was obviously very delicate: my first print illustrated both how fine it was and how easily it tore on the bed.
The print had jagged edges, though the model showed them as perfectly smooth. There were also pinholes, tiny little gaps along the seam where the piece went from one layer thick to two. How timely this article!
I asked Google what settings needed to be changed on my 3D printer in order to better produce a fine print, and the AI overview came back with a long list of suggestions. Here are the ones I adopted:
A Slower Print Speed
Examining Print Speeds
One of the recommendations was to slow the print speed. A slower print allows the plastic to be more ‘properly deposited and adhered’, according to the AI.
My software lists several different categories that have print speed: sparse infill, internal solid infill, solid surface, and gap infill. There are also support speeds, overhang speeds, and travel speeds, as well as speeds listed for outer and inner walls.
I wasn’t sure which ones to change, but the first four seemed the most reasonable in my estimation, so I changed those (sparse infill, internal solid infill, solid surface, and gap infill) as well as the outer and inner walls. The original values ranged from 200 mm/s to 300 mm/s, so a drop to 50 mm/s seems like a good starting point.
A Lower Layer Height
The second suggestion is to lower the layer height. The AI thinks .2 mm is good, but that’s my default. I opted to switch the height to .15 mm and see what happens.
Ironing
I turned on the ironing feature, choosing ‘all solid layers’ and the default pattern. Ironing is supposed to smooth the top layers by basically warming over them and gently pressing. I don’t know if it will make the edges of the tepals smooth or if it will squish them. I wish I knew before I started printing since squishing seemed most likely. Still, I tried anyway, and it came out well; ironing looks really nice on some of these flat surfaces.
Enough of the AI!
I opted to change the infill density because my tepals are dangerously thin and I need to strengthen them. I also tried changing the surface patterns for increased smoothness.
Infill Density
I changed the sparse infill density from 10% to 15%. That’s a 50% increase. I think the tepals will be less delicate, but do they have to be so thin as to be nearly transparent? The optimal number is probably somewhere in between 10 and 15, but I am going to see how this print looks.
Changing Surface Patterns
I chose concentric for the top and bottom surface patterns. That particular one should emphasize the tepal curves, though I’m not sure how it will handle the pointy ends. I think it will look really nice.
Version Three
Changed the layer height again, this time to .1
Removed ‘detect thin walls’ Added it back, as removing it made the tepals look jagged, like autumn leaves.
Put infill density back to 10%.
Changed number of wall loops from 2 to 1.
Separated the flower model into two layers, also adding a tepal to one of the spirals so that they both have 4.
Tried out the ‘scarf joint seam’, beta version, which supposedly smooths out seams.
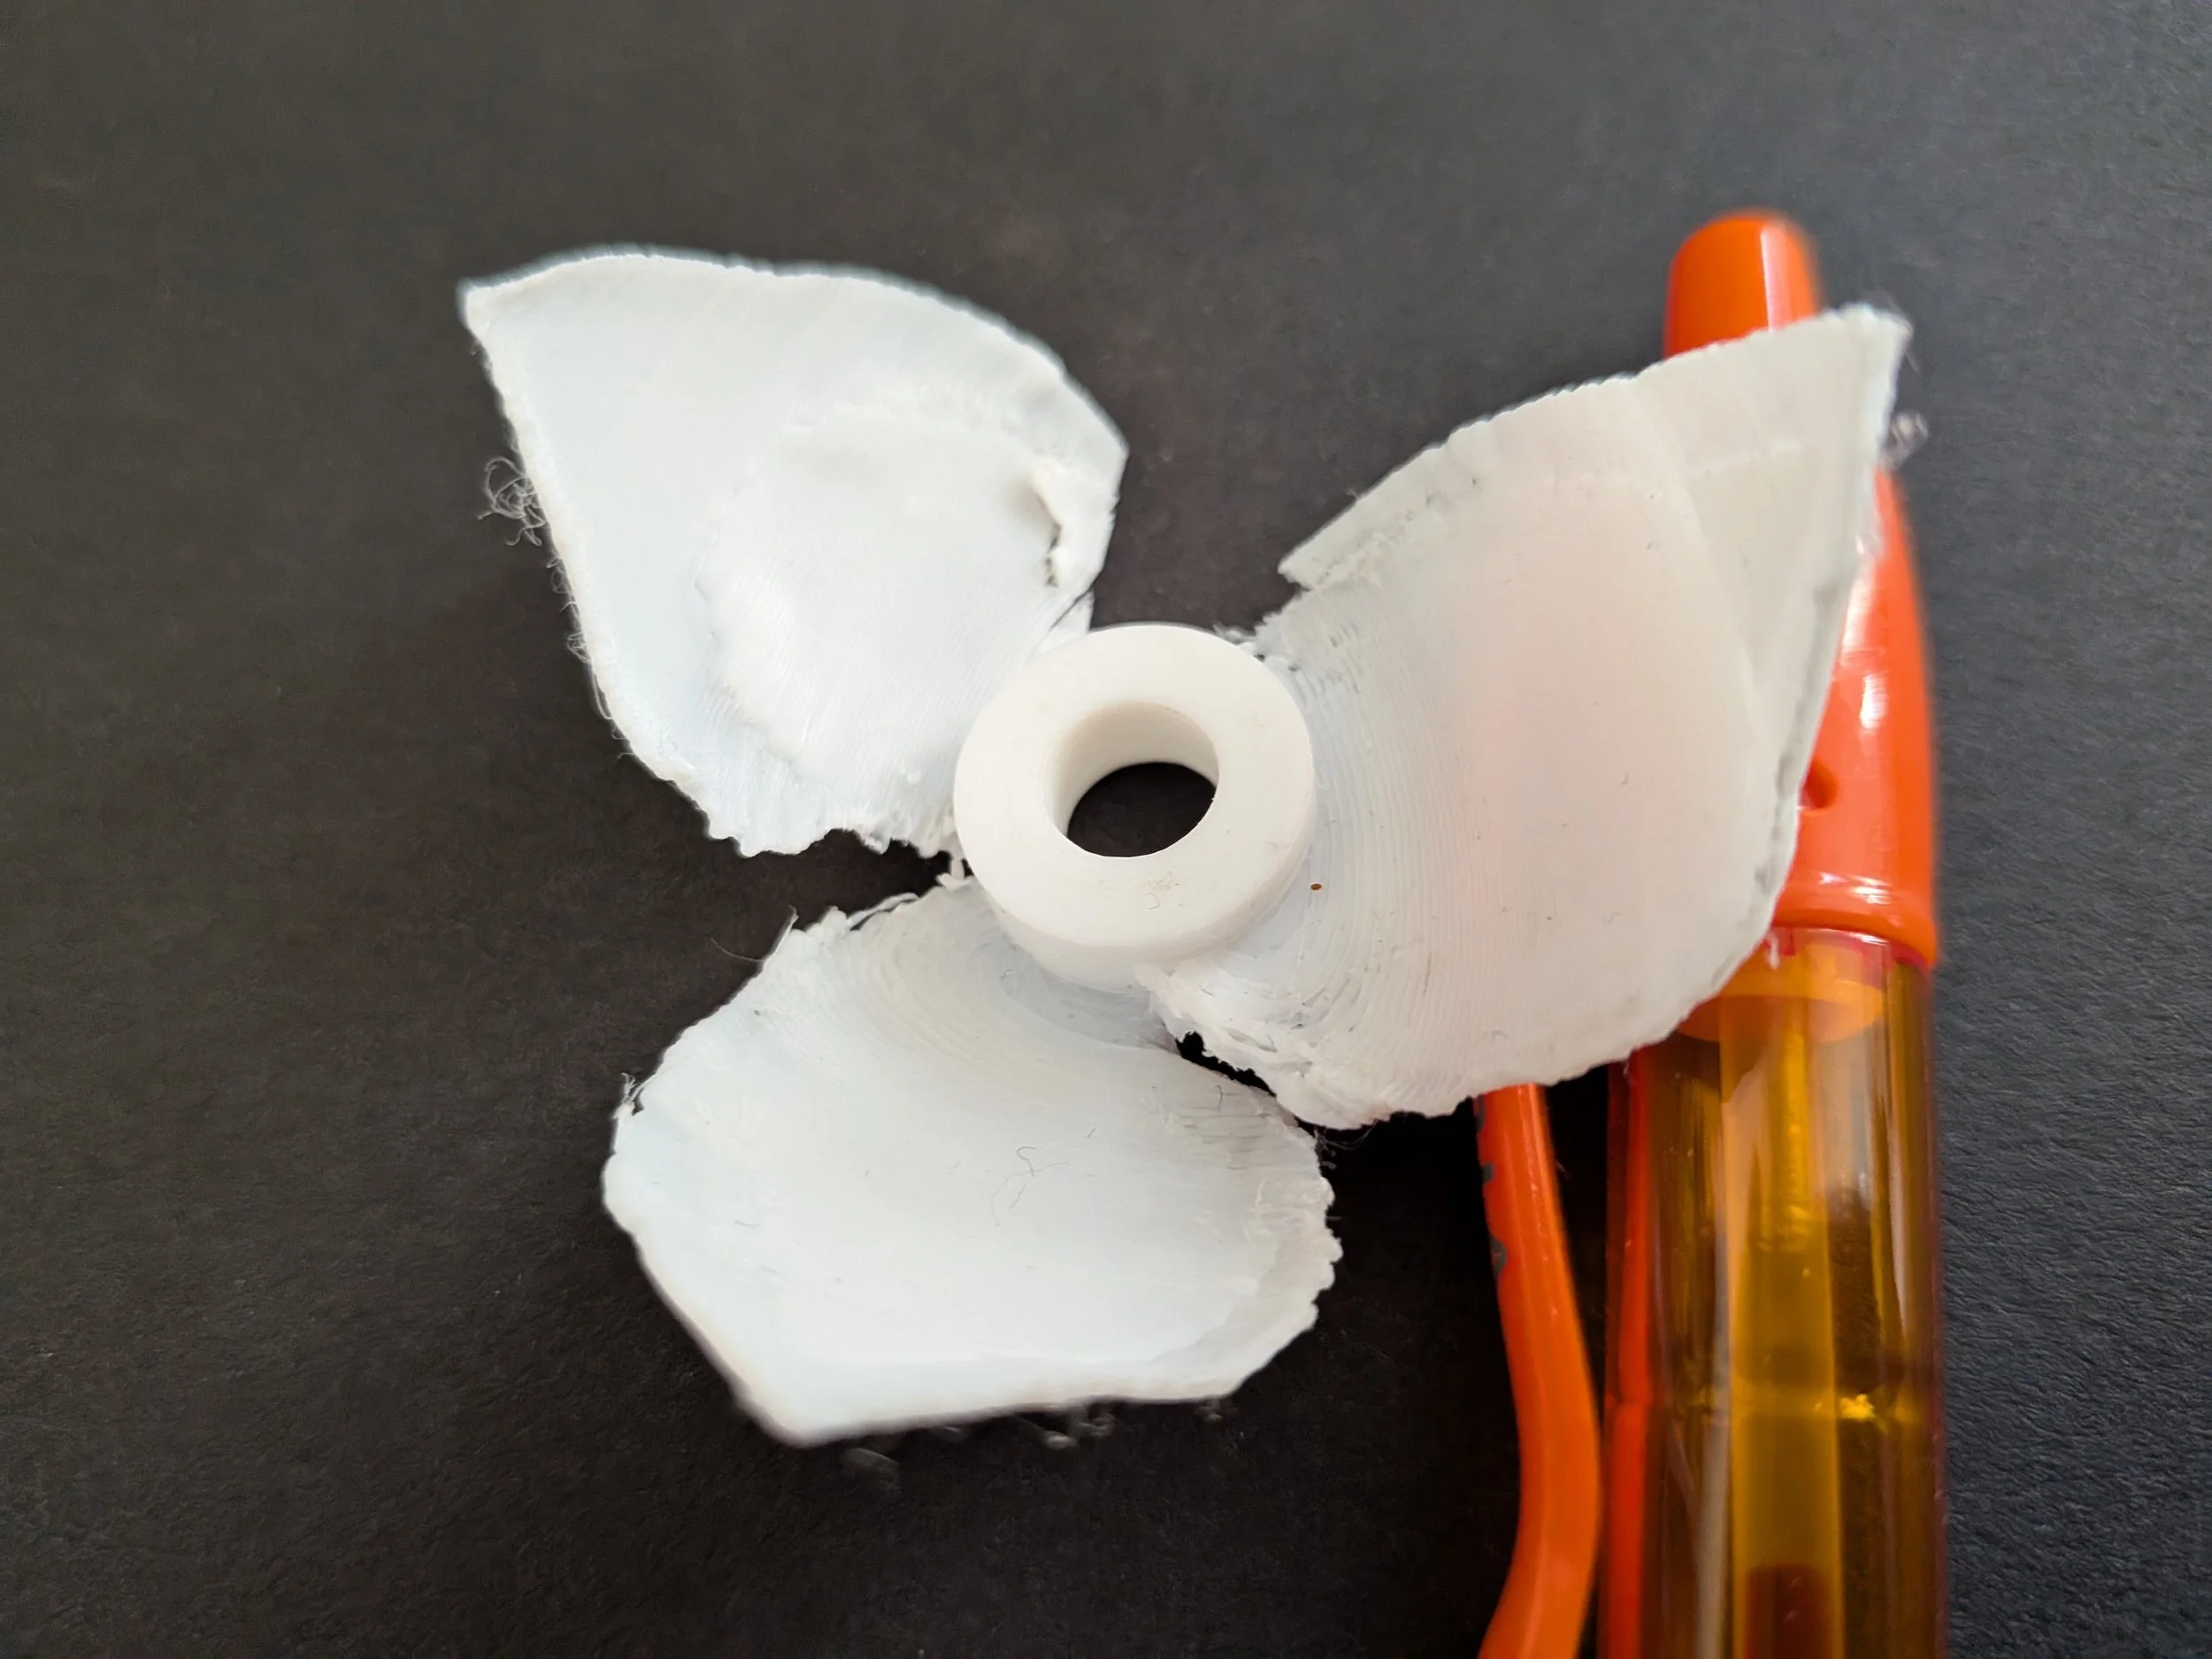
The petals are gorgeous but they are so thin you can see your fingers through them, which makes them a special challenge. The scarf joint seam did not work well with things that were only 1-2 layers thick.
Results
I got closer every time, but was ultimately unable to get smooth edges, no matter how I changed the settings. My model was simply too thin. Removing supports without tearing the model was also extremely difficult.
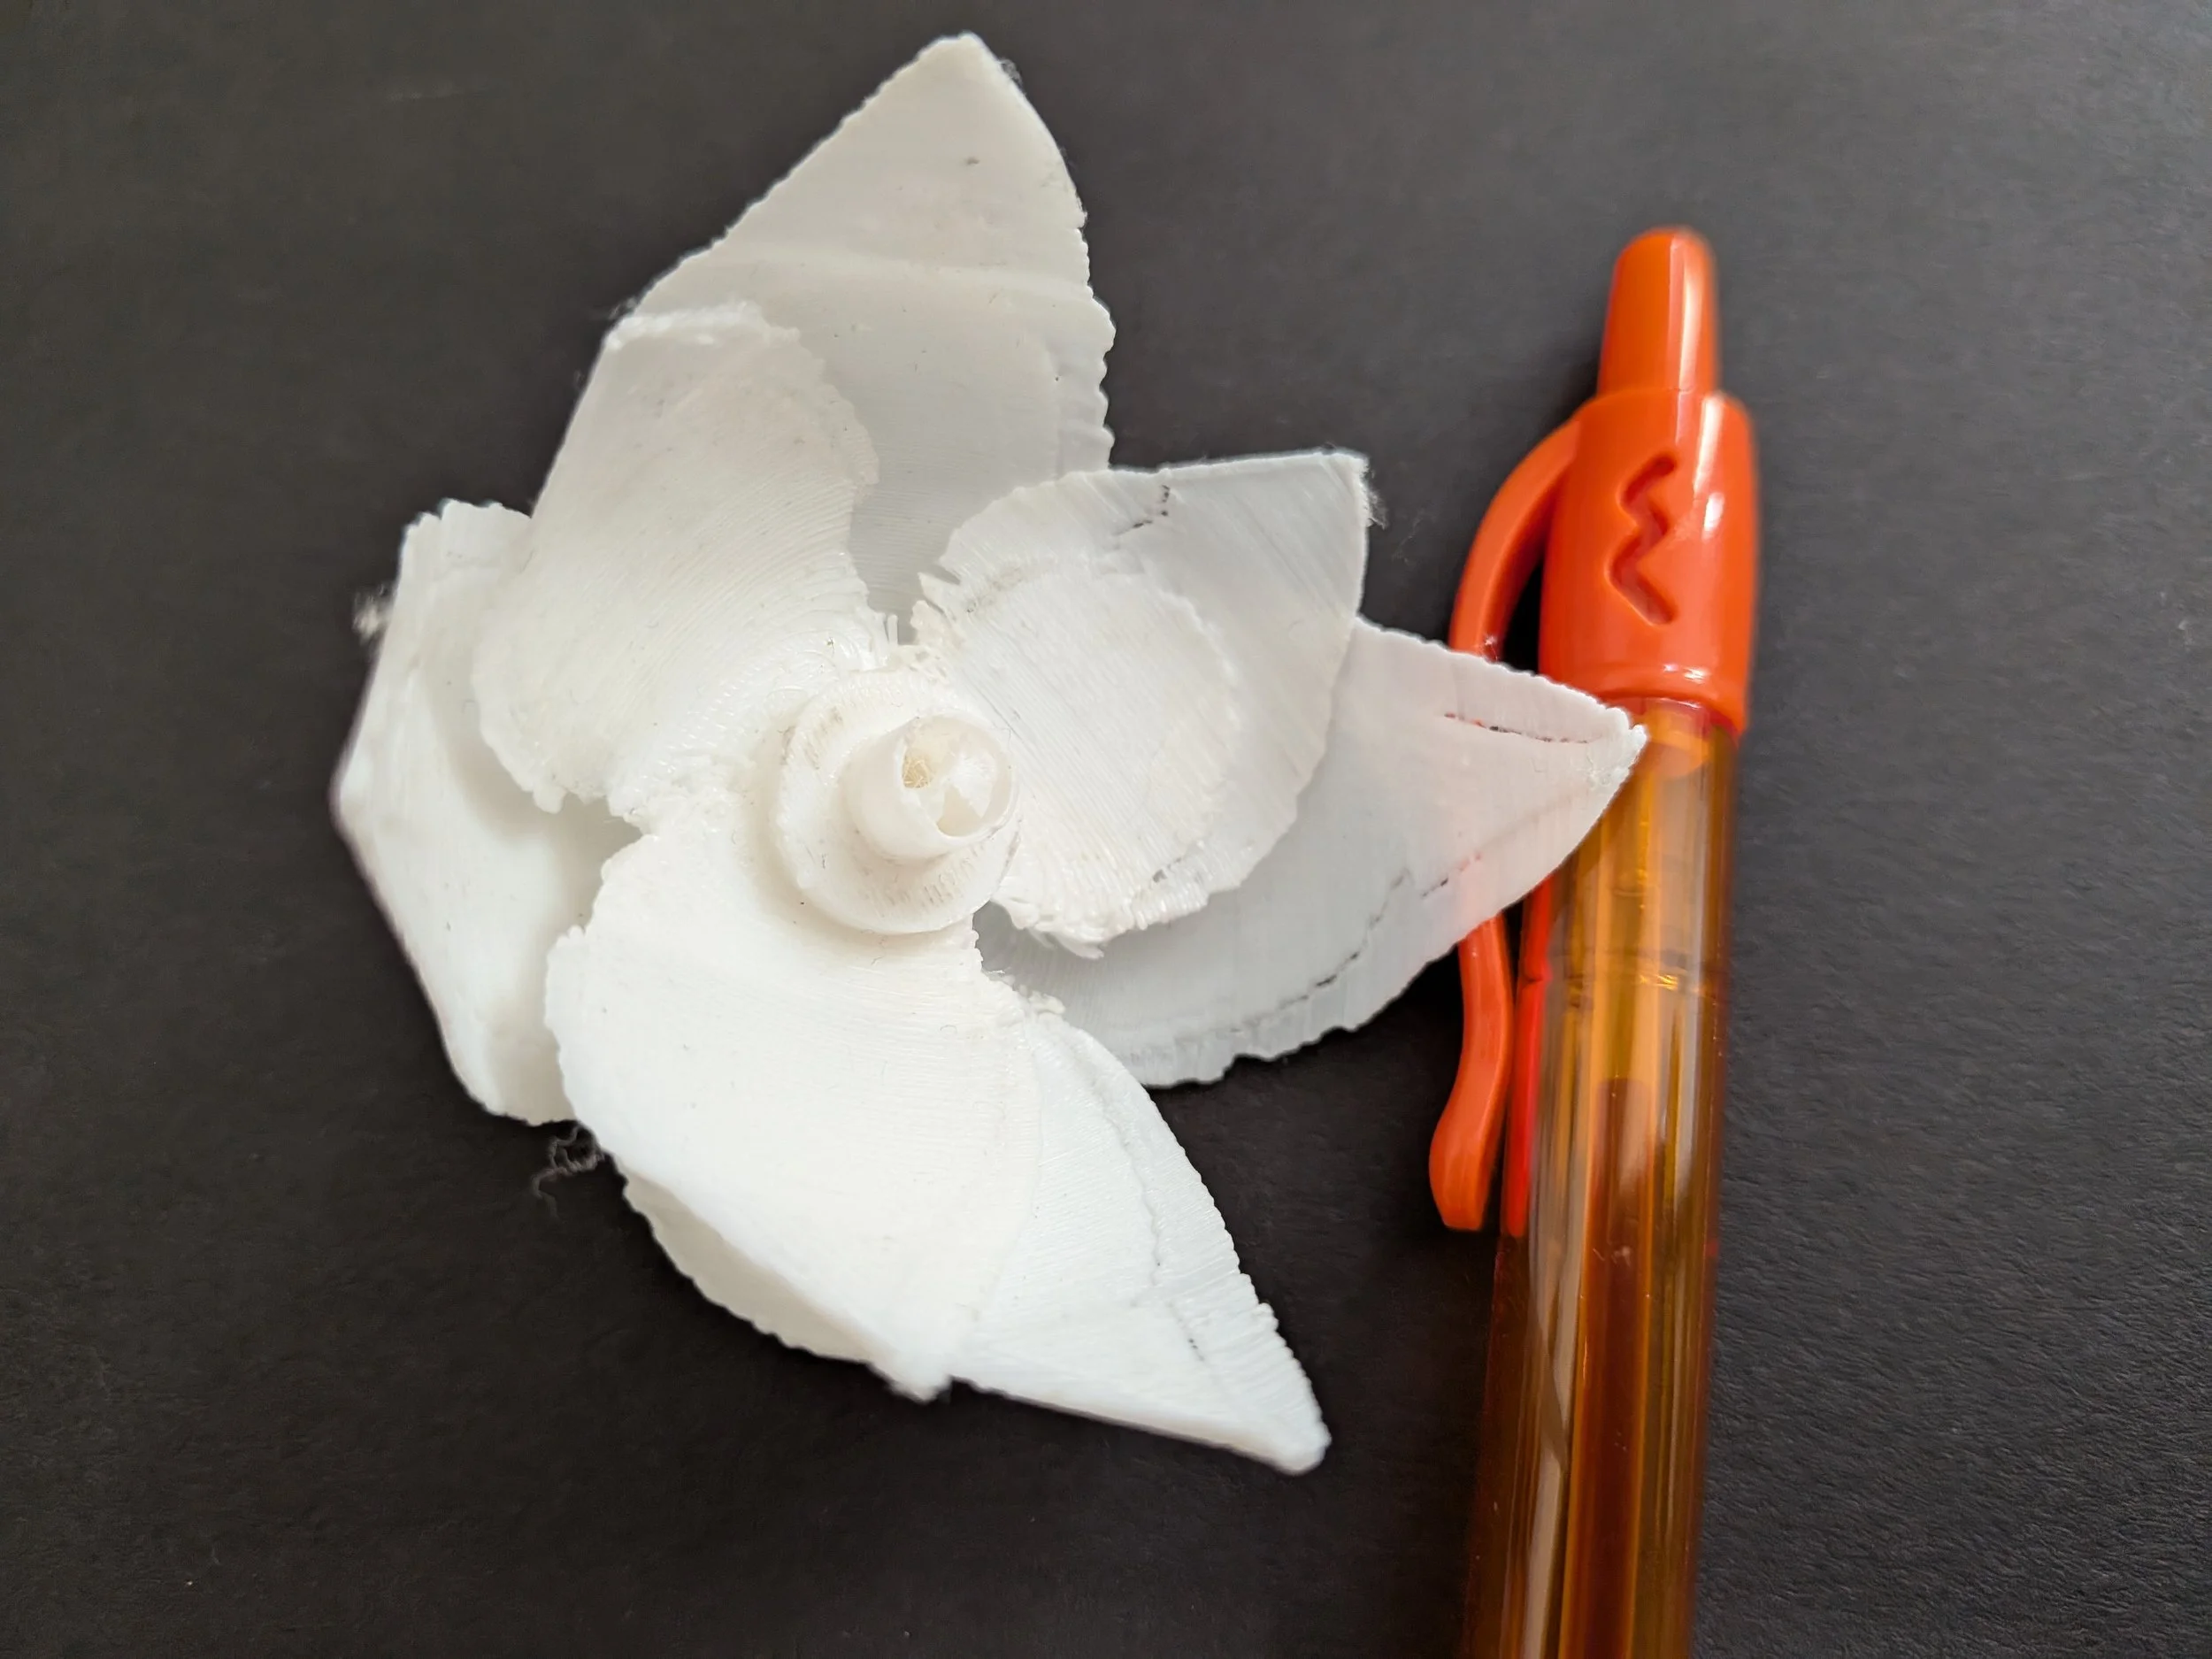
I ended up starting the petal design from scratch, using the same method but with edges that weren’t as thin. The result was a thickness varying between two and four layers. The extra layers made for smoother blends and a less fragile piece.
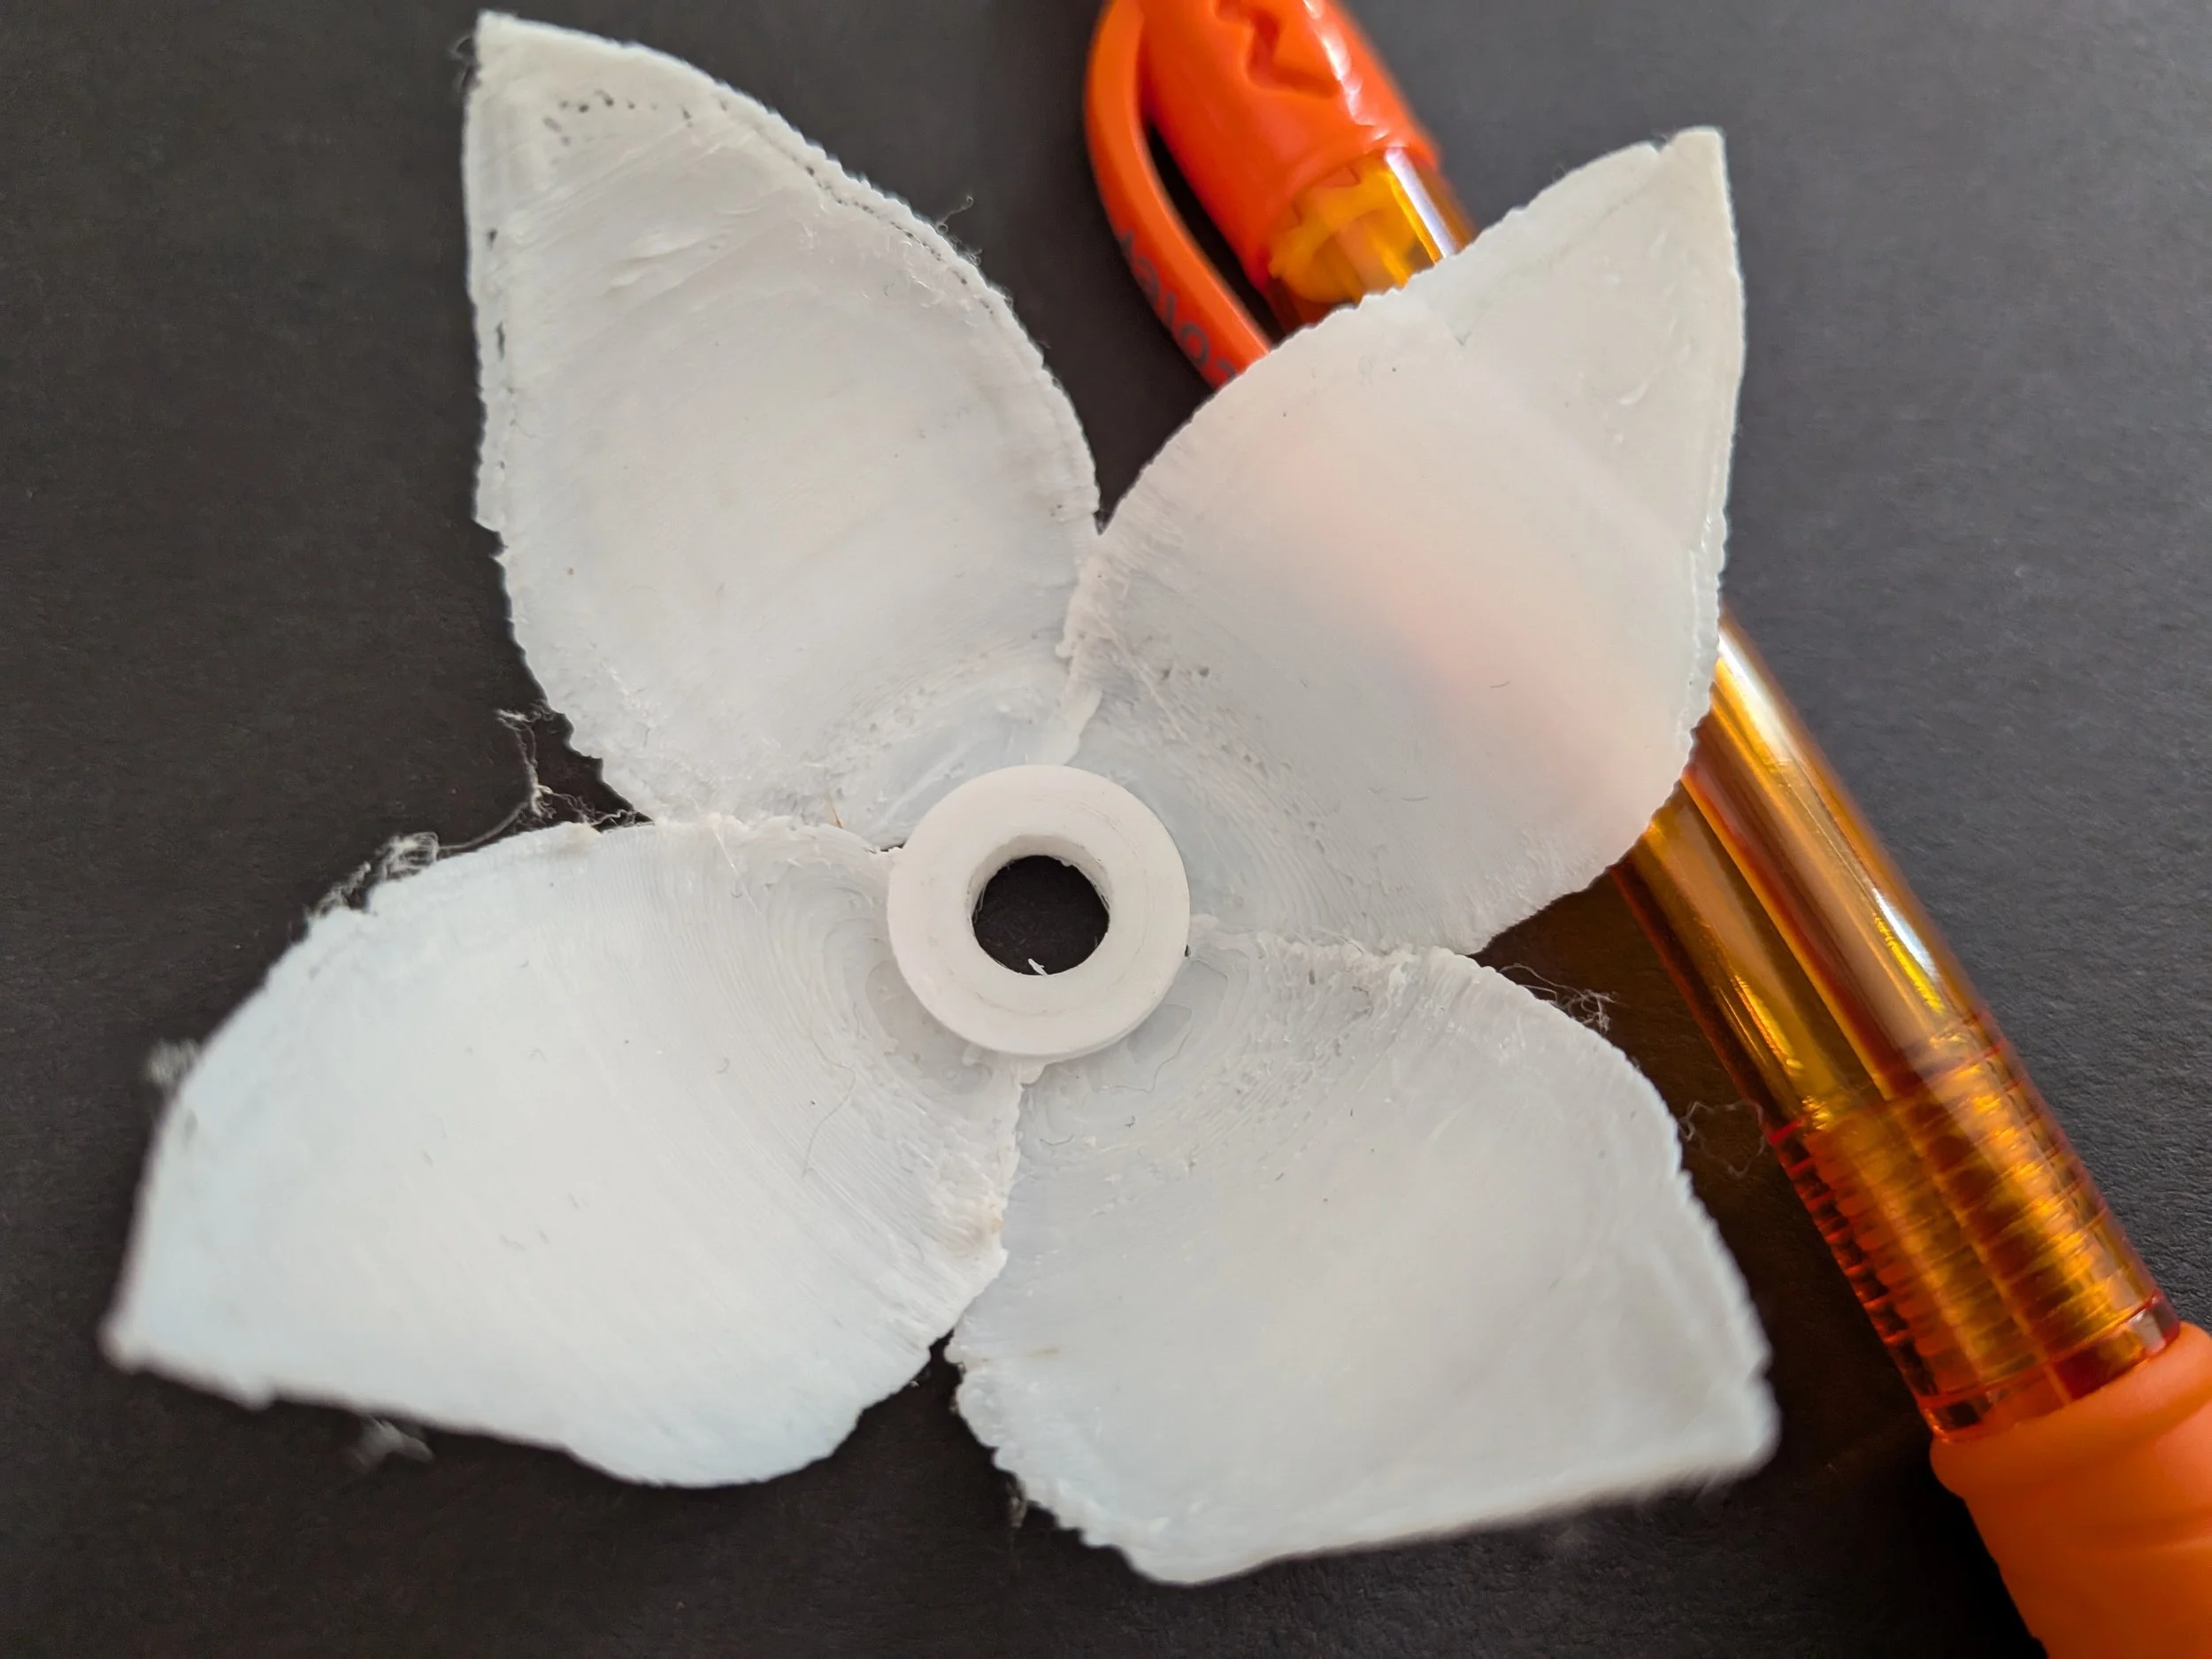
For the final print I kept some of those pre-processing settings. Slowing the print speed helped a great deal, as did changing the number of wall loops from 2 to 1, increasing the infill density, and adding concentric surface patterns.
The amount of improvement gained from changing settings on the 3D printer was stellar. It couldn’t rescue a model as fragile as the original, but I was able to use these techniques to redesign the flower with finely detailed petals and better results. This technique is something I’m likely to use in future projects.
Bibliography
3D Printing Settings and Parameters: Types and Optimization
Raise 3D
07 September 24
MakerBuildIt
You Won’t Believe the Smooth Finish Ironing Gives to 3D Prints
YouTube
27 September 2024
M.M’s Prop Shop
The Ultimate Guide to Smoothing and Finishing 3D Prints
YouTube
14 September 2024