Designing a 3D-Printed Lid for Comet Cleanser
If you’ve ever bought Comet cleanser, you know that it doesn’t have a lid. Instead it comes with a sticky tab that gets unsticky as it gets covered in Comet, eventually leaving the top covered in gritty cleanser with bleach in it. Potentially unsafe, definitely a recipe for a spill.
I designed a solution for that, and it was wonderful. I even had it as one of my free uploads. However I have since learned that my design might not work the same way on every printer with every filament type, and that I need documentation. Also someone seems to have thrown away the lid. Gasp.
Time for a re-design, and this time you can come along with me :)
The Planning Phase
I first took careful measurements. The metallic rim that the lid needs to cover is 2.75” across, with a rim of 0.125” and a lowered inner circle of 2.5”. While the dip is only 0.125” deep, I want the outside of the lid to be 0.25”. My prior design was a bit chunky for my tastes, but snapped on with gusto. I’d like to recreate that effect, making sure this time that it works well across a spectrum of printers and filaments. But how to do that?
I thought back to a video by slant3D, about tolerance, and how to make your pieces fit a variety of scenes. That seemed like a good place to start. There wasn’t much on round lids specifically, but his video did give me some ideas.
I got out my sketchbook and put together a technical drawing, with the following details:
Top of Lid - 2.75” across + .125” over the rim on either side (.25”) = 3” diameter, 0.25” high
Forming a Skirt (the part that drops down from the edge of the rim) - 3” - .04” on either side (rim, .08) = 2.92” diameter, 0.125” high
That was enough for before if I remember correctly, but this time I’m going to add a little something: scalloping. Last time I left a big chunk in the middle. I think I can safely make it a scalloped shape instead, all around, like a sunburst or a many-petaled flower. If I do that, and scoop out some of the inside so that it’s thinner and has some room to give, I think it will have a snug fit, with a little room for the filament to expand (or not). Time to try out these thinks!
First, the lid. I used the dimensions from the draft, first creating the 3” cylinder, then creating the smaller ‘skirt’ portion. I made the 2.92” diameter one into an eraser shape, centered it in the larger cylinder, then joined them, creating a nice cap.
Next, the inside, where the magic happens. We’re going to make another cylinder for the center. I started out with the idea of adding scalloping around the edges, but I ended up going with a pattern of nubs instead.
First we need a 2.75” cylinder that’s .25” high for the center. That’s the same diameter as the top of the can, inside the rim. Then we need to add a little friction, and we’re going to do that with barely visible ribs.


Once again, we’re using a cylinder shape, though this time it’s going to be very small! We need our cylinder to be .25” high but only .1” diameter. Then we copy it and move the copy about 2.75 inches away. Group those two into a pair, then copy the pair and move it by 9 degrees. Keep doing that until there is a complete ring of these pegs. The ring should be 2.719” diameter.
Combine the ring of pegs with the center piece we just made: the result should be a cylinder with very slight ribs all along the edge.
Here is where you could theoretically join the outer cap and inner piece, but the reality was that a single layer of mystery space kept appearing between the two pieces. I ended up joining the center to a problem-solving cylinder of 2.9” diameter and .125” height, enough that it would blend in to the already-made lid without a fuss. That took care of the missing layer between the center portion and the cap.
I joined the outer cap and inner portion together, and poof! like magic I had a compliant lid. The ribs keep the lid on via friction: you can even shake the can upside down quite vigorously and the lid stays on. Despite that, it comes off easily, and takes only a light touch to put it on.
This is probably my favorite creation, so simple but useful. If you liked this but would prefer to download an already-made one, this lid is available as a free download in the store. Enjoy :)
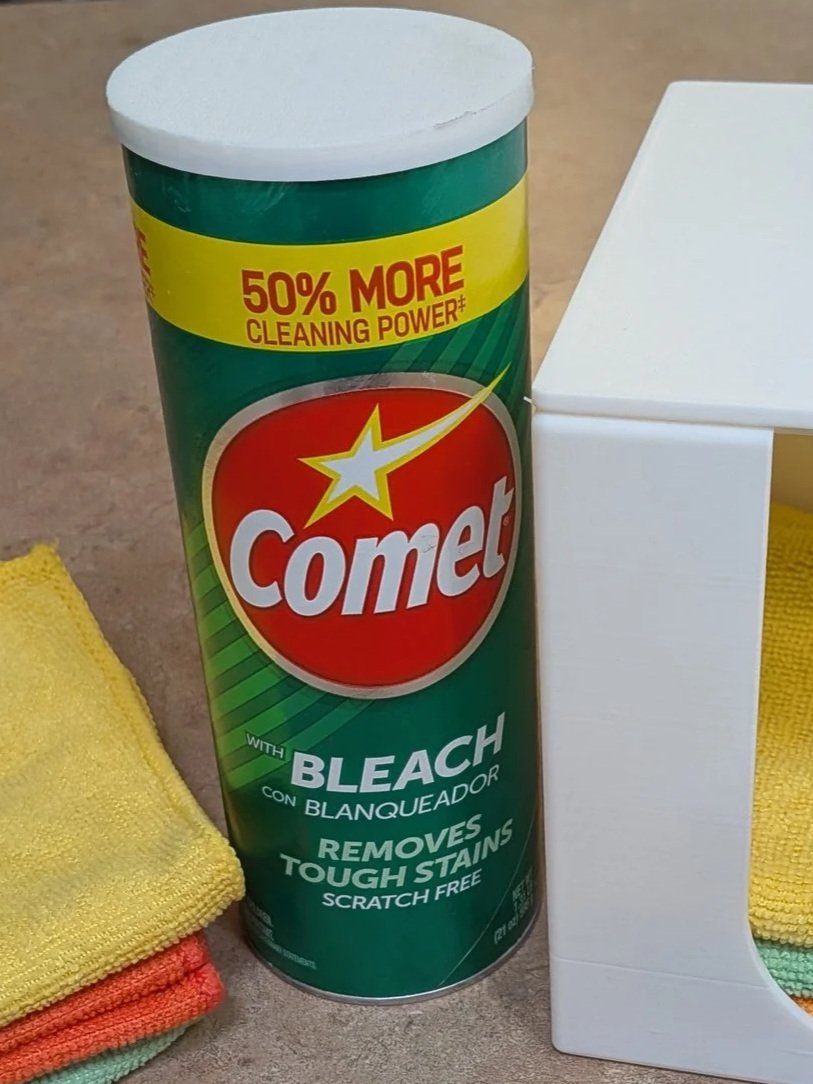
Comet Cleanser with Lid, between washcloths and a Washcloth Bin